How to Create Personalized Wall Art {Using Only an Old Pallet/Fence Board, Screws and Yarn}
This post may contain affiliate links, meaning that I may earn a small commission if you make a purchase. See our disclosure policy for more information.


Have a big wall that’s just sitting there, taking up space? You need some personalized wall art, my friend. With just the right amount of rustic and chic, and so inexpensive it’s practically free. Spell anything you like – we did LOVE – or you can do your last name, your child’s name with pretty pink yarn etc. What an awesome baby shower gift for a new baby’s room! ♥
How to Create Personalized Wall Art
Materials Needed:
- Old pallet (or weathered fence board or NEW painted fence board)
- Screws
- Drill
- Yarn or thin twine
- 8×10 Paper
Directions:
Prepare your wood. Find an old, weathered fence board or an old pallet, consider asking on a virtual yard sale group if you are unsure where to find one. You could also buy a new fence board at Lowe’s or Home Depot and stain or paint it. That would be beautiful as well!
Disassemble your pallet or cut wood to length needed. If you have more than one board, you can stagger them or leave them aligned, then brace together using a bracket or another piece of wood placed perpendicularly, securing on the back side with screws to keep it all together.

Decide which word you would like to create (love, your child’s name, your last name?), and use Microsoft Word (or Microsoft Paint, OR just draw them with a ruler on a piece of paper) to make the letters as large as you can. Choose your font and print them, one letter to an 8×10 page. You want them BIG.

Lay the letters out on your prepared wood, I used scotch tape to keep mine in place as I worked. You’re going to use your drill to screw straight through the paper and into the wood, following the outline of each letter.
DO NOT SCREW THEM IN ALL THEY WAY. Leave the screws about 1″ taller than the wood, so that you can wind your yarn around, back and forth and around again. Also, make sure you’re not screwing through the wood to the underside. Remove what paper is left after screwing in all of your screws.
Wanna save this for later?

Once you have your screws in place for each letter, you’ll attach your yarn and start winding. Wind the yarn around the screws randomly, back and forth, in and out, back and forth again, until you can no longer see the wood beneath. Make sure to tie your knots securely and then tuck the end of the yarn behind/under itself.
In order to hang, you’ll need to attach brackets to the back, similar to these. Use whatever yarn color you like, paint your wood if you like, the possibilities are endless!

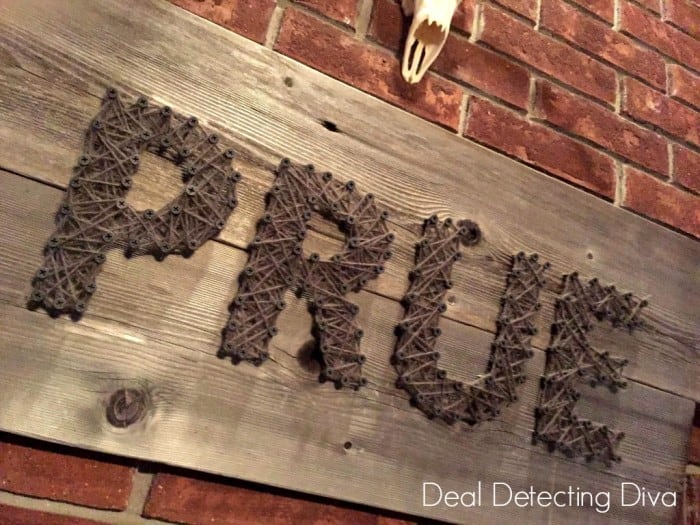
Our friends followed suit and made one with their last name for their mantel. How gorgeous is this?!
See more DIY right here on Heart Hook Home, and if you crochet we’ve got a bunch of free patterns for you as well!
Don’t forget to pin on Pinterest! Follow us here.


One Comment