How to Make a Slip Knot for Crocheting and Knitting
This post may contain affiliate links, meaning that I may earn a small commission if you make a purchase. See our disclosure policy for more information.
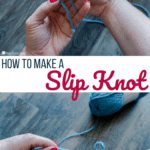
Making a slip knot is the very first thing a new crocheter or knitter needs to learn before getting started. There are many ways to make a slip knot, and today I will share with you my favorite.

How to Make a Slip Knot
With a flick of the wrist, you’ll have a loop that can be tightened or loosened to accommodate the size of your specific crochet hook or knitting needle. If you need to start a project completely over, this knot will – quite literally – slip apart if pulled on both ends leaving you once again with a fresh bit of yarn.

In fiber arts, the “working yarn” refers to the yarn that is coming straight off of the ball of yarn.
To make a slip knot:
1. With the tail of the yarn to your left, and the “working yarn” to your right, form a loop over your index finger.

2. With your thumb and index finger facing you (like pinchers) insert from the back side of the loop.

3. Rotate your wrist so that the yarn between your hands crosses.

4. With the same thumb and index finger, pinch the “working yarn” and pull it through the loop.
Wanna save this for later?


That’s it! Now you are ready to embark on your crocheting or knitting journey. Here’s a video, too!

More crochet tutorials:
How to Weave in Yarn Ends {So They Don’t Come Out}
How to Add Ear Flaps to a Crochet Beanie
How to Size Crochet Beanies + Master Beanie Pattern


One Comment