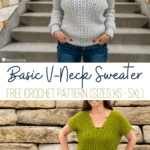
Basic V-Neck Crochet Sweater: Free Pattern in Sizes XS – 5XL
This post may contain affiliate links, meaning that I may earn a small commission if you make a purchase. See our disclosure policy for more information.
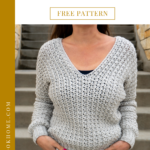

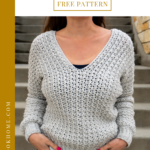
If you’re looking for a free, beginner-friendly, quick, super squishy, size-inclusive, v-neck crochet sweater pattern – you have hit gold, my friend! The Basic V-Neck sweater crochet pattern is all of the above, and then some. 😉

Basic V-Neck Crochet Sweater
The Basic V-Neck Sweater is the perfect accessory for spring and/or fall. Make it sleeveless for summer (which creates short sleeves – see photo below), or full length sleeves for those chillier days. Featuring a simple-to-crochet and nearly seamless design, this sweater is flattering – and most importantly – comfy to wear.


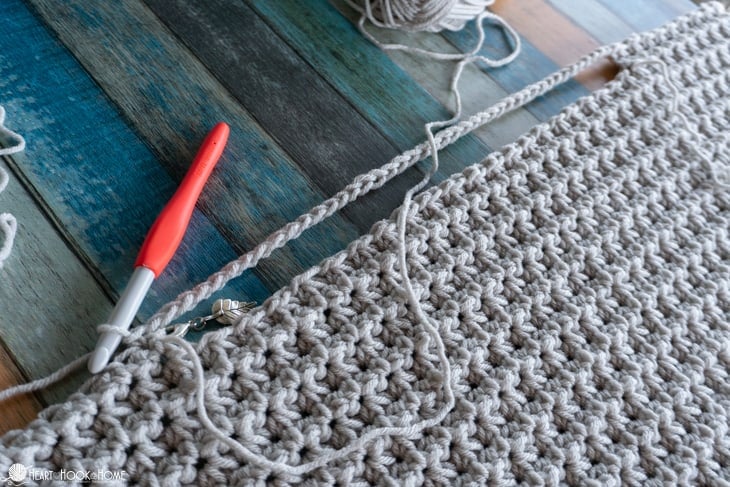
We are using a medium/size 4/worsted weight yarn for this sweater. The blue in photos is Lion Brand Wool Ease in “succulent”, the green is Brava Worsted in “Avocado”, and the grey is Soft & Sleek in “Light Grey”.

You could use a worsted weight cotton to make this as well. It would be a bit cooler to wear in the summer, and I think I may whip one up myself just to see!


We are using a large crochet hook paired with a worsted weight yarn to make this basic v-neck sweater. If you’re one that can’t stand clothing creeping up on your neck, or you get hot easily, this combination takes the comfort level of this design over the top. This is definitely a beginner-friendly wearable pattern!
You may want to head over and check out the Trinity Stitch tutorial before you get started. It is not difficult. In fact, it consists of just single crochets and chains, but in a way that creates this stunning effect.

Add this pattern to your Ravelry queue here, or purchase the ad-free PDF printable pattern on Ravelry, Etsy, or in the Heart Hook Home shop. Thank you!
Sizing: (XS, S, M, L, XL, 2XL, 3XL, 4XL, 5XL)

Materials:
Worsted Weight yarn (see more specific recommendations above)
-approx. (600, 700, 835, 860, 875, 900, 1050, 1150, 1250) yards
(w/o sleeves)
-approx. (800, 900, 1030, 1170, 1250, 1275, 1350, 1500, 1600) yards
(*including sleeves)
Crochet hook in size 9mm
Crochet hook in size 6.5mm
Gauge:
Trinity Stitch = 11 sts x 10 rows = 4” square (with 9mm hook)
Pattern for gauge:
Row 1: Ch-12, sc in 2nd ch from hook. Sc3tog using same as last sc and next two chs. * ch-1, sc3tog using same as last st and next 2 chs * repeat between * * to end. Sc in same as last st. (11)
Rows 2 – 10: Ch-1, turn, sc in first. sc3tog using same as last st, top of next st, and next ch-sp. * ch-1, sc3tog using same as last st, top of next st, and next ch-sp * repeat between * * to end. Sc in same as last st. (11)
Pattern Notes:
Pattern written using US terms.
If you need help reading a crochet pattern, make sure you head over here and check out this detailed post.
Pattern is worked in vertical rows. Odd numbered rows are “right side”.
The ch-1 at the beginning of each row does not count as a stitch.
If you would like a longer sweater, adding 20 sts to the beginning chain will add ~4”. This adds 10 sts before the neck opening and 10 sts after the neck opening.
Find the CHILD sizes of this pattern right here.

Pattern:
Row 1: Starting with a ~30” tail, and the 9mm hook, Ch-(116, 116, 122, 122, 122, 122, 126, 130, 130) sc in 2nd ch from hook, Sc3tog using same as last sc and next two chs. * ch-1, sc3tog using same as last st and next 2 chs * repeat between * * to end. Sc in same as last st. (115, 115, 121, 121, 121, 121, 125, 129, 129)
Rows 2 – (18, 20, 24, 26, 30, 32, 34, 36, 40): Ch-1, turn, sc in first. Sc3tog using same as last st, top of next st, and next ch-sp. * ch-1, sc3tog using same as last st, top of next st, and next ch-sp * repeat between * * to end. Sc in same as last st. (115, 115, 121, 121, 121, 121, 125, 129, 129)
Row (19, 21, 25, 27, 31, 33, 35, 37, 41): Ch-1, turn, sc in first. Sc3tog using same as last st, top of next st, and next ch-sp. * ch-1, sc3tog using same as last st, top of next st, and next ch-sp * repeat between * * (17, 17, 17, 17, 17, 17, 18, 19, 19) more times. Sc in same as last st. Do not fasten off, but mark with a st marker. (39, 39, 39, 39, 39, 39, 41, 43, 43 sts so far for “1st half”). Sk-(37, 37, 43, 43, 43, 43, 43, 43, 43) sts (neckhole) and attach in next st with a new ball of yarn. Ch-1, sc in same. Sc3tog using same as last st, top of next st, and next ch-sp. Repeat between * * to end. Sc in same as last st. (39, 39, 39, 39, 39, 39, 41, 43, 43 sts for “2nd half”)

First half finished.

Attaching for second half.

Row (20, 22, 26, 28, 32, 34, 36, 38, 42): Ch-1, turn, sc in first. sc3tog using same as last st, top of next st, and next ch-sp. * ch-1, sc3tog using same as last st, top of next st, and next ch-sp * repeat between * * (17, 17, 17, 17, 17, 17, 18, 19, 19) more times. Sc in same as last st. (39, 39, 39, 39, 39, 39, 41, 43, 43 sts so far). Ch-(37, 37, 43, 43, 43, 43, 43, 43, 43). Sc in next st of “1st half”. Sc3tog using same as last st, top of next st, and next ch-sp. Repeat between * * to end. Sc in same as last st. (115, 115, 121, 121, 121, 121, 125, 129, 129)

Ready to chain for neck hole.

Neck hole completed!

Row (21, 23, 27, 29, 33, 35, 37, 39, 43): Ch-1, turn, sc in first. Sc3tog using same as last st, top of next st, and next ch-sp. * ch-1, sc3tog using same as last st, top of next st, and next ch/ch-sp * repeat between * * to end. Sc in same as last st. (115, 115, 121, 121, 121, 121, 125, 129, 129)

Wanna save this for later?

Rows (22, 24, 28, 30, 34, 36, 38, 40, 44) – (39, 43, 51, 55, 63, 67, 71, 75, 83): Ch-1, turn, sc in first. Sc3tog using same as last st, top of next st, and next ch-sp. * ch-1, sc3tog using same as last st, top of next st, and next ch-sp * repeat between * * to end. Sc in same as last st. (115, 115, 121, 121, 121, 121, 125, 129, 129) Fasten off leaving a long tail for seaming.

*A few rows past the neck opening, you can go ahead and do the single crochet edging so you can clip that yarn. Just don’t weave in the end quite yet!
Neck edging: Where still attached at the neck, and using the 6.5mm hook, use that yarn to sc around the entire opening.


Seam both sides (using the beginning tail and the end tail), leaving (31, 33, 35, 37, 41, 45, 51, 55, 57) sts unworked. Do not fasten in ends yet. (We’ll use those to cinch up holes after finishing the sleeves).

You may choose to not weave in the neck edging end yet, in case you decide to do another row, or to go down another hook size for that one single crochet row (if the opening is a bit to big for your taste).

Bottom Edging:
Using the 6.5mm hook, attach at either side seam. Ch-1, sc in each row end around sweater bottom. Join. (80, 84, 104, 112, 128, 136, 144, 152, 168)

Row 1: Ch-11, sc in 2nd ch from hook and in each to end. Sl st to top of corresponding st on sweater body. (10)

Row 2: Sl st to top of next st on sweater body, turn. Sc in BLO in first 9 sts, sc in both top loops of last st. (10)

Row 3: Ch-1, turn, sc in BLO of each st to end. Sl st to top of corresponding st on sweater body. (10)

Rows 4 – (81, 85, 105, 113, 129, 137, 145, 153, 169): Alternate rows 2 & 3 around the entire bottom of the sweater. Fasten off and sew stitch for stitch closed.
If you are choosing to leave off the sleeves, you’re done! 🙌
Sleeves:
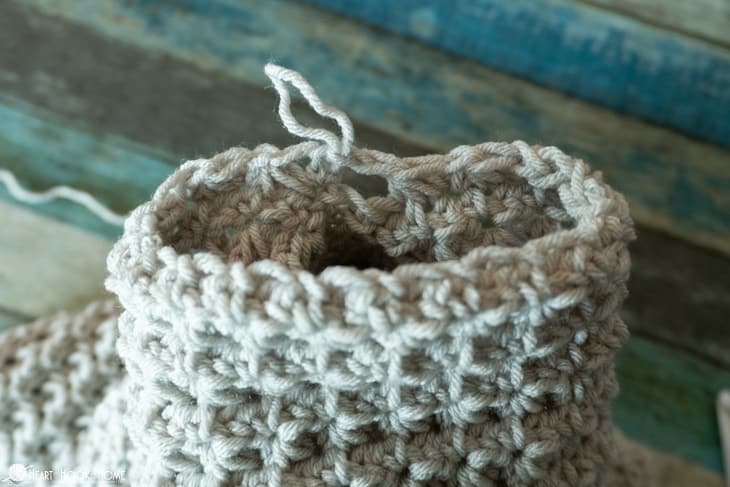
Looking at the inside, attach in the chain st (not a sc) to the left of the seam. (see photo)

Round 1: Ch-1, sc in same. Sc3tog using same as last st, top of next st, and next ch-sp. * ch-1, sc3tog using same as last st, top of next st, and next ch-sp * repeat between * * around. Ch-1, join to top of first sc. (31, 33, 35, 37, 41, 45, 51, 55, 57)
Rounds 2 – (32, 32, 32, 30, 28, 28, 28, 28, 28): Ch-1, turn, sc in first st. Sc3tog using same as last st, top of next st, and next ch-sp. * ch-1, sc3tog using same as last st, top of next st, and next ch-sp * repeat between * * around. Ch-1, join to top of first sc. (31, 33, 35, 37, 41, 45, 51, 55, 57)

Switch to the 6.5mm hook to start the cuff…
Round (33, 33, 33, 31, 29, 29, 29, 29, 29): Ch-1, do not turn, sc in each st around. Join to top of first sc. (31, 33, 35, 37, 41, 45, 51, 55, 57)
Round (34, 34, 34, 32, 30, 30, 30, 30, 30): Ch-1, do not turn, * sc2tog, sc in next * repeat between * * around. Sc2tog in last 2 sts. Join to top of first sc. (21, 22, 23, 25, 27, 30, 34, 37, 38)
Sizes XS, S, M, L: Do not fasten off… jump down to start on the cuff.
Size XL: Ch-1, do not turn, sc2tog, sc in next 12 sts, sc2tog, sc in remaining 11 sts. Join to top of first sc. (25) Do not fasten off… jump down to start on the cuff.
Size 2XL: Ch-1, do not turn, sc2tog, * sc in next 5 sts, sc2tog * repeat between * * three more times. Join to top of first sc. (25) Do not fasten off… jump down to start on the cuff.
Size 3XL: Ch-1, do not turn, sc2tog, * sc in next 3 sts, sc2tog, sc in next 2 sts, sc2tog * repeat between * * two more times. Sc in next 3 sts, sc2tog. Join to top of first sc. (26) Do not fasten off… jump down to start on the cuff.
Size 4XL: Ch-1, do not turn, sc2tog, * sc in next 2 sts, sc2tog, sc in next st, sc2tog * repeat between * * 4 more times. Join to top of first sc. (26) Do not fasten off… jump down to start on the cuff.
Size 5XL: Ch-1, do not turn, sc2tog, * sc in next 2 sts, sc2tog, sc in next st, sc2tog, sc in next st, sc2tog * repeat between * * two more times. Sc in next 2 sts, sc2tog, sc in remaining 2 sts. Join to top of first sc. (27) Do not fasten off… jump down to start on the cuff.
Cuff (all sizes):
Row 1: Ch-11, sc in 2nd ch from hook and in each to end. Sl st to top of corresponding st on sleeve. (10)
Row 2: Sl st to top of next st on sleeve, turn. Sc in BLO in first 9 sts, sc in both top loops of last st. (10)
Row 3: Ch-1, turn, sc in BLO of each st to end. Sl st to top of corresponding st on sleeve. (10)
Rows 4 – (21, 22, 23, 25, 25, 25, 26, 26, 27): Alternate rows 2 & 3 around the entire bottom of sleeve. Fasten off and sew stitch for stitch closed.

I hope that you absolutely love this sweater, and that if this is your first wearable crochet pattern, that you enjoyed making it! Please share a photo with me in the Heart Hook Home Crochet Community on Facebook or by tagging @HeartHookHome across all social media.
More free patterns for you:
The Easiest Crochet Cowl: Free Crochet Pattern
Shell Yeah! Free Tunic Crochet Pattern


