Tunisian Crochet Puff Stitch Tutorial
This post may contain affiliate links, meaning that I may earn a small commission if you make a purchase. See our disclosure policy for more information.
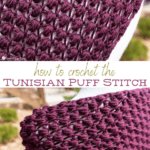
The Tunisian Crochet Puff Stitch is absolutely gorgeous. Whether you’re making a scarf, a baby blanket, or a trivet, this stitch creates such a lovely effect. Let’s learn how to crochet the Tunisian Puff Stitch today!

Tunisian Crochet Puff Stitch Tutorial
While it looks quite difficult, once you get the rhythm of the stitches and where to place your hook in order to create your puffs this stitch is a breeze. Fabric made using this stitch is airy, somewhat holey, and has excellent drape. There are many ways to make a puff stitch, and this is my favorite!

About the Tunisian Puff Stitch:
This stitch needs to start with a multiple of TWO so you’ll want to begin with any even number of chains.
Each puff stitch = yarn over pull up a loop in designated space, yarn over pull up a loop in designated space, yarn over pull up a loop in designated space. (6 loops on hook) To close the puff, yarn over and pull through FIVE of the loops.
You will need a Tunisian crochet hook in order to work this stitch. Read all about Tunisian hooks here.
Once you set up how many puff stitches you have per row, that number will always stay the same. For example if you start with a chain-24, you will end up with 11 puff stitches – meaning that every row for the duration of the pattern should also have 11 puff stitches. In this example I have chained 12, which means I will have 5 puff stitches each row.
Scroll down to see the VIDEO tutorial for this crochet stitch.

Tunisian Puff Stitch Steps:
1. As with virtually all Tunisian Crochet, you’ll start with a foundation row of Tunisian Simple Stitches. Chain an even number of chains, pull up a loop in the second chain from the hook and in each chain to the end, then work your return pass as normal: Ch-1, * yarn over and pull through two loops * to the end of the row. Foundation row made!

2. Now you will set up your first row of puff stitches.
To do this you will chain one, skip the first space, and puff in the next space. * sk-next space, puff in next * repeat between * * to end.


Yarn over, pull up a loop in outside stitch.

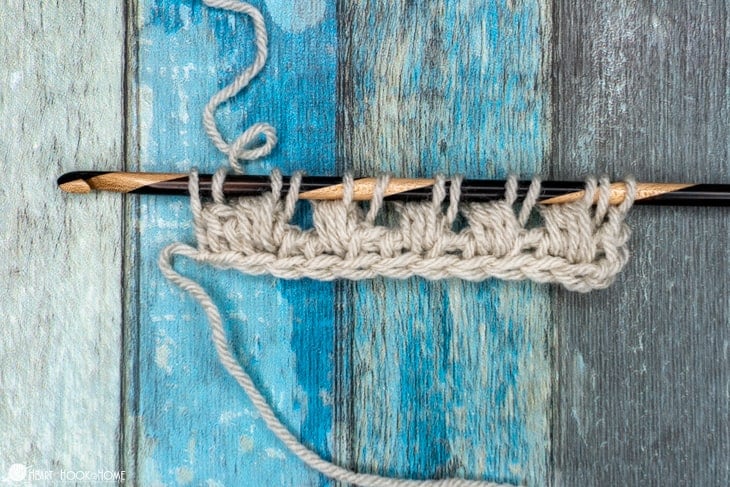
Return pass: Ch-1, * yarn over and pull through two loops * to the end of the row. First puff row made!

We will offset the puff stitches each row. One row we’ll start in the very first space, then the next row we’ll start in the second space.
3. Puff in first space. * puff in between next 2 puffs * repeat between * * to end.
Wanna save this for later?


Yarn over, pull up one loop using second to last loop and outside stitch (see photo).


Return pass: Ch-1, * yarn over and pull through two loops * to the end of the row.

4. Ch-1, skip the first space, and puff in between the next two puffs from the previous row. * puff in between next 2 puffs * repeat between * * to end.


Yarn over, pull up a loop in outside stitch.

Return pass: Ch-1, yarn over and pull through two loops, to the end of the row.

Alternate steps 3 & 4 until the piece is as tall as you’d like it to be. When desired height is reached, sl st across, fasten off, and weave in ends.

As this puff is a dense stitch set it does use more yarn that other, more traditional Tunisian stitches. I just love the texture though, and I love how quickly it works up!
Tunisian Puff Stitch Video tutorial:

More Tunisian Crochet Tutorials:
Tunisian Knitling Stitch Tutorial
How to Work Tunisian Crochet in the Round


6 Comments