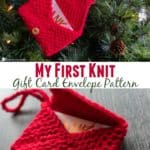
My First Knit Pattern: Gift Card Envelope Christmas Ornament
This post may contain affiliate links, meaning that I may earn a small commission if you make a purchase. See our disclosure policy for more information.
Learning to knit? This knitted Christmas Ornament Gift Card Envelope pattern is the perfect way to learn how to knit and to practice your tension. As a bonus you have a finished item that will stay with the family for years. I call that a win!

Knit Gift Card Envelope Christmas Ornament
When Marly Bird asked if I would design a quick knit pattern for Christmas, I was terrified! I am not a knitter, in fact I watched her beginner videos throughout the weekend and practiced my tension before whipping up this design. This knit pattern is geared toward a VERY beginner knitter, just like myself! For this knitted envelope gift card holder we are knitting a basic square. The square needs to be about 4.5″, then we will fold it in a way that creates a small envelope just the size of a gift card. Grab your needles and let’s get started!

Materials:
Red Heart With Love in Holly Berry
Knitting needles in size 7 (4.5mm)
Favorite this pattern on Ravelry here.
We are using a smaller needle size than recommended for this yarn because we want the stitches to be tight enough that we can’t see the gift card inside. If, like me, you are new to knitting, making tight stitches may not be a problem. 😀 Just do the best you can! As long as we end up with a square it will turn out fine.

Gauge: 20 garter sts and 40 rows = 4.5″ (11.43 cm)
Pattern:
Use long tail cast on and leave an extra 10” for seaming. Cast on 20 sts.
Rows 1 – 40 (or until square): knit across –20 sts
Cast off leaving a long tail for sewing envelope.
You should now have a square about 4.5″ tall and 4.5″ wide. As you can see, I am working on my tension, but like I said earlier… for this pattern that doesn’t matter. Let’s fold it up!

Take the yarn from where you fastened off and feed it through the opposite corner as pictured.
Wanna save this for later?

Now take the bottom corner and bring it up to the center.

Now sew the two diagonal seams shut to form the envelope.


We are almost done! We just need to add the hanger, a closure, and a button.

For the hanger you can either crochet a chain (which, as a crocheter, I find easiest), or you can knit an i-cord. For my crocheted chain hanger I attached in the top left corner and made a tight chain of 30 stitches. Securely weave in all ends.
Attach yarn at the tip of the envelope flap and make a crochet chain (or another knit i-cord) about an inch long. Secure it and weave in all ends. Add a button to the corresponding spot on the envelope and you are finished!


If this was your first knit pattern I sure hope you enjoyed it! If you are an experienced crocheter and you have a set of knitting needles lurking in the corner, this would be an excellent way to both learn a new skill and practice your tension!
More knit for beginners:
28 Yarn Box Subscription Services for Knitters and Crocheters


