Tunisian Reverse Crochet Stitch Tutorial
This post may contain affiliate links, meaning that I may earn a small commission if you make a purchase. See our disclosure policy for more information.

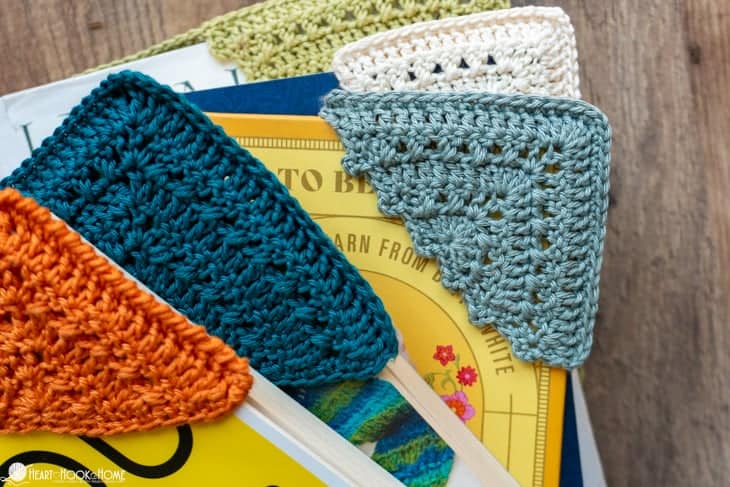
The Tunisian Reverse stitch is a gorgeous, textured stitch that makes for great washcloths, blankets, garments, and more. This stitch has such great visual appeal. It looks difficult to do, but I assure you that it is not! Grab your supplies and let’s whip up some reverse stitches.

How to Crochet the Tunisian Reverse Stitch
I will confess that when I first learned this stitch I didn’t fall in love right away. It took some trial and error as to how to hold both the yarn and the work to make adding those stitches go more smoothly. Now I love this stitch, and with the tips and techniques outlined below I know you’ll learn to love it too!

An interesting fact about this stitch is that it is literally the reverse of the Tunisian Simple Stitch. So, instead of pulling up a loop in the front vertical bar as in TSS, we are coming from the back side and pulling up a loop in the back vertical bar. It does sound tricky, but there is a way to hold your work that opens up those stitches and makes the back bar more easily accessible.
If you are learning this stitch as part of the 2023 Tunisian Basics Crochet-Along, I do suggest following along with the video below to get your feet wet before starting the full size square. Once you’re comfortable inserting the hook into the back vertical bar (which feels tricky at first) move on to the full size Afghan square pattern here.

Some things to note about this stitch:
This stitch can be started with any number of chains. There is no multiple.
The backward pass of the previous row is the visible part (the horizontal bar) of the stitch of the current row. Because of this you want to keep the tension in each backward pass as consistent as possible. It will help the stitches stay more uniform in shape. See what I mean in the video below.
To crochet the Tunisian Reverse stitch you will need any kind of yarn and a corresponding hook size. Here I am using worsted weight yarn and a 6mm crochet hook. If just practicing you can use any regular ol’ hook to work up a small swatch, but if you are making anything larger you will want a Tunisian crochet hook.
How to Tunisian Reverse Crochet:
Begin with the same foundation row as in most Tunisian stitches…
1. Start with ANY number of chains. There is no multiple needed.

2. Pull up a loop in the second chain from the hook and in each chain to the end. You should have as many loops on your hook as you chained to start.

3. Backward Pass: Chain one to start the backward pass, then * YO, pull through two loops * to the end of the row, until just one loop remains.

4. Inserting the hook right to left under the back vertical bar, pull up a loop in each stitch to the end. Pull up a loop in the outside stitch by going under both legs of the previous outside stitch. Again, you should have as many loops on your hook as you chained to start.


5. Backward Pass.

Wanna save this for later?
Alternate steps 4 & 5 until the piece is as tall as you like.
To fasten off the Tunisian Reverse Stitch you will insert your hook into the back vertical bar as you have been, but instead of adding loops to the hook you’ll slip stitch them off as you go.

Now, there are some learning curves to this stitch. I’ll admit that when I first learned to crochet this one I wasn’t a big fan. After trying different ways of holding the work, I’ve found a few helpful tips that made me fall in love…
Tips for Tunisian Reverse Crochet:
I find that inserting the hook into the back vertical bar is much easier to do if you fold the piece over your thumb so that you can see the back side of the work.

This helps in several ways…
A. It is soooo much easier to find the back vertical bar and to insert your hook.
B. If you don’t fold it over your thumb, but instead always have the front facing, it is both harder to insert the hook AND the stitches tend to get extremely tight. Holding it over your thumb helps to keep your tension more consistent and the stitches a bit looser.
C. You can use a different finger (of the same hand) to hold open the stitches as they lay across your thumb, making it MUCH faster to crochet.
See what I mean about all of these tips in the video tutorial below.
Due to the nature of the stitch there tends to be a gap on the left edge of the piece. To avoid this, make the first “YO, pull through two” of the Backward Pass tighter than the rest.
Tunisian Reverse Video Tutorial:
If, for some reason, this video does not want to play for you, head over and watch it on my YouTube channel here.
That’s it! This stitch may take some practicing but I do think you’ll learn to love it as I have.
More Tunisian Stitches & Techniques:
How to Crochet the Tunisian Simple Stitch
How to Unkink Circular Knitting Needles and Tunisian Crochet Cords
The Ultimate Guide to Tunisian Crochet
How to Crochet the Tunisian Half Double Crochet Stitch