How to Crochet the Tunisian Knit Stitch
This post may contain affiliate links, meaning that I may earn a small commission if you make a purchase. See our disclosure policy for more information.
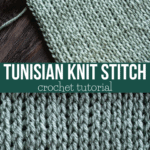
The Tunisian Knit Stitch is the most knit-like stitch we can make in crochet. With the appearance of a knitted piece, this fun Tunisian crochet stitch is much easier than it looks. Let’s learn how to crochet the Tunisian Knit Stitch with this video tutorial!

Tunisian Knit Stitch
What distinguishes the Tunisian Knit Stitch (abbreviated TKS) from other Tunisian stitches is the placement of your crochet hook and how you pull up the loops. Unlike in “normal” Tunisian stitches, when crocheting the Knit Stitch you’ll work between the vertical bars of each stitch.

Pulling the loop through to the front of the piece creates a beautiful upside down “U” shape that looks remarkably like knitting!

More Tunisian Tutorials:

When working Tunisian Crochet
Remember that all Tunisian crochet is always worked like an old-fashioned typewriter. You’ll work your way all the way down the row (right to left), then reverse to work your way back to the beginning (left to right) in what is called the “backward pass”.
For a Tunisian piece of considerable width, you will need cabled Tunisian hooks, but for learning or making smaller pieces like beanies or even some baby blankets, a stick hook will suffice.
It is inevitable that Tunisian crochet will curl. It doesn’t matter the stitch, but you can combat this by using a hook size larger than you normally would were you to “regular” crochet with the same yarn. I also find that staying looser when pulling up loops on the forward pass helps to combat the curl significantly.
Wanna save this for later?
While bumping up your hook size does help with the curl, you may also need to block your item when finished.
See more information about curling and all things Tunisian in the Ultimate Guide to Tunisian Crochet.

Tunisian Knit Stitch Tutorial
1. Chain any number of stitches.
2. Pull up a loop in the second chain from hook and in each chain to end.
For your backward pass, chain one to create the edge stitch (as in any other Tunisian crochet), then yarn over and pull through two loops, yarn over and pull through two loops, yarn over and pull through two loops, repeating all the way to the beginning of the row.
First actual Tunisian Knit Stitch row:
3. Insert hook in between the vertical bars of the first stitch, pull up a loop. Pull up a loop in between the bars of every stitch to end. In the last (end) stitch, go through both parts of the “v” of that stitch. You should now have as many loops on your hook as you do stitches.
![]()
4. For your backward pass, chain one, then yarn over and pull through two loops, yarn over and pull through two loops, all the way to the beginning of the row.
To continue working, alternate steps 3 & 4 until desired height is reached. Isn’t that fun and easy?
Tunisian Knit Stitch Video Tutorial:
If, for some reason, this video does not play, please watch on my YouTube channel here.
More Tunisian Tutorials:
How to Crochet the Tunisian Purl Stitch
Tunisian Chevron Crochet Tutorial


13 Comments