Easy Loop Yarn Scarf Tutorial
This post may contain affiliate links, meaning that I may earn a small commission if you make a purchase. See our disclosure policy for more information.
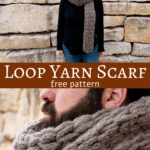
Have you tried the new Loop yarns? No needles or hooks required, just your fingers and the Loop Yarn to make a scarf! For this tutorial we are using the new Bernat Alize EZ-Wool yarn, a gorgeous, warm wool blend. Unfortunately discontinued, but Lion Brand Off the Hook and Bernat Alize Blanket yarn would work too.

Easy Loop Yarn Scarf
For this Loop yarn scarf you will need two skeins of loop yarn, I’m using Bernat Alize EZ-Wool yarn (discontinued) – and nothing else. I chose the color Wheatberry because I love that rich brown and the wool blend. It is luxurious, and comfy, and warm, and cozy! Definitely a unisex scarf!


If you have never worked with loop yarn before, I do recommend playing around a bit before diving right in with the scarf pattern below. If you have a general concept of crocheting or knitting, and even if you don’t, you’ll get the hang of it in no time!
Helpful tips when working with loop yarn:
1. Always keep the loops facing the same direction. (It is easy for them to twist while you’re working on the other loops)

2. Always pull up your outer most loops in the same direction (so the side loops are not twisted and stay as consistent as possible).

3. When adding a new skein, snip the last few loops of the first skein and snip the first few loops of the new skein so you have something to weave in and secure the yarn ends later.

Once you’ve played around with a small bit of your loop yarn and gotten the hang of it, it’s time to make your scarf!
Step One: Lay out 12 loops. (this will be the width of our scarf)
Step Two: Bring the yarn back the opposite direction so you can pull up those loops through your existing 12 loops.

Step Three: Working in the opposite direction, pull up a loop in each loop to end.
Continue working back and forth (similar to an old fashioned typewriter), pulling up a loop in each of the 12 loops of the previous row. When you get to the end of the first skein, snip the last 2 – 3 loops. Snip the first 2 – 3 loops of the new skein. Use those ends to tie a simple knot, and continue adding loops as before.
When you get to the end of the second skein, it is time to finish your scarf. Make sure you have at least as many loops left as your scarf is wide before you start your final row. In this case, we need 12 for the final row itself and 3-ish for fastening off.
To Fasten Off
Pull the first two loops through as if you were starting a “normal” new row.
Wanna save this for later?

Take the second loop (the one on the left) and pull it through the first loop. Like this:

Now bring the next loop on the working yarn through the next loop on the scarf. Like this:

Again, pull the second loop (the one on the left) through the loop on the right.
Now bring the next loop on the working yarn through the next loop on the scarf. Continue pulling the second loop (the one on the left) through the loop on the right, all the way to the end of the row.


When you reach the end of the scarf and you have no more loops to work into, snip the last few loops loose so you have just one strand of yarn with no loops left. Pull the tail through the last stitch as pictured, and weave in those ends. You’re done!

The scarf will naturally curl in on itself a bit, forming a tube-like effect. I connected the sides of each end to give it a more pronounced tube effect. I just love the look of the scarf and how fast it works up! If this is your first foray into Loop Yarn, I hope you’ve enjoyed it and your new scarf! Share a photo of your scarf in the Heart Hook Home crochet community!
More free scarf patterns:
Fur-Ever Fur Infinity Scarf Crochet Pattern
Scrumptious Scoodie: Hooded Scarf Free Crochet Pattern


4 Comments