Come On I Wanna Ruana: PART TWO
This post may contain affiliate links, meaning that I may earn a small commission if you make a purchase. See our disclosure policy for more information.

Here we are, ready for part TWO of the Come On I Wanna Ruana Crochet Along! In part two we will complete the back of the ruana and sew it together. The sewing isn’t too bad, and after that we are on the home stretch!

Come On I Wanna Ruana: PART TWO
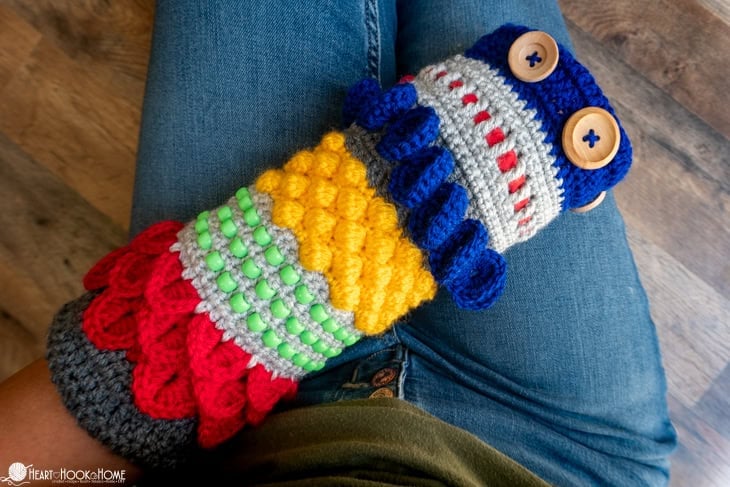
In part two we will crochet the backbone of the ruana using rows of Half Double Crochet Moss Stitch. While that is a mouthful to say, it works up beautifully and surprisingly fast! In part one we left off on row 8 for the bottom band of Lover’s Knots. In part two we will add the “right” and “left” to the back and sew it up.
Find the materials list, gauge, and dates & info here.
The width of your “right” and “left” panels should be about 15″ each. Because gauge isn’t super important in this pattern, that width measurement can be as much as an inch or more off in either direction and it will turn out just fine.
Ruana: PART TWO
Watch the video for part two below.

Where still attached from part one…
Row 9: Ch-5 (counts as tc + ch1), turn, sc in center of first Lk pair. * loosely ch-3, sc in center sc of next Lk set * repeat between * * 15 more times. Ch-3, sc in same as first st of “center”. (17 ch-3 sps)

Row 10: Ch-2 (counts as one st here and throughout), turn, sk next ch, hdc in next. * ch-1, sk-1 ch, hdc in next st/ch * repeat between * * to end, placing last hdc in 4th ch of beg chain from row 9. (70)

Rows 11 – 68 (or however many rows for 29” – including bottom knots): Ch-2, turn, hdc in first ch-sp. * ch-1, hdc in next ch-sp * repeat between * * to end, placing last hdc in the turning ch-2-sp. (70) Do not fasten off.
Left side
Leaving a long (40”) tail, attach in 17th Lk set from left (same as where “center” ends).
Row 9: Loosely ch-2, sc in first sc. * loosely ch-3, sc in center sc of next Lk set * repeat between * * 15 more times. Ch-1, tc in last. (69)
Row 10: Ch-2, turn, hdc in first st. * ch-1, sk-1 ch, hdc in next st/ch * repeat between * * to end. (70)
Rows 11 – 68 (or however many rows for 29” – including bottom knots): Ch-2, turn, hdc in first ch-sp. * ch-1, hdc in next ch-sp * repeat between * * to end, placing last hdc in the turning ch-2-sp. (70) Do not fasten off.
Sewing

Wanna save this for later?
When laid out, all three pieces should be the about same height at 29” tall (unless you removed or added length). Line up the top of the “center” with “right” and “left” sides. Use stitch markers to hold everything in place.

Using the long tails from earlier, sew up two seams evenly, being careful not to pull too tightly. I find that this goes more smoothly if I leave the piece laid flat on the table without moving as I sew.


Continue sewing both edges until you reach the top. Do not weave in ends, rather let the tails hang out until we are completely finished with the ruana. We will weave in these ends at the very end of the crochet along. That is IT for part two! Next week we will crochet the FRONT of the ruana.

SIGN UP FOR EMAIL ALERTS FOR THIS FREE CROCHET ALONG!
If you can’t wait to finish this pattern, it is available in its entirety on Ravelry. You do not have to purchase the pattern in order to participate.
Part One – published here
Part Two – this one!
Part Three – published here
Part Four – published here
Sing up for email alerts for this crochet along, and every time a new part is published you’ll be the first to know!
MORE FREE CROCHET ALONGS:
“Woven In Time” Sofa Blanket Crochet Along (CAL) Materials & Dates
The Elizabeth Cardigan – Crochet Along (CAL) – Free Crochet Pattern


2 Comments