Shrink Film Stitch Markers Tutorial + Free SVG
This post may contain affiliate links, meaning that I may earn a small commission if you make a purchase. See our disclosure policy for more information.
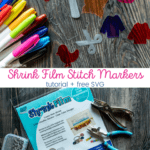
Do you have a love for crochet, crafts, and a cutting machine? If so, you’re in luck, friend! These Shrink Film Stitch Markers put the “fun” in functional! 😉 Make your own set with this free SVG file and your Cricut or Silhouette machine (or a pair of scissors).

Shrink Film Stitch Markers Tutorial
As crocheters, we are crafty folks. Let’s use our creative side to make something other than crochet – even if we are making something that will then help us later in our crochet adventures.
If you remember playing with Shrinky Dinks as a kid, you will absolutely LOVE taking this useful trip down memory lane. There’s nothing better than sitting on the kitchen floor, spatula in hand, as you gaze into the oven, expectantly watching your project start to curl, then flatten out again into a much smaller version of what you put in just moments before.
One of my best friends, Amanda, is a talented artist. A few years back for Christmas she made me a yarn ball painting that hangs proudly centered above my desk in my office. (As I look at this photo of my desk now, I can not help but to laugh. My office hasn’t looked this clean since the day this photo was taken. 😳 See other, equally laughable and clutter-free photos of my office here.)

I love her art so much that I commissioned her to draw a variety of yarn related (or just cute) images that I could then take and convert into an SVG file, size appropriately, and use my Cricut to cut the images out. She delivered a collection of absolutely adorable little critters, crocheted items, and the like that I absolutely adore. Thank you, Amanda!

First things first, supplies!
Materials:
Lobster clasps (the bigger the better, but these 9mm will suffice)
Cutting machine (or scissors)
SVG file of images (yes, it’s free!)

We are using Shrink Film to make these stitch markers. There are several options when purchasing shrink film, and I chose the transparent.
You will also need the jump rings, pliers, a hole punch, permanent markers, and lobster clasps. Oh! And the SVG file from which to cut said images. 🙌 You can download this file for free here.
Ideally you want to use a cutting machine such as a Cricut or Silhouette. If you do not have a cutting machine, you could cut the images using regular scissors. It may not be perfect, but they’ll shrink up just fine!
If you do have a Cricut or other cutting machine, you will need to change your settings in order to cut this thick material. Go to “manage custom materials”, add a new material to your list (I just called mine “Shrinky Dinks”), then change your settings as I have below. Cut 6 times with a fine-point blade and push it all the way up to 350.

Wanna save this for later?
With a cutting machine you’ll first want to upload the SVG file to your cutting platform. Set the overall width of the entire image to 5″. This should force the height to be ~ 7.72″ meaning that you should have enough space to place two of these images side by side if cutting in landscape orientation. That gives you TWENTY-FOUR stitch markers per page! WOOT!
Let your machine do the cutting while you prepare your other supplies…

Once the images have been cut, you’ll use your permanent markers to color the shrink film. Get creative!

When finished, and if the design doesn’t already have a hole (as in the peace sign, coffee mug, and scissors), you’ll need to create a hole using your hole-punch BEFORE BAKING to use to attach the jump ring and lobster clasp.


When all of the images have been cut, colored, and hole-punched, it is time to bake!
Make sure you follow the directions on the shrink film packaging. I used butcher paper as that is what we had on hand.

After just a couple of minutes in the oven, the shrink film will have done it’s work. Note! If you notice that some of the pieces are not perfectly flat, it is important to smush them as soon as possible (while they are still warm) with a spatula lest they snap when you try to flatten them after they have come back to room temperature.

Now that your stitch markers are a fraction of their original size, it is time to add the jump rings and lobster clasps. Simply open the ring using your pliers, slip on both the shrunken down image and the lobster clasp, and close the jump ring again. That’s it!
How adorable are these little fellas?! I love the little alpacas the most. I loved them so much, I decided to do a whole sheet just of them. ♥

I sure hope you enjoyed this craft as much as I did, and thank you again to the lovely Amanda for her drawing skills!
More crafts I think you’ll enjoy:
Dream Yarn Room + Craft Room DIY and Tutorials


