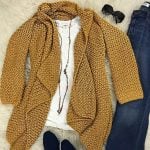
The Elizabeth Cardigan CAL – Parts 3 & 4
This post may contain affiliate links, meaning that I may earn a small commission if you make a purchase. See our disclosure policy for more information.
Now that we are ready for part THREE and FOUR of the Elizabeth Cardigan Crochet Along, we are on the homestretch! Woohoo! This is the easiest part to explain and to understand. We’ve already done our legwork, so let’s finish the body of this bad boy right on up!

Elizabeth Cardigan CAL – Part 3
There are four parts to this cardigan. The most difficult is part ONE, where you decide how tall to make your cardigan, and obtaining the desired weave/feel of the fabric. In part TWO we created the first armhole and the “back” portion of the cardigan, and now in part THREE we are creating the second armhole and the second “front” portion of the cardigan. Part FOUR will be the sleeves and the trim.
Now that we know exactly where we are, let’s start part THREE, yo! 😀
First, you’ll want to make sure that you end part TWO at the TOP of the cardigan, so that your armholes are identical – and on the same (top) side. If you ended part two at the bottom you can either: add a row (= more slouchy) or remove a row (= less slouchy) before you start.
Armhole row: Crochet Mini Beans the same amount as you did for the first “collar” portion. Then skip as many Mini Beans as needed for the first armhole. Chain as many as needed for skipping those Mini Beans, then continue your Mini Beans to the end of the row.
Work back up the row until you get to the armhole chains, and complete the row in the same manner as you did the other.
How many rows did you complete in part ONE? You want this side to be identical to the other.
Continue to “Front Width” measurement in rows: Ch-1, turn, Mb in each Mb to end.
DO NOT FASTEN OFF

Note that at the end of part three, we have completed the body of the cardigan. Go ahead and try it on if you like, just be careful not to stretch out the armholes too much before we reinforce those stitches with the sleeves (or edging if not adding sleeves). When trying on keep in mind that the weight of the sleeves will help to open up the collar and the shoulders, and they will give the cardigan its slouchy feel.
Elizabeth Cardigan CAL – Part 4
Edging:
*if you started part one with a foundation row, you’ll want to finish part three with a matching row. For example, if you started with Foundation Single Crochet, do one row of single crochet, being careful to go into each part of the Mini Bean so that your first and last row have the same stitch count.
Where yarn is still attached, ch-1, crab stitch in the “holey” part of each Mb around the entire cardigan. This will cinch up those stitches just enough to give it a nice curl when it hangs. On the edges with sc or hdc, crab stitch in every other stitch to keep the effect. Fasten off and weave in all ends.

Sleeveless version:
Attach yarn at bottom center of armhole, leaving a decent sized tail for closing any hole:
Row 1: Ch-1, sc in each side of each Mb ( = 2 single crochets per Mb stitch) around, including top (shoulder). Join to top of first sc, weave in all ends.
Sleeve version:
How many Mbs did you skip for your armhole? Take that number and MULTIPLY by two, then ADD two. For example, I skipped 13 Mbs for my armholes. That means 13 x 2 = 26 and 26 + 2 = 28 and my sleeve will start with 28 Mbs in that first row.
To Mb2tog: Insert hook into next space, pull up a loop. (two loops on hook) Yarn over, insert hook in same space and pull up a loop. (4 loops on hook) Insert hook into next Mb space, pull up a loop. (5 loops on hook) Yarn over, pull up a loop. (7 loops on hook) Yarn over, pull through ALL loops, then chain one to close the stitch.

Wanna save this for later?
Attach yarn at bottom center of armhole, leaving a decent sized tail for sewing later:
Row 1: Ch-1, Mb in each Mb around, including top (shoulder). Count your Mbs to make sure you’re on track. Join to top of first Mb. (if you need an extra Mb to make the seams look good that’s okay)
Row 2: Ch-1, turn, Mb in each Mb around. In last two, Mb2tog. Join to top of first Mb. (one less Mb this row)
Row 3: Ch-1, turn, Mb in each Mb around. Join to top of first Mb. (same st count as last row)
Row 4: Ch-1, turn, Mb2tog, Mb in each Mb around. Join to top of first Mb. (one less Mb this row)
Row 5 & 6: repeat row 3, then repeat row 2
Rows 7 – 20 (or until just above the elbow): repeat row 3
Row 21: repeat row 2
Row 22: repeat row 3
Row 23: repeat row 4
Row 24: repeat row 3
Row 25 – 40: repeat rows 2, 3, 4, 3 in sequence until cuff circumference is reached.
Rows 41 to 45 (or desired length): repeat row 3
Final Row: Ch-1, looking at right side, crab stitch around. Fasten off and weave in ends, cinching up an gaps in underarm area.

Finishing up:
You will definitely want to wash your cardigan per the washing directions on the yarn label. Washing will really help the stitches relax and make the cardigan hang better and gain more slouch.
I’ve found that the more I wear my finished Elizabeth cardigans, the more I love them. They relax, they get more comfy, and my sleeveless version is perfect for this warmer weather! I am working on a thin, lightweight summery sleeveless version that I will share with you when I’m done!
Are you playing catch up? Here are the other parts already available:
Part 1 of the Elizabeth – here
Part 2 of the Elizabeth – here
Free crochet patterns:
Fast and Free Men’s Slippers Crochet Pattern
Ninja Turtle Child’s Beanie with Mask FREE Crochet Pattern
The Hedonist’s Housecoat: Free Crochet Housecoat Pattern (Medium, One-Size and Plus Size)
Houseplant Clippings Plant Hanger Crochet Pattern
Throw Pillow Cover Crochet Pattern Using One Skein of Red Heart Ombre Yarn


21 Comments