The Hedonist’s Housecoat: Free Crochet Housecoat Pattern
This post may contain affiliate links, meaning that I may earn a small commission if you make a purchase. See our disclosure policy for more information.


UPDATED May 8, 2024
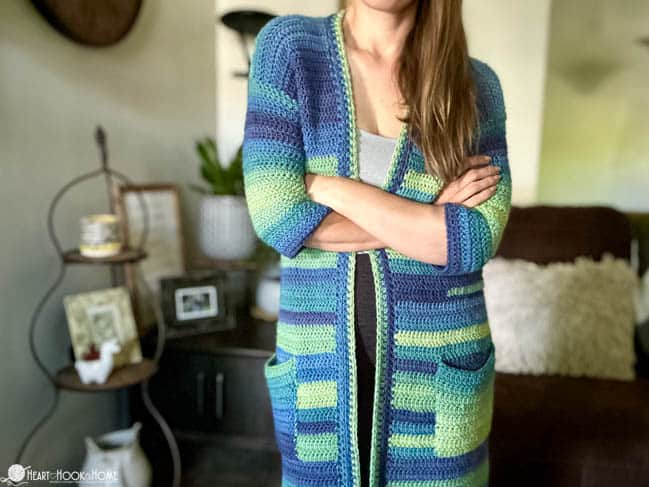
Every time I create a new pattern I think to myself this has got to be my favorite pattern to date. How is it then, that I am wrong each and every time? Because THIS new crochet housecoat pattern is definitely my favorite. This housecoat is luxurious, it is comfortable, and it makes me extremely happy. Which is why I named it The Hedonist’s Housecoat… and you may not want to keep it only at home!
Free Housecoat Crochet Pattern
Hedonism is the belief that pleasure or happiness in all things should be top priority. Therefore, a hedonist is a person in constant pursuit of pleasure; they do things, eat things, wear things, etc that make them feel good. And this housecoat does just that.

You know when you walk into Kohl’s, and there’s that area with the purses, belts, and scarves? If I were tasked with placing this housecoat in a specific department, that would be the one; right there with all of the other one-size-fits-most shawls and ponchos. You know, where the hedonists shop. 😛

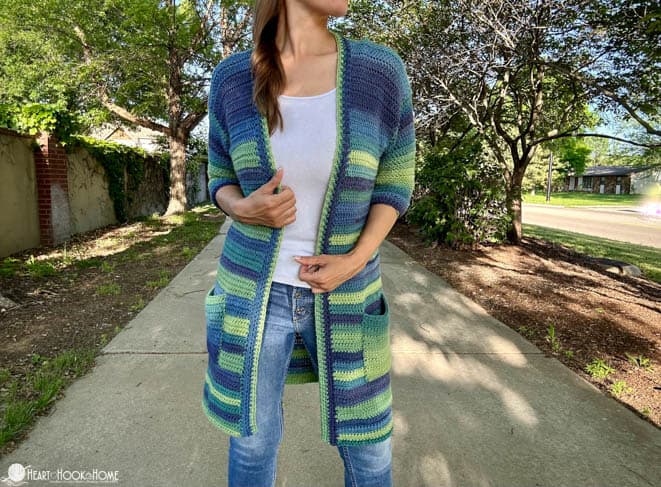
It’s roomy, it’s comfy, it’s oh-so soft. We can wrap up in it and cuddle with the spouse and kids on the couch to watch our favorite movies wearing face masks and eating popcorn. SIGN ME UP!
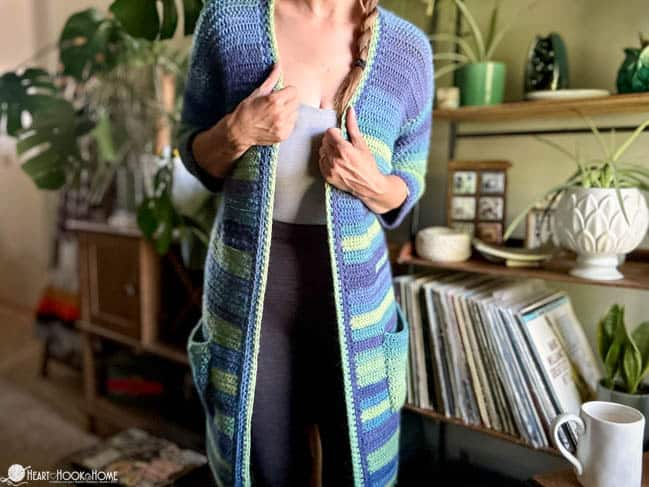
This pattern was UPDATED in May of 2024. This revised version features Chroma Worsted yarn in the “Fathoms” colorway. Isn’t it gorgeous?
Approximate measurements for one-size-fits-most housecoat:
Body circumference: 62″
Height (neck to hem after washing): 36″
Upper arm circumference: 21″
Lower sleeve circumference: 12″

Crochet Housecoat Free Pattern
For this pattern we are using the Herringbone Half Double Crochet, abbreviated as the HHDC. This stitch is much easier than it looks, so give it a shot with this new video tutorial. You’ll love it, and after crocheting this housecoat you’ll have it mastered!
Get the ad-free printable version of this pattern here on Ravelry, Etsy, or in the Heart Hook Home shop.
See the companion VIDEO tutorial for this pattern here.
Get the SMALL size here.
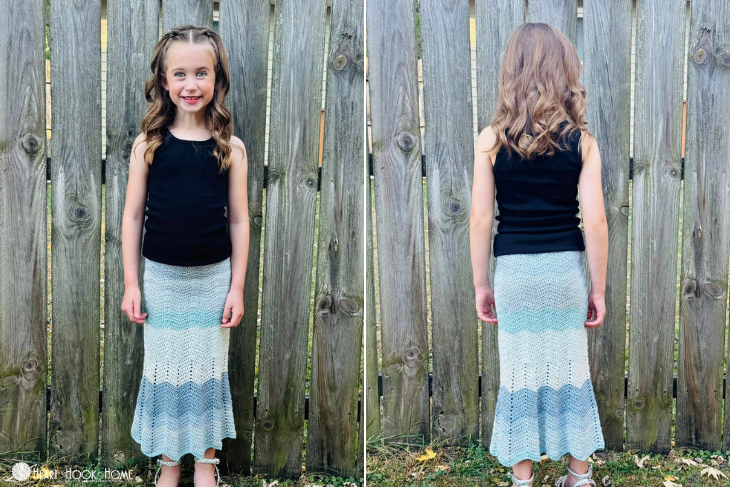
Get the CHILD size here.
Materials:
Medium/size 4/worsted weight yarn (updated using Chroma Worsted yarn)
– approx. 1500 yards for medium
– approx. 1700 yards for one-size
– approx. 2000 yards for large size
Crochet hook size J/6mm
If you need help reading a crochet pattern, make sure you head over here and check out this detailed post.
Gauge:
12 hhdc and 10 rows = 4″ square
Need help adjusting your gauge? This article will help!
Housecoat Pattern:
Row 1: Fhdc-(110, 130, 160, 190)
*alternately you could ch-(111, 131, 161, 191), hdc in 2nd ch from hook and each across. (110, 130, 160, 190)
Rows 2 through (56, 62, 62, 62): Ch-1, turn, hhdc in each st to end. (110, 130, 160, 190)
Left:
Row (57, 63, 63, 63): Ch-1, turn, hhdc in first (20, 23, 25, 35) sts only. (20, 23, 25, 35)
Rows (58, 64, 64, 64) through (74, 80, 80, 80): Ch-1, turn, hhdc in each st to end. (20, 23, 25, 35) Fasten off.
Back:
Leave (10, 12, 20, 20) sts open and attach yarn in next st to create back portion…
Row (57, 63, 63, 63): Ch-1, hhdc in same st and next (49, 59, 69, 79) sts only. (50, 60, 70, 80)
Rows (58, 64, 64, 64) through (74, 80, 80, 80): Ch-1, turn, hhdc in each st to end. (50, 60, 70, 80) Fasten off leaving long tail for seaming.
Right:
Leave (10, 12, 20, 20) sts open and attach yarn in next st to create next portion:
Row (57, 63, 63, 63): Ch-1, hhdc in same st and each to end. (20, 23, 25, 35)
Rows (58, 64, 64, 64) through (74, 80, 80, 80): Ch-1, turn, hhdc in each st to end. (20, 23, 25, 35) Fasten off leaving a long tail for seaming.
You should now have a “left”, “back”, and “right”. See photo below for reference.
 General shape before sewing shoulders, for example only.
Wanna save this for later?
Fold the two outside panels in and sew the shoulders using the Mattress Stitch. You should have (10, 14, 20, 10) sts open across the back of the neck.
Edging (all sizes):
Attach yarn at bottom right corner (if you were wearing the housecoat) with sl st.
Row 1: Ch-1, hdc (not hhdc) up the front to shoulder, across neck and down the other front.
Rows 2 – 4: Ch-1, turn, hdc in each st to end. Fasten off and weave in all ends.
Small Sleeves:
Leaving a long tail for cinching any holes, attach yarn at the bottom center of the armhole.
Round 1: Ch-1, hhdc in same st and each around. Join with sl st to top of first hhdc. (48)
Rounds 2 – 17: Ch-1, turn, hhdc2tog in first 2 sts, hhdc in each st around. Join with sl st to top of first st. (32 sts after row 17)
Rounds 18 – 28 (or desired length): Ch-1, turn hhdc in each st around (make sure first st goes into same as join). Join with sl st to top of first hhdc. (32)
Round 55: Ch-1, turn, hdc in each st around. Join using invisible join and weave in ends. (32)
Medium Sleeves:
Leaving a long tail for cinching any holes, attach yarn at the bottom center of the armhole.
Round 1: Ch-1, hhdc in same st and each around. Join with sl st to top of first hhdc. (50)
Rounds 2 – 17: Ch-1, turn, hhdc2tog in first 2 sts, hhdc in each st around. Join with sl st to top of first st. (34 sts after row 17)
Rounds 18 – 28 (or desired length): Ch-1, turn hhdc in each st around (make sure first st goes into same as join). Join with sl st to top of first hhdc. (34)
Round 29: Ch-1, turn, hdc in each st around. Join using invisible join and weave in ends. (34)
One-Size & Large Sleeves:
Leaving a long tail for cinching any holes, attach yarn at the bottom center of the armhole.
Round 1: Ch-1, hhdc in same st and each around. Join with sl st to top of first hhdc. (58)
Rounds 2 – 28: Ch-1, turn, hhdc2tog in first 2 sts, hhdc in each st around. Join with sl st to top of first st.
Round 29: Ch-1, turn, hdc in each st around. Join using invisible join and weave in ends. (31)
Pockets:
Make two…
Row 1: Ch-21, hhdc in 2nd ch from hook and in each across. (20)
Rows 2 – 15: Ch-1, turn, hhdc in each st to end. (20)
Row 16: Ch-1, turn, hdc in each st to end. (20)
Fasten off leaving a super long tail for sewing to housecoat front. I placed the bottom of my pockets 16 rows up from the housecoat bottom and 10 stitches in from the edging.
That. Is. It.
How easy is this?! If you want a longer housecoat simply crochet more rows before starting the armholes. Alternatively, if you want a shorter housecoat simply crochet less rows before starting the armholes.
If you’d like more coverage in the front, add more edging rows. I love how the Half Double Crochet contrasts with the Herringbone Half Double, but I must admit that I had to really pay attention after working with both stitches on this project.
I hope you love this pattern as much as I do, and when you make one, I would LOVE to see your photos! I was telling everyone in my crochet group that this housecoat could easily be made a scrap-coat; a great way to use up scrap yarn!
Share photos of your crochet housecoat with me by tagging @HeartHookHome on Instagram and Twitter, and by sharing in the Heart Hook Home Crochet Community group on Facebook!
More free crochet patterns:
Basic V-Neck Sweater Free Pattern
Eva Cardi: Free Bulky Cardigan Crochet Pattern
Free Dog Toy Crochet Pattern Using T-Shirt Yarn
Hair Towel with a Twist {FREE Crochet Pattern}
12 Month Infant Hoodie Free Crochet Pattern
Straight Up EASY Vertical Stripes Sweater Free Crochet Pattern


105 Comments