Tunisian Crochet in the Round (Advanced Tunisian Workshop Week 3)
This post may contain affiliate links, meaning that I may earn a small commission if you make a purchase. See our disclosure policy for more information.
If you love Tunisian crochet but are intimidated by the double ended hook needed to work it in the round, you are in luck! This tutorial will walk you through all the steps needed to master Tunisian crocheting in the round.

How to Tunisian Crochet in the Round
This week marks the half-way mark in the Advanced Tunisian Crochet Workshop! Today we’re learning how to do Tunisian Crochet in the round, and we have a new crochet pattern to start together, too. Read on to learn all of the ins and outs (and rounds 😉) of crocheting Tunisian Crochet in the round.

Like we learned in the 2023 Tunisian Basics Crochet Along, there are many Tunisian stitch patterns and crochet patterns that are worked in rows – back and forth like a old-fashioned typewriter.

As with regular crochet, you can also do the Tunisian in the round. Tunisian worked in rounds is excellent for beanies, cowls, infinity scarves, mittens, coffee cup cozies, etc. Virtually anything that can be crocheted in a circle.
Before you start though, there are a few things you need to know.

Perhaps the most enticing aspect of crocheting Tunisian in the round is that you can easily create a multi-colored project that simultaneously adds depth and looks much more difficult than it truly is. In fact, it’s no more difficult than making a solid colored version.

It is imperative that you understand how flat Tunisian crochet is worked before attempting this technique. Not that it is difficult to master, but Tunisian in the round is worked very differently than regular crochet in the round. Because of this, I highly recommend completing the Tunisian Basics Crochet-Along where you’ll learn 12 different Tunisian stitches and various techniques. If you can’t devote that much time, start by mastering any of these stitches worked flat before attempting them in the round:
Tiny Clusters Tunisian Crochet Tutorial
What you’ll need for Tunisian in the Round:
1. Two balls of yarn.
I find it helpful to use two contrasting colors particularly when learning this technique – although this is not a requirement. I find it helps to differentiate between the “forward pass” yarn and the “return pass” yarn, which makes it easier to understand the process – particularly for beginners.
This is also how you’ll get that interesting color changing effect – with no extra effort.

2. A double ended crochet hook.
This can be a standard-length crochet hook with the same size hooks on each end, or a cabled Tunisian hook, ideally with the same size hook on each end.
If you have one set of hooks of each size with no duplicates, it is possible to use the closest two hook sizes. Not ideal, but it will work in a pinch. Use the larger of the two as the “forward pass” hook and the smaller of the two for the “return pass” hook.


3. Stitch Markers (optional, but helpful!)
While stitch markers are not technically a requirement, they certainly make the process – specifically counting your stitches and finding the first stitch of the row – much easier.
How to join Tunisian crochet:
There are two ways to join your work when starting your project. You can either:
A.) Make the chain and join (without twisting) to the first chain made by pulling up a new stitch in that first chain. This is the technique shown in the written/photo tutorial below.
OR
B.) Crochet the entire foundation row as normal and join when you start round two. This is the technique shown in the cowl pattern and in the cowl video tutorial for the Advanced Workshop below.
What should you do? Well, I find that option B is much easier. Having the foundation round completed makes it MUCH easier to ensure that it is not twisted on itself, especially with large projects and many chains. Also note that weaving in the beginning yarn tails is the same process with either option. Take the path of least resistance! After that we’re just working in a spiral until we decide to stop.
Helpful Tips:
Mark the first stitch of each round with a stitch marker, moving it up as you start each new row. Because you will always have more than one loop on your hook, counting can be tricky at first. Keeping track of the first stitch of each round is a lifesaver!
Because you need two balls of yarn to work Tunisian crochet in the round, and to keep things from turning into a tangled mess, I find it best to separate the two balls and place one on either side of my work space. If you have two yarn bowls (or any old bowl, really), this is an excellent opportunity to put them to use!
Always leave a minimum of two loops on the hook at all times: one using the “forward pass” ball of yarn, and one using the “return pass” ball of yarn. You can leave several loops from each ball on the hook as you work, but never less than two. In these photos the blue Magic Hour colorway is my “forward yarn” and the grey Cement Colorway is my “return yarn”.

Don’t let the chain (or the first few rounds) get twisted on itself. This goes without saying if you’re an experienced crocheter, but should be noted nonetheless.
Getting started is the hardest part. Follow along with the photos below where we are making a quick adult size ear warmer, or with the NEW cowl pattern made especially for the Advanced Tunisian Crochet Workshop which can be found below. We will learn how to fix a dopped stitch when working in the round next week. Awesome!
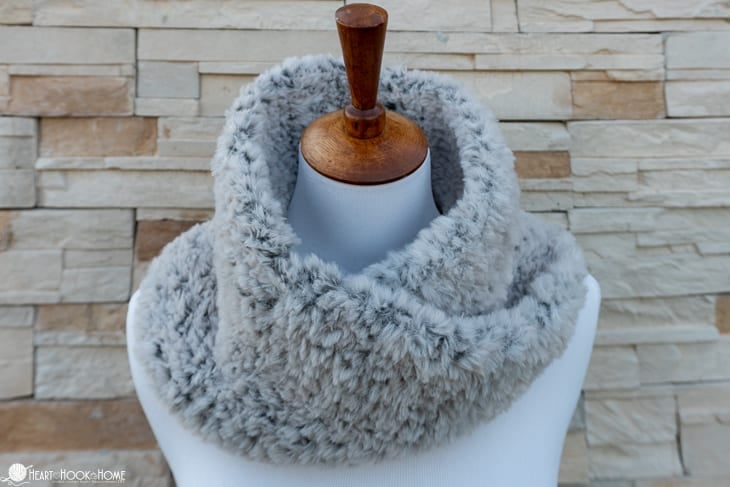
Tunisian Reverse Cowl:
Materials:
(2) skeins of Worsted Weight yarn in contrasting colors
–Mighty Stitch in “Dublin” and “Ivy Heather” pictured
Double ended crochet hook in size 7mm
(1) Stitch Marker
Pattern Notes:
TRS = Tunisian Reverse Stitch (tutorial here)
If you would like to substitute the stitch used that is perfectly fine! Other great stitches for this cowl would be the Knit Stitch, Simple Stitch, or feel free to check out the other stitches here.
If you would rather watch this video on YouTube you can find that here. Subscribe while you’re there! 😉
Cowl Pattern:
Foundation Round: Ch-100, pull up a loop in the 2nd chain from the hook and in each to end. Mark first stitch on the hook with stitch marker.
Backward Pass: Slide stitches to the other end of the cable. Using that hook and Color B, begin the Backward Pass by making a ch-1, then YO pull through two as normal. Repeat the YO pull through two loops until there are no fewer than two loops remaining: one loop of each color. (100)
Round 2: Make sure round one is not twisted and work into the marked stitch as stitch number one. TRS in each st around. When no more stitches will fit on your hook in the Forward Pass, turn the work so that you’re looking at the inside. YO, pull through two loops. Repeat until no fewer than two loops remain.
Rounds 3 – 30 (or until desired height is reached, or you run out of yarn): Working in a spiral, TRS around. Return Pass. (100)
Wanna save this for later?
Don’t forget that in next week’s installment of the Advanced Tunisian Crochet Workshop we’ll learn how to fix a dropped stitch when working this way. Be sure not to actually fasten off this project so that you can practice that with me in the video when it is released!
To finish off: YO pull through final loop. Use the Forward Pass yarn (Color A) to Trslst around. Fasten off using Invisible Join.
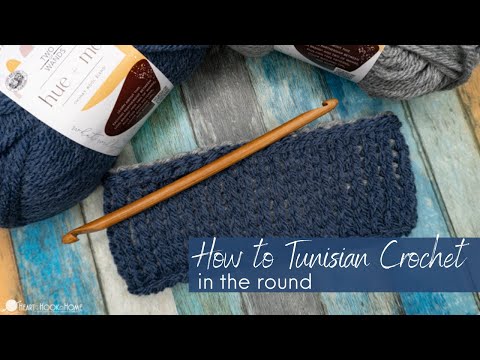
Photo/Written Tutorial start:
For the written/photo tutorial here I am using Lion Brand Hue + Me yarn and a 9mm double ended crochet hook.
Start with a crocheted chain as normal. For this example I am starting with 40 chains – which just so happens to be the perfect size for an “adult” ear warmer!

Being careful not to twist your work, form a circle and pull up a loop in the first chain made (not a slip stitch). You may find it helpful to mark this loop with a stitch marker.


From here on out we will work in continuous rounds with no joining, no chaining, and no turning (except to work stitches off the back end of hook for the the “return pass”).
Pull up a loop in as many of the chains as you can comfortably fit on your hook. You will not be able to get them all – and that’s okay!

When the hook is as full of loops as you can comfortably wield it, it is time to start working the loops off the back end of the hook for the “return pass”.

To do this, turn the work so that you are looking at the inside. Notice the difference in the two photos above.
For the very first stitch with the second ball of yarn – and only this stitch! – simply pull through the first loop as pictured.

Now you’ll YO (yarn over) and pull through 2 loops as with traditional Tunisian crochet.


Continue working the chains off the hook, one chain per vertical bar until you have no fewer than two loops remaining (at least one loop from the “forward” and at least one loop from the “return” ball of yarn). As pictured above.


When you have worked most of the stitches off the back end of your hook, it is time to turn so that you are looking again at the outside of the work. Now you’ll continue picking up one loop in each chain until you can once again no longer comfortably wield the hook.


Now it is time to work stitches off the hook again. Turn the work so that you are looking at the inside and work those loops off the hook by yarning over and pulling through two loops with the “return” ball of yarn.

When you complete your first round, and reach the first stitch of the round (the one you marked with the stitch marker), you can either slip stitch to this first stitch or simply continue crocheting straight on through (pulling up the loops as you have been). I personally keep on going, then use the tails from the beginning to close any gaps created using a technique called the Invisible Join.
Continue crocheting in a spiral using the Tunisian Knit Stitch.


Once the first few rounds have been established, this technique becomes much easier. Continue adding stitches to the front end of the hook with the “forward pass” ball of yarn until you can fit no more on the hook, then turn and work the stitches off the hook with the “return pass” ball of yarn. Rinse and repeat until the piece is as tall as it needs to be. For this ear warmer I did 9 rounds, or just shy of 4″ tall.
To finish (cast) off:
When finished adding height to your project, it is time to cast off. Fasten off the “return pass” yarn now so that you only have the “forward yarn” remaining. (Or simply remove the loop from the hook and mark it with a stitch marker to weave in later).

Looking at the outside, or “right side” of the project, slip stitch in each stitch of the final round until you reach the beginning again.

(During this process you will never have more than one loop on your hook at one time.) This is how traditional Tunisian projects are finished as well.

Fasten off using Invisible Join and look how seamless this is! ♥ Awesome!
Tunisian in Rounds Video Tutorial
More Tunisian and crochet tutorials:
How to Fix a Dropped Stitch in a Flat Row of Tunisian Crochet (Advanced Tunisian Workshop Week 1)
How to Crochet the Tunisian Half Double Crochet Stitch
Complete Guide to Changing Colors in Tunisian Crochet (Advanced Tunisian Workshop Week 2)
Tiny Clusters Tunisian Crochet Tutorial


9 Comments