Home » Hook » How to Crochet: Reverse Shell Crochet Border using Single Crochet
| |

How to Crochet: Reverse Shell Crochet Border using Single Crochet

This post may contain affiliate links, meaning that I may earn a small commission if you make a purchase. See our disclosure policy for more information.

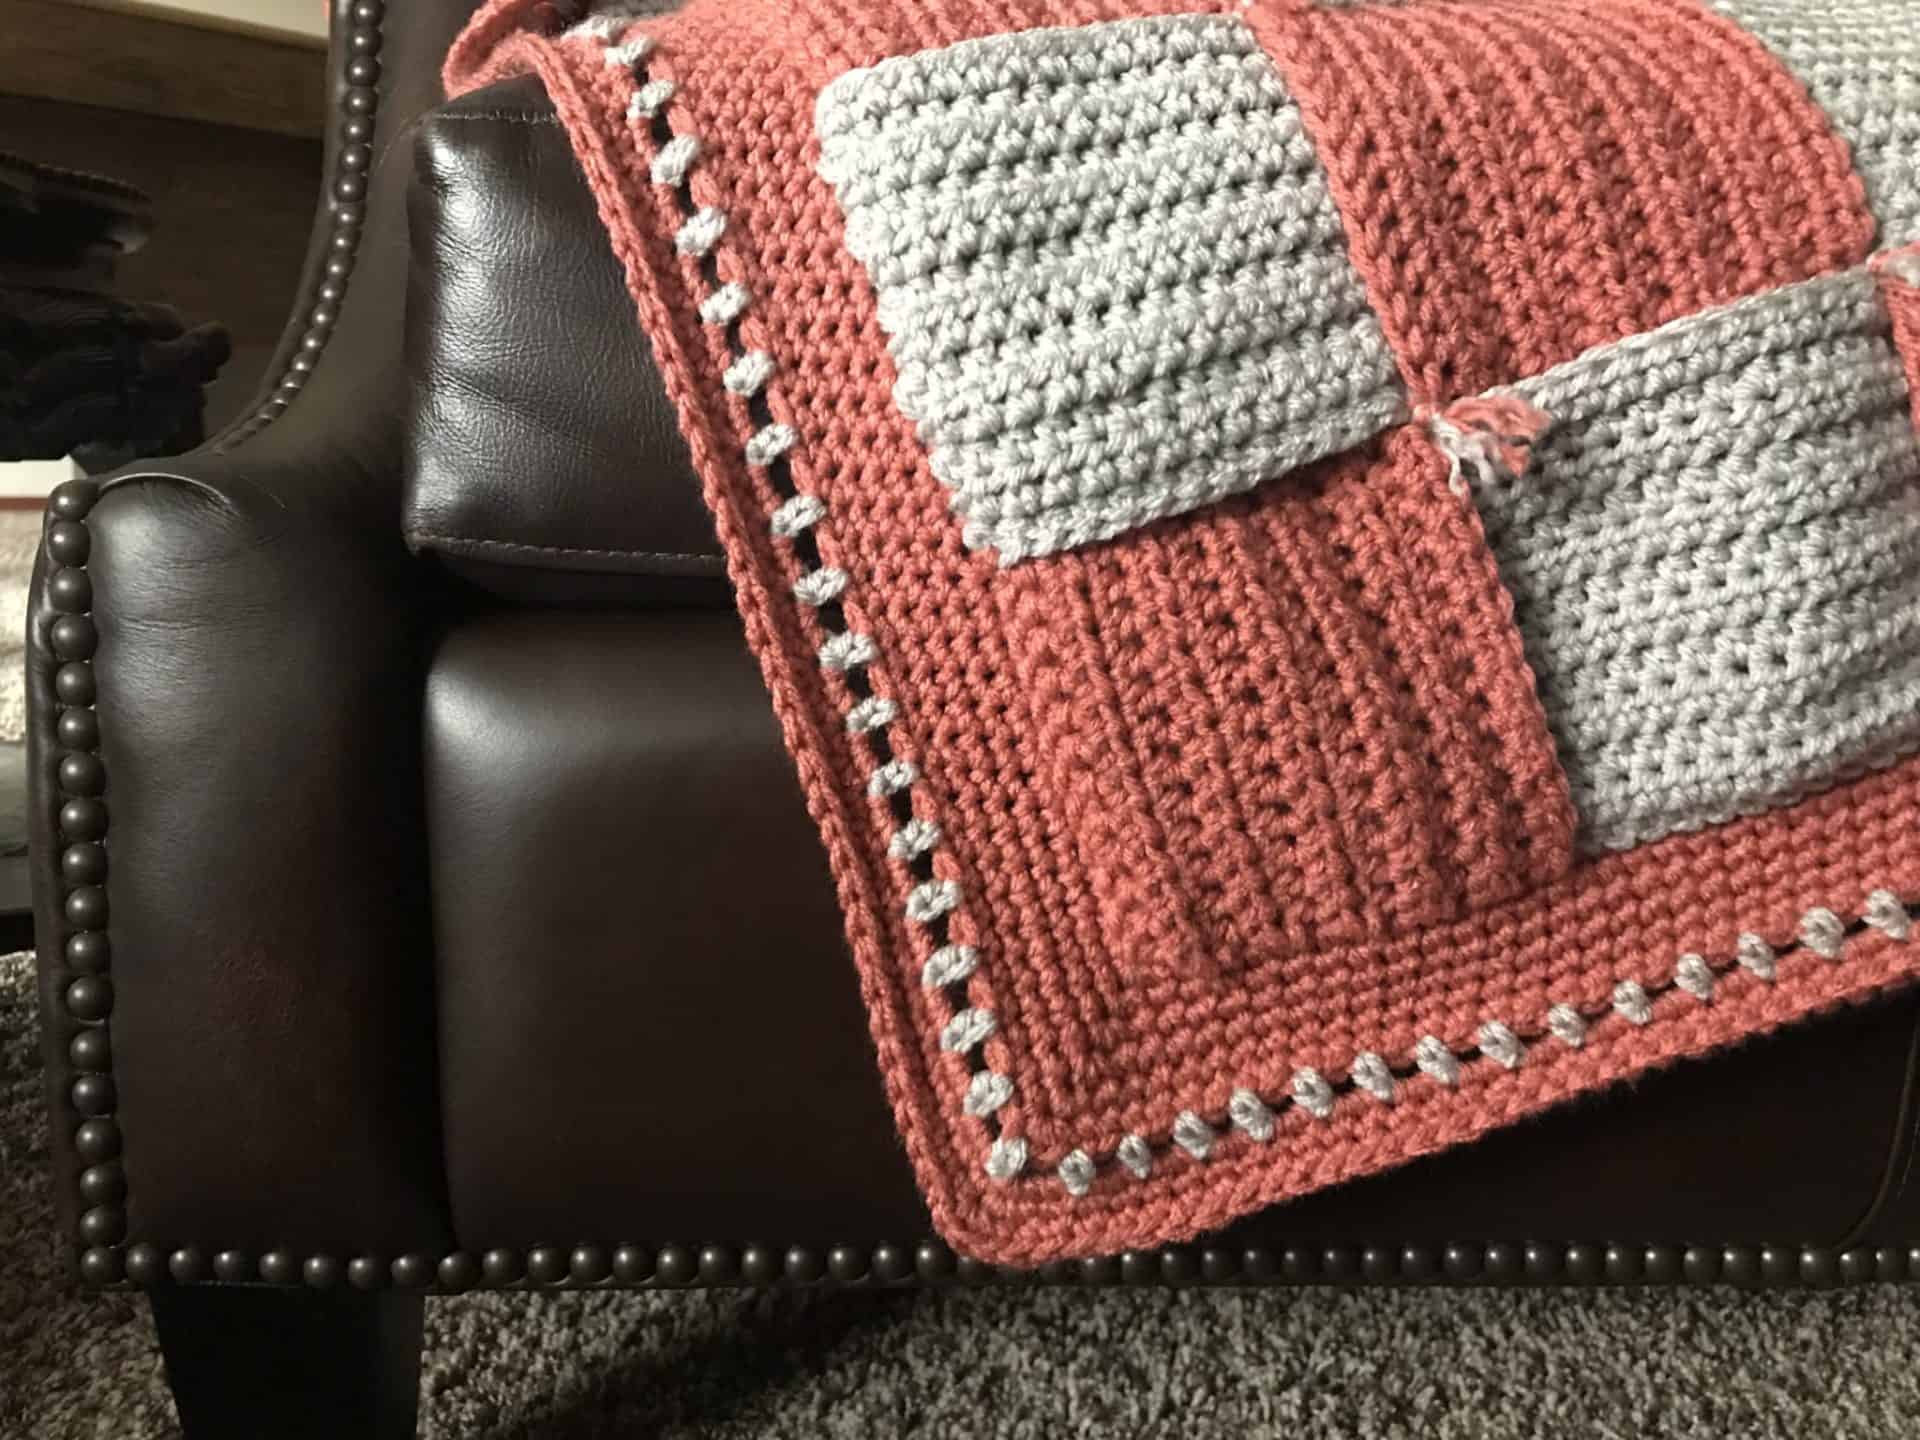
My all-time favorite crochet border? The reverse shell crochet border using single crochet – especially when used in a baby blanket.   I’ll show you how. 😉

How to Crochet Borders: Reverse Shell Using Single Crochet

Similar to this tutorial using double crochet, this version uses single crochet is just as beautiful – if not more so.

This crochet border is so much easier than it looks. Just a repeat of three of the most basic stitches: the single crochet, the double crochet and the slip stitch.  Each shell is three stitches wide, so ideally you’ll want your stitch count to be a multiple of three before you start this portion of the border. If you find that you are short a stitch, just add one in an inconspicuous place (a corner perhaps?) and continue along.

How to Crochet the Reverse Shell Border Using Single Crochet

Written instructions (video tutorial below)

Note: The first shell will be slightly different than the rest.

  1. To start, attach your yarn with a slip stitch.  Then chain-1 and single crochet in each of the first three stitches.  You should now have a row of three single crochets.
  2. Chain-3 and turn your work (to the left so you are looking at the back side) and slip stitch to the top of the very first single crochet made. Chain-1. This creates a chain-3 space that you will then crochet the shell into.
  3. Turn your work back to front side and double crochet seven times into that chain-3 space you just created.
  4. First shell complete!
  5. For each subsequent shell you will single crochet once into each of the next three stitches, chain-3 and turn your work so that you’re looking at the back side. Slip stitch to the nearest post of the last shell (also could be described as the chain-3 from the last shell). Chain-1 and turn your work so that you are once again looking at the right side. Double crochet seven times into that chain-3 space.
  6. When you get to the very end of your piece, you’ll want to end with a slip stitch to the front of very first shell completed, so that the very first shell sits behind the very last shell, as seamlessly as possible. That’s it!

To see the video crochet border tutorial:

YouTube video
Isn’t that just gorgeous?! Use two contrasting colors for your reverse shell border to make those shells really POP or use all one color as I did here.

How to Add a Reverse Single Crochet Border

More crochet tutorials:

How to Add a Border in Crochet
How to Crochet the Triple Crochet (Treble Crochet) Stitch
Understanding Crochet Gauge and How to Measure It
How to Crochet the Invisible Decrease for Amigurimi Crochet
How to Crochet the Moss Stitch (Written and Video Tutorial)
Third Loop Half Double Crochet (Video Tutorial)

You can find dozens of our Free Crochet Patterns here!

Similar Posts

Leave a Reply

Your email address will not be published. Required fields are marked *

This site uses Akismet to reduce spam. Learn how your comment data is processed.

38 Comments

  1. Just found this border pattern and can't wait to try it on my afghan. I have read all of the comments and multiple people asked you how to do the corners but you never answered any of them. Please, PLEASE tell us how to go around the corners with this pattern!!
  2. Thank you so much for sharing. Will use it on my baby boy’s blanket. It’s a bit confusing when America’s crochet stitches are different from the UK’s but I’ve learnt to get the difference.
  3. Outstanding simple instructions. I didn't even need to watch the video. Not finished yet, but this border is making my baby blanket gift look extra special that I had to write right this minute. Thanks so much!!!
  4. Love this border. I wonder if it can be used on Bulky (5 or 6) yarn. I am going to try it. Thank you for sharing.
    1. How did it turn out using bulky yarn? I am thinking of trying myself. I’ve used this border several times on other baby blankets but never with bulky yarn.
  5. Thanks from New Zealand, this was just what I wanted to finish a wee blanket for my girl and your instructions + video were so easy to follow for a new crocheter!
  6. So I attempted this pattern using 3 colors of wool at once, alternating at every shell. It turned out really well, thanks for sharing.
  7. This was a lot simpler than I thought it was, but also far more time consuming that I thought it would be! It’ll be worth it in the end and it’s making a pretty simple blanket stand out, for sure! Thanks for the tutorial.
  8. Great border and tutorial. Just wondering if you need to do anything special at the corners. Thanks!
    1. How do you do square corners? I have knit squares that I want to finish with a border but the right angle will need more.
  9. I like the shell border, but what pattern is the blanket in the picture? It almost looks like a basket weave. My first granddaughter is due to be born in October. I am looking for a look/pattern similar to what my mom did for my son (the dad to be). He will appreciate that!
    1. Hi Anne! That is a corner to corner (c2c) blanket. If you don't know that one, I have a tutorial here: https://hearthookhome.com/how-to-crochet-a-corner-to-corner-c2c-throw/
  10. I just finished a corner 2 corner blanket and want to add the reverse shell border to it. Is it possible to use this border on a C2C? In your video you have a pink stitch already on your blanket before you start adding the reverse shell border. Do I need to add that stitch? If so how is it done?
    1. Hi Donna! I do a round of sc around my blankets before starting the "pretty" border...this just helps clean up the edges a bit and gives you a nice base for you chosen edging. I have a tutorial for it here: https://hearthookhome.com/how-to-add-a-border-in-crochet/
  11. Pingback: Best Crochet Borders for Blankets - Maria's Blue Crayon
  12. Pingback: Easy Fast Free Crochet Baby Blanket Pattern For Beginners | HFW
  13. Pingback: 20 Crochet Free Edging Patterns You Should Know - TheYarnAddicts
  14. It’s pretty. Almost too pretty for my project Lol. Mine is coming out too tight and not as wide as yours. Trying to loosen it up. Anyways it’s still nice
  15. Love this border! Just finished making a blanket for my new granddaughter and needed a border. It looks great and is really not hard to do. Thank you!!
  16. Thank you for your pattern instruction it is beautiful , and i am using it in a baby blanket. Sharing is so awesome
  17. I love this border! I did a daisy granny square afghan with multiple colors. This border gave a ruffly look as it cascades around the border. Just what I was looking for! Thank you.
  18. I love this border. Seems simple enough to do yet has an unbelievable effect. Please let us know about the corners though. Does one "shell" cover the corner?
  19. Not sure what size hook to use. I used size 6 knitting needles for the blanket. Was thinking maybe an I hook or smaller? Do anything special around thge corners? Does it matter where I start?
  20. I really love it and I plan on using it on an afghan I'm about to finish. Could you tell me about the corners? How do you turn corners so they stay flat? Thanks!