How to Crochet the Woven Lattice Stitch
This post may contain affiliate links, meaning that I may earn a small commission if you make a purchase. See our disclosure policy for more information.
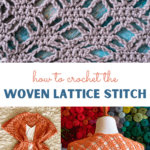
The Woven Lattice stitch is an interesting crochet stitch that is excellent for confident beginners. This stitch creates a gorgeous drape and is great for scarves or other open, lightweight designs. Let’s learn how to make the Woven Lattice stitch today!

Woven Lattice Tutorial
This gorgeous stitch is great for all types of light garments, including scarves and shawls. We are using a combination of chain stitches and single crochet stitches. What I love most about this stitch is the way it drapes. The fabric created is so lightweight yet sturdy – and stunning too!

Every project I have made using this stitch has required blocking. Blocking is not difficult to do and really helps to open up those stitches, as seen in the back of the Maddie Ruana pictured below. Get detailed instructions on How To Block Crochet here.

What a STUNNING and lightweight stitch for warmer weather months! I love it! I think this would also make for an excellent table runner using cotton yarn… and could almost act as a hot pad running down the entire center of the table, too. How great would that be when gathered around a looong table full of family this Thanksgiving?
About the Woven Lattice Stitch:
Start with a chain multiple of 8 + 1, + 1.
There are 8 stitches in each repeat.
If you are using a foundation stitch to start your project, you can omit the extra chain mentioned above and make your foundation row a multiple of 8 + 1.
This stitch is a 6-row repeat. You’ll repeat those same 6 rows in order until the piece is as tall as you like.
The little diamonds created in this stitch are made up of that 6-row repeat. The first row you will have 1 single crochet, then next row you’ll have 3, then 5 on the following row. Then the next row you’ll go back to 3, then 1 single crochet to complete each “diamond” found in the woven lattice stitch set. This is explained in more detail in the video tutorial below.
I highly recommend watching the VIDEO tutorial where I share tips for keeping on track, and walk you through the process. Scroll down!
To crochet the Woven Lattice:
1. Chain a multiple of 8 plus 1, plus 1. In this tutorial I chained 26 stitches. (8 + 8 + 8 + 1 + 1 = 26)
2. Single crochet in the second chain from the hook. Single crochet in the next two chains.
3. Chain five, skip three chains, and single crochet in each of the next 5 chains.
4. Repeat step three until there are only 6 chains remaining. Chain five, skip three chains, and single crochet in each of the remaining three chains.

First row made! Now you’ll start with the first of the row repeats.
Repeat row #1:


1. Chain one and turn. Single crochet in the first two stitches.
2. Chain three, single crochet around the chain space from the previous row. Chain three. Skip the next single crochet and make one single crochet in each of the next three stitches. Skip the next single crochet.
3. Repeat step 2 until you have only one chain space remaining. Chain three, single crochet around the chain space, chain three. Skip the next single crochet. Single crochet in the final two stitches.
Repeat row #2:

1. Chain one and turn. Single crochet in the first stitch.
2. Skip the next single crochet, chain three. Single crochet around the next chain space, single crochet into the top of the next single crochet, single crochet around the next chain space. Chain three, skip the next single crochet, single crochet in the next stitch.
Wanna save this for later?
3. Repeat step 2 to the end of the row, ending with: skip next single crochet, chain three, single crochet around the next chain space, single crochet into the top of the next single crochet, single crochet around the next chain space. Chain three, skip the next stitch and place one single crochet in the final stitch of the row.
Repeat row #3:


1. Chain five and turn. This counts as a double crochet and a chain two. Skip the first single crochet.
2. Single crochet around the next chain space. Single crochet into each of the next three stitches, single crochet around the next chain space. Chain five.
3. Repeat step 2 to the end of the row ending with: Single crochet around the next chain space. Single crochet into each of the next three stitches, single crochet around the next chain space. Chain two, double crochet in the final stitch.
Repeat row #4:

1. Chain one and turn. Single crochet in the first stitch.
2. Chain three, skip the next stitch and single crochet in each of the next three stitches. Skip the next stitch and chain three. Single crochet around the chain space.
3. Repeat step 2 to the end of the row, ending with the single crochet going into the third chain of the turning chain.
Repeat row #5:

1. Chain one and turn, single crochet in the first stitch, single crochet around the chain space.
2. Chain three, skip the next stitch and single crochet in the next. Skip the next stitch and chain three. Single crochet around the chain space, single crochet into the next stitch, single crochet around the next chain space.
3. Repeat step 2 to the end of the row, ending with two single crochets.
Repeat row #6:

1. Chain one and turn, single crochet in the first two stitches. Single crochet around the chain space.
2. Chain five, skip the next stitch and crochet around the next chain space. Single crochet into each of the next three stitches, crochet around the next chain space.
3. Repeat step 2 to the end of the row, ending with three single crochets.

Those are the row repeats! Make sure to start over at repeat row #1 above, then follow the sequence for all six rows until the piece is as tall as you like.
VIDEO TUTORIAL:

More stitch tutorials:
How to Crochet the Pique Stitch
Alpine Stitch Crochet Tutorial
How to Crochet the Small Triangles Stitch


6 Comments