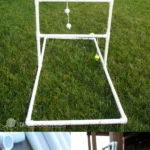
How to Make a Ladder Golf Game Set Using PVC Pipe
This post may contain affiliate links, meaning that I may earn a small commission if you make a purchase. See our disclosure policy for more information.
Yard games: everybody’s got their favorite and ours is Ladder Golf (a.k.a. Hillbilly Horseshoes). We’ve all seen this game at Walmart or online for ridiculous prices. I’m here to tell you that you do not have to spend a fortune on this game, and by making your own Ladder Golf Set you’ll pay about HALF of what you would doing so (and it only takes about an hour!).

We made our first ladder golf set several years ago and since ours was damaged in a recent storm (and we didn’t use the correct thickness of PVC pipe – learn from us!) we decided to make a NEW and sturdier ladder golf set and document the process. I love how not only does the whole set take about an hour start to finish, but you don’t have to wait for shipping if ordering online AND it will provide hours and hours of family fun. Shoot, my kids like to play it by themselves! I call that a win.
How to Make a Ladder Golf Set Using PVC
This game is really quite simple. You take a rope with two golf balls attached to each end (called Bolas) and throw them at the opposing ladder. If your bola wraps around the bottom rung you get one point, if it wraps around the middle rung you get two points and if the bola wraps around the top rung you get three points. Your teammate stands opposite you, and you’ll play against the member of the other team standing next to you during your turn. You will each throw all three of your bolas per turn, and the first team to 21 points (without going over) wins. You could play cancels if you wish, or speed it up by counting every single eligible throw. For a more in-depth run-down of the official rules head on over here.
Supplies:
48′ of PVC pipe (3/4″)
12 PVC elbows (3/4″)
12 PVC T’s (3/4″)
PVC glue
Measuring tape
Sharpie
To Make Bolas:
12′ of Twine (1/8″-3/16″ in diameter)
6 white golf balls
6 colored golf balls
Drill (and drill bit slightly larger than your twine)
Instructions:

Using a chop, table or hand saw, cut the PVC into (18) 2′ pieces and (12) 1′ pieces. Use the elbow joints for all the corners and the T-shaped joints for both the rungs and where the base attaches to the top.
Important! Omit the cement where the top portion connects to the base. This will allow you to break each ladder down into two pieces, making it a lot easier to transport and store.
The base:
 Every section of the base uses 2′ pipes. You’ll only use the 1′ pipes vertically. From the base to the bottom rung, from the bottom rung and the second rung and the second rung and the top rung. All other parts use 2′ pipes. (see photo below)

Wanna save this for later?
Before you put them together you’ll want to apply a small amount of PVC cement inside of each joint immediately before attaching it to the appropriate piece of PVC. Be mindful that you’ll only have a second or two to line the joint up to mirror the opposite end before it dries. It helps to immediately lay the pieces flat on the cement to make sure they are completely level. Adjust ASAP if necessary.

To make the bolas for ladder golf, you’ll need 6 golf balls of one color and 6 golf balls of another color. I used (6) white balls and (6) yellow range balls (you could always paint 6 whites ones). Place the balls in a vice and carefully drill a hole through the center of each ball with a drill bit just slightly wider than the twine that you’ll be using.
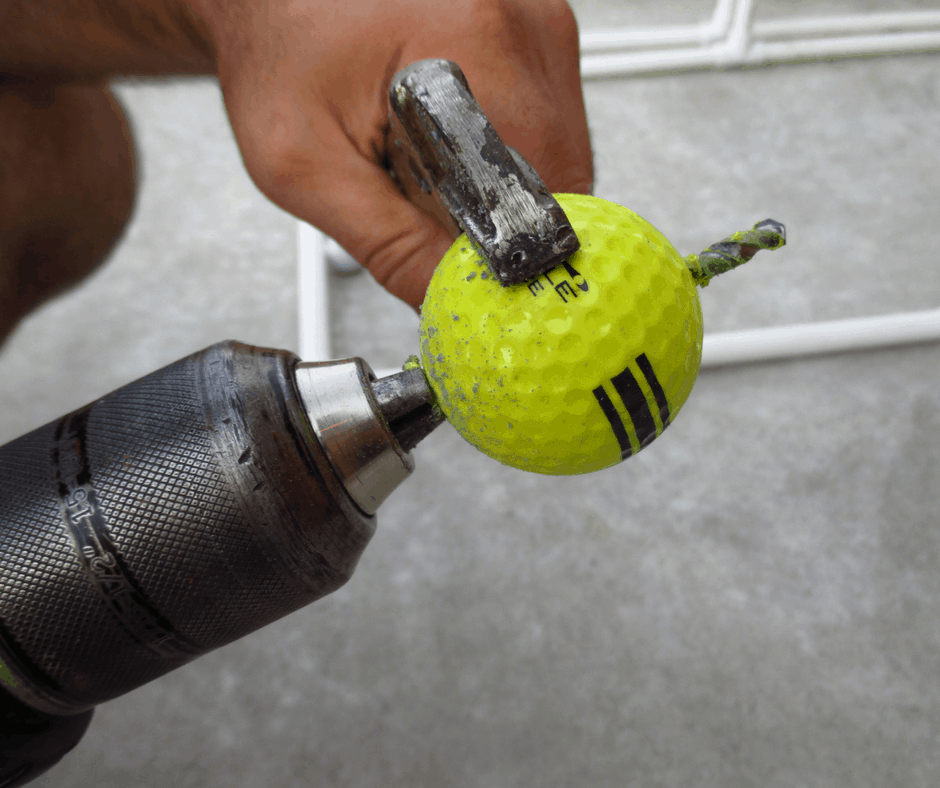
Take your twine and cut (6) 24″ pieces. Feed the twine through the center of each ball and knot it on both sides of the ball so that they don’t move around. Make (3) bolas using the one color of golf balls and (3) more of the other color.

Of course, if you’re an over-achiever you could always spray paint the PVC and joints prior to assembly to have it correspond with your favorite sports team.
Since we didn’t glue the top of the base to the ladder, we can take it apart for easy storage. Sa-weeeeet! That’s it. Pretty simple, huh?

DIY Ladder Golf Set Using PVC Pipe

More Homemade Games and Projects:
Mason Jar and Pallet Board: DIY Storage Rack
Over-The-Garage-Door Storage System
DIY: Photo/Card Display – Frugal, EASY and Cute!
Toy Car Parking Garage
DIY: Portable Photography Floor for Photo Staging


12 Comments