Herringbone Single Crochet Stitch Tutorial
This post may contain affiliate links, meaning that I may earn a small commission if you make a purchase. See our disclosure policy for more information.


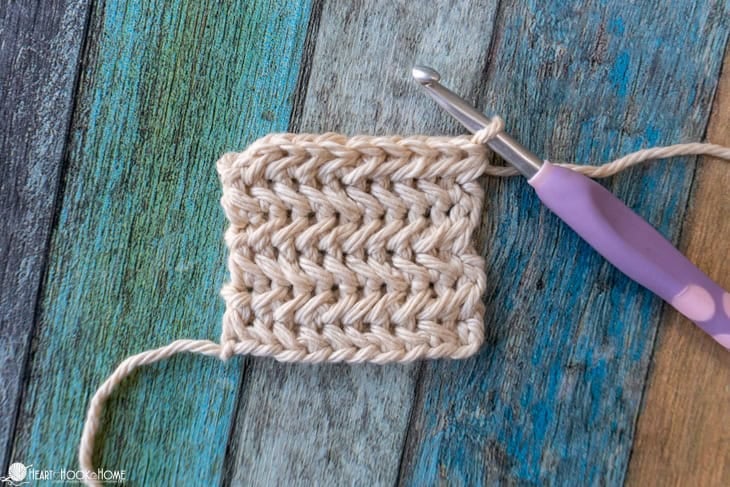
The Herringbone Single Crochet is an interesting, gorgeous stitch. Learn how to crochet this stitch with this comprehensive, step-by-step tutorial.

Herringbone Single Crochet Tutorial
This stitch takes some getting used to. Unlike the Herringbone Half Double and the Herringbone Double Crochet, this stitch is comprised of a two-row repeat that makes it to where you are always crocheting on the “right side” of the fabric… even when you’re looking at the “wrong side”. Sound difficult? It’s not that bad!! Let me show you how.
The Herringbone Single Crochet is a two-row repeat where one of the rows is easy peasy and the other, well, takes a bit of practice. Good thing we’re using this in the Holiday Sparkle Stitch Mix Crochet along. Plenty of practice!
This stitch works lovely for scarves and hats, and other accessories.
About the Herringbone Single Crochet
Unlike the other Herringbone stitches, the Herringbone Single Crochet is a two-row repeat.
There is a definite RIGHT side and WRONG side of this fabric. You can tell the wrong side because of the horizontal line that runs across the back side of each row.
How is this stitch abbreviated in crochet patterns? Hbsc is typically what you’ll see in written patterns to denote this stitch when worked on the “Right Side” of the fabric. For the alternating rows (the “Wrong Side”) I use rHbsc to note that we are working in reverse.
Is there a multiple needed for this stitch? Nope! You can start with ANY number of chains with the Hbsc.
Herringbone Single Crochet Instructions:
1. Start with ANY number of chains.

2. Single crochet in the second chain from the hook.

3. Hbsc across. To do so, insert hook into the left leg of the sc just made and directly into the next chain. (3 loops on hook). Yarn over and pull through all three loops. Continue across until no chains remain.


The other row in the two-row repeat is more tricky. I like to think of it as crocheting in reverse, or on the “Right Side” of the fabric while LOOKING at the “Wrong Side”. If you’re ambidextrous, you could simply crochet this row with your left hand.
4. Chain one and turn. We are looking at the “wrong side” while crocheting on the “right side”. To do this keep the working yarn in front of the fabric and single crochet in the first stitch from the other side of the fabric.

Wanna save this for later?

5. Again working from the other side of the fabric, insert hook into the left leg of the sc just made and directly into the next stitch. (3 loops on hook). Yarn over and pull through all three loops. Continue across until you run out of stitches.

Now we will do the easier of the rows…
6. Chain one and turn, regular single crochet in the first stitch.


7. Hbsc in each st across.

The two-row repeat is complete!
To continue to grow your crochet project using the Hbsc you’ll start over at step 4.

Once you get the hang of crocheting on the RIGHT side of fabric while looking at the WRONG side it become much easier! Tension on that row is the hardest to master since our fingers aren’t used to crocheting that way. I also find it helpful to keep the size of the loops as consistent as possible when doing the reverse rows.
Herringbone Single Crochet VIDEO:
If you would rather watch this video on YouTube, you can find it on my channel here. Don’t forget to subscribe while you’re there!
More crochet tutorials:
How to Crochet the Double Moss Stitch
Corner to Corner Moss Stitch Tutorial Step by Step
How to Crochet a Moss Stitch Granny Square


One Comment