How to Crochet the Drop Loop Stitch
This post may contain affiliate links, meaning that I may earn a small commission if you make a purchase. See our disclosure policy for more information.


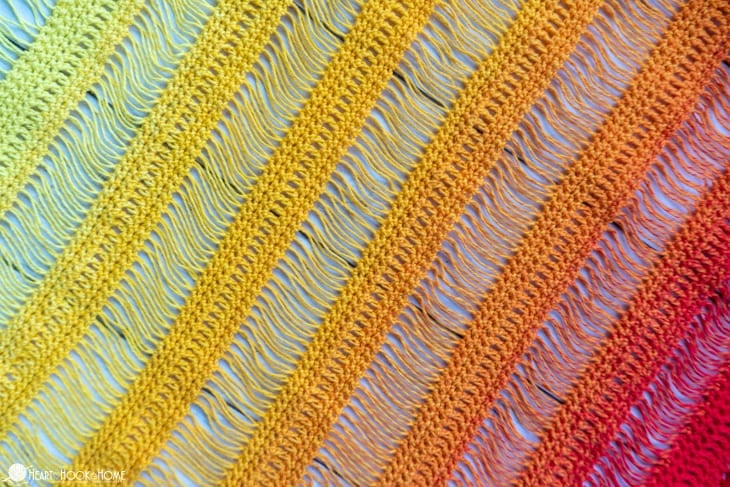
The Drop Loop Stitch is a tall, open, and stunning stitch. Grab your dowel rod (or a broomstick) and let’s learn how to make this gorgeous stitch today. It’s easier than you may think!
Drop Loop Stitch Tutorial
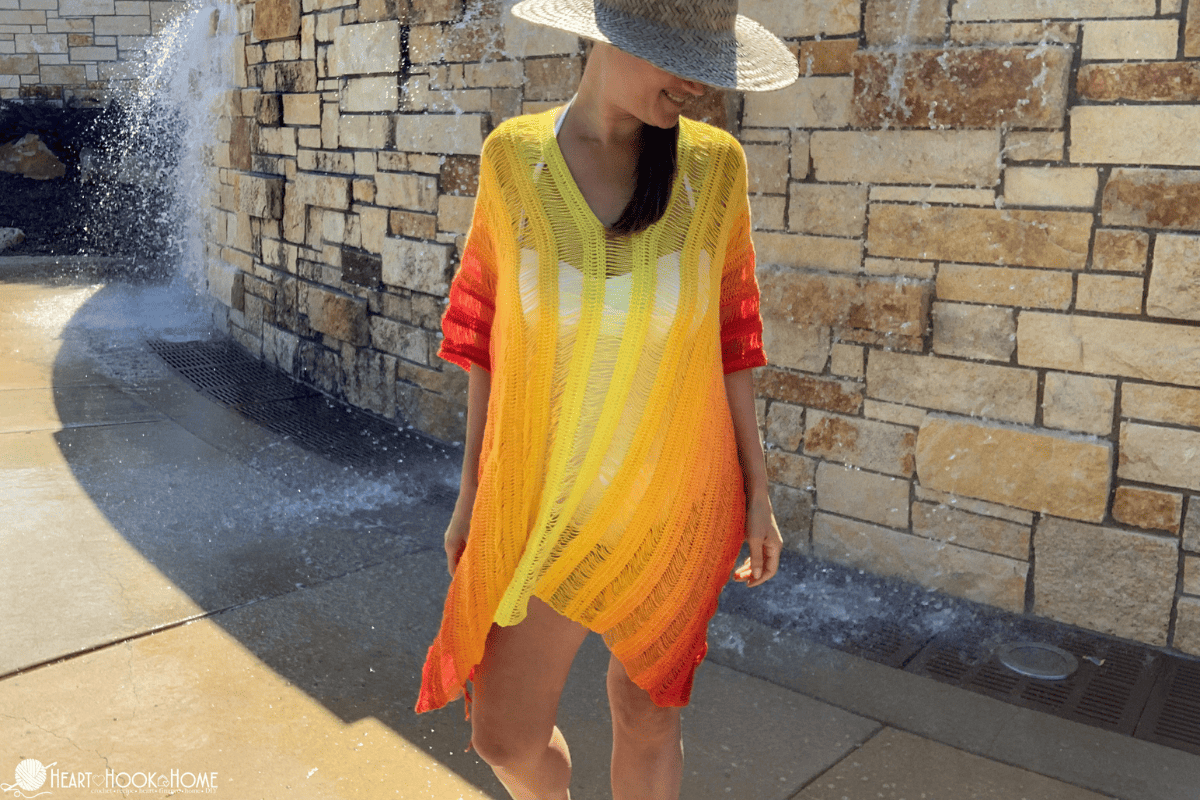
Drop Loop stitches are tall, breathable, and provide a great drape to any crocheted fabric. This stitch is great for swimsuit coverups, or summery tops. * hint, hint * The Phoenix Swimsuit Coverup (pictured here in all its red-to-yellow gorgeousness!) will hit the blog shop this June!

The most daunting aspect of using the Drop Loop Stitch is figuring out the way to wield the dowel rod so that your stitches are uniform in height and direction, and in a way that makes it easy to “knock them off” the back end when you’re finished with a row.

For this crochet stitch you will need a dowel rod or a broomstick. Technically speaking any size will work but I’ve found that at least a 3/4″ diameter provides the best results for me, and my sweet spot is 1″ in diameter. The larger the dowel/rod the taller the drop loop stitches.
One thing to note is that with this stitch you will absolutely want to block your item when you’re finished.
I do not recommend using this for a blanket because toes and fingers would get entangled, but for tops and other garments this works beautifully!

About the Drop Loop Stitch:
Start with any multiple of stitches.
Each drop loop = one stitch.
Always try to have a row, or a few, of solid crochet in between drop loop stitch rows. You can use single crochet, half double crochet, or even double crochet. This is because those drop loop stitches don’t have a lot of consistency to them so adding a solid row (or several) in between each helps to keep the integrity of the fabric.
It helps to always add new loops to the rod in the same direction. (See what I mean in the video below) This helps to keep all of the loops as uniform as possible.
If at all possible try to keep ALL of the loops on the dowel rod until you are ready to knock them off. Again, this helps to keep all of the loops as uniform as possible. This also makes it easier – and certainly faster – to knock the stitches off when you complete the row.
The first chain when you start the Drop Loop row is the one you’ll pull up to height.
When making the chain, before pulling up the Drop Loop, make sure that chain is small. (See what I mean in the video below).
How to make the Drop Loop Stitch:
Start with a row or two of solid crochet stitches of your choice. For this tutorial I have started with four (4) rows of twenty (20) single crochets.

When ready for a Drop Loop row, chain one and turn. Keep this chain small.

Pull up the loop and wrap around the dowel rod. Pull tight.


Insert hook into next open stitch, and chain one. Again, keep this chain small.
Pull up the next loop and wrap it around the dowel rod. Pull tight.
Continue to the end of the row.

To work the Drop Loop stitches off the dowel rod, turn.
Wanna save this for later?

Move loops up to the end of the dowel rod so that you can knock them off one by one.
For the first loop, hold the base of the loop so that it does not “grow”.


Yarn over and pull through, then make a single crochet in the back bar only. (If you’ve ever done the Solomon’s Knot, this is essentially the same technique).


For all of the rest of the loops you’ll insert the hook under the next loop and single crochet into it.


Continue to the end of the row. (Tip: try not to make those single crochets too tight!)

Chain one and turn, and crochet a solid row or two of crochet. In this example I am separating my drop loop rows with three rows of single crochet.

Continue making drop loop rows as often as you like, separated by the solid crochet rows of your choice. Isn’t that gorgeous?!
While these rows can get a bit tedious working the stitches on and then off of the rod, I do love how tall they are – it’s like crocheting several rows at once!
Video tutorial:
If you need help reading a crochet pattern, make sure you head over here and check out this detailed post.
More Crochet Stitch Tutorials:
Alternating Single Crochet Spike Stitch Tutorial
How to Crochet the Pique Stitch
Alpine Stitch Crochet Tutorial
How to Crochet the Small Triangles Stitch
Waffle Stitch Crochet Tutorial
How to Crochet the Bobble Stitch: Written and Video Tutorial


5 Comments