How to Crochet Hdc Slip Stitch Ribbing
This post may contain affiliate links, meaning that I may earn a small commission if you make a purchase. See our disclosure policy for more information.
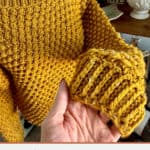

While playing around with different techniques for edging and borders, I recently came across a great way to make a knit-look crocheted edging that is both easy to do and gorgeous. Use this for a base of your next sweater pattern, or as the brim of a beanie, or blanket border!

How to Crochet Half Double Crochet Slip Stitch Ribbing
If you’ve been looking for a knit-like crocheted ribbing or edging that is stretchy and gorgeous, this is it! The Hdc slst combines beautifully when alternated with rows of regular slip stitches. Placing the slip stitches in a specific loop of the half double crochet stitch pushes part of that stitch forward, which is what you’re seeing on the front side of the fabric. GORGEOUS!

This is much easier to do than it seems. I love that we can crochet as many rows as needed, then go straight into those row ends working up to create sweater bodies or hats or beanies, etc.
As you may know, the Half Double Crochet consists of three loops. As with other basic crochet stitches, there is a front loop and there is a back loop, but in the Half Double there is also a loop along the back side of the stitch called the third loop. We will use that loop to our advantage to create a gorgeous effect.

Making the Hdc Slst Ribbing:
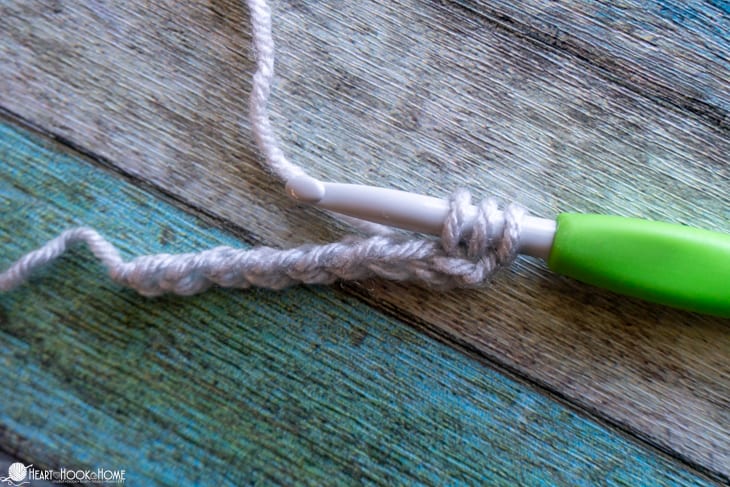
Start with any number of chains.
To make the first Hdcslst row you will yarn over, insert your hook into the 2nd chain from the hook and pull up a loop.

Hold the bottom of the stitch and pull that loop straight on through the other two loops on the hook.
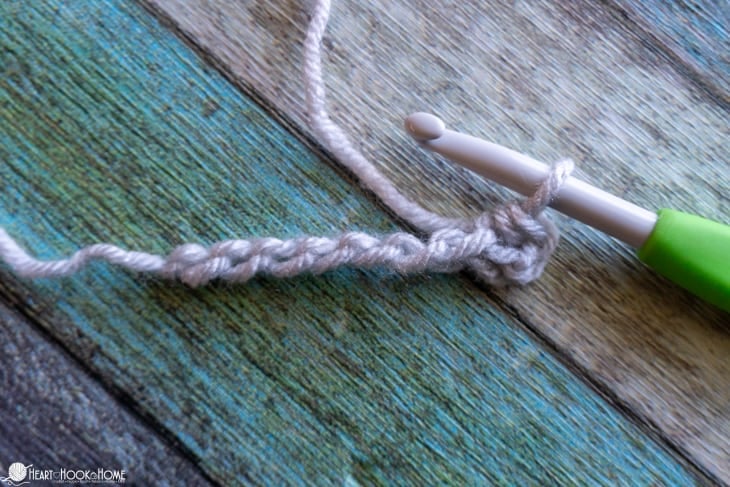
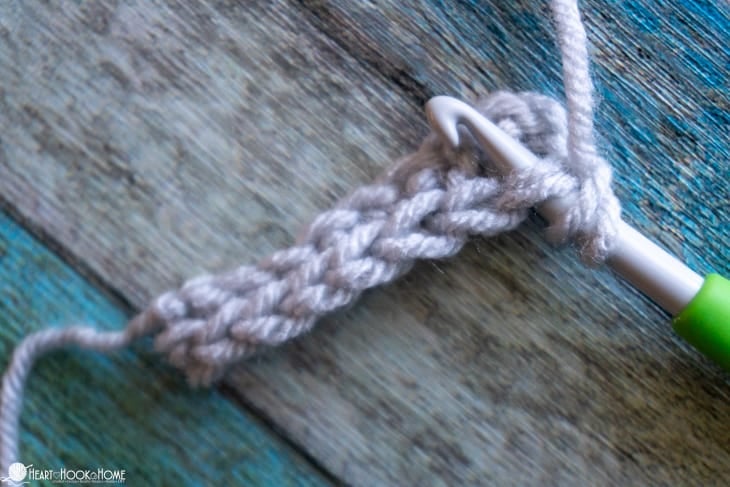
Repeat this in each chain until you get to the end.

To start the alternating row you will turn (do not chain) and make sure that the working yarn is in front of the piece, like so…

Slip stitch in the previous row’s third loop only. Repeat this in each st across.
Wanna save this for later?

When you get to the end, go through both of the outside loops (the previous row’s third loop and the back loop). I find it helps to create a cleaner edge and is shown in more detail in the video tutorial below.

Turn (do not chain), and half double crochet slip stitch one time into each of the slip stitches across.

After a while you’ll really start to see the effect taking shape!


This is a stretchy, squishy, crocheted ribbing that makes for the perfect brim on bottom-up beanies (like the Back in Brugge beanie) or for the bottom band on your next sweater. Stay tuned because a NEW sweater pattern will be hitting the blog soon that features this beautiful ribbing technique. 🙌
Hdc Slst Ribbing Video:
If you would rather watch this video on YouTube, you can find it on my channel here. Don’t forget to subscribe while you’re there! 😉
More crochet tutorials:
Double Crochet Rib Stitch Tutorial (Knit-Look)
How to Add Crocheted Edging to Fabric
How to Crochet Front Post and Back Post Stitches (FP/BP)


