Home » Hook » How to Crochet Front Post and Back Post Stitches (FP/BP)
| | |

How to Crochet Front Post and Back Post Stitches (FP/BP)

This post may contain affiliate links, meaning that I may earn a small commission if you make a purchase. See our disclosure policy for more information.

Front post and back post crochet stitches sure can be intimidating – but don’t let that stop you from creating lovely crochet projects using them! These stitches are perfect for edging, ribbing, and even cabling in crochet! Let me teach you how with this tutorial.

front post back post crochet stitches

Front Post and Back Post Crochet

These crochet stitches are what we use for the edging of the Painted Canyon Cardigan pattern. We also use this in the Head Honcho Poncho, for edgings on all kinds of hats, and even as a 12″ square in our Stitch Sampler Afghan pattern!

fp/bp afghan square

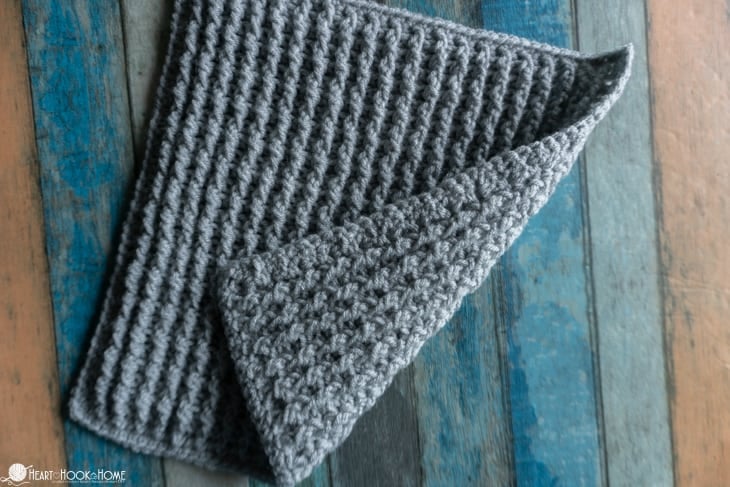
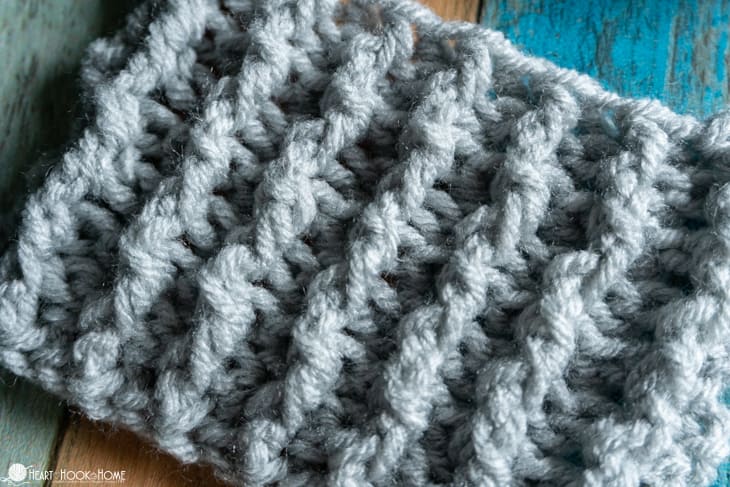
It is what gives the edging/border that nice ribbing effect. It really pulls everything together in a way that sets off a finished piece. Make your next hat (like the Messy Mom Bun Beanie pictured below), blanket, or sweater really POP by using this unique stitch set.

How to Crochet fpdc bpdc

Use front post/back post crochet with virtually any crochet stitch: single crochet, half double crochet, double crochet, treble crochet… Literally the only the difference is that you’re hooking around the POST of the stitch, then completing the rest of the stitch as normal. Doesn’t that sound easy? Probably because it is!

Note that this stitch does tend to shrink after several rows in. This is normal, but should be taken into account if you’re looking to hit a certain width or dimensions.

fp/bp crochet

Prefer a video tutorial of this stitch set? See that below!

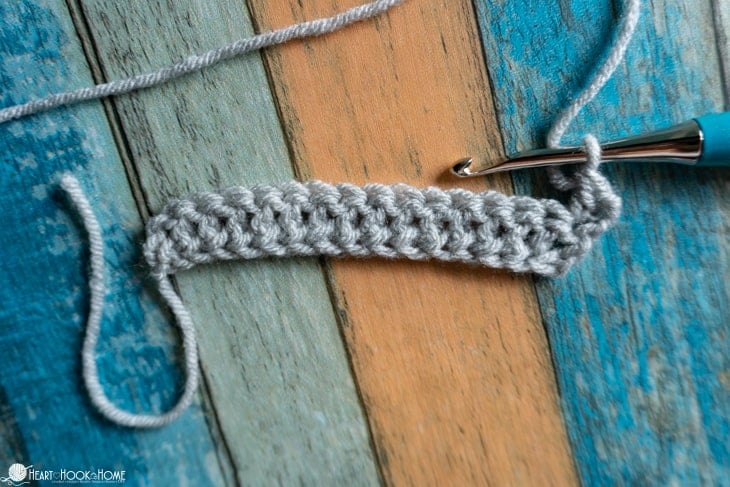
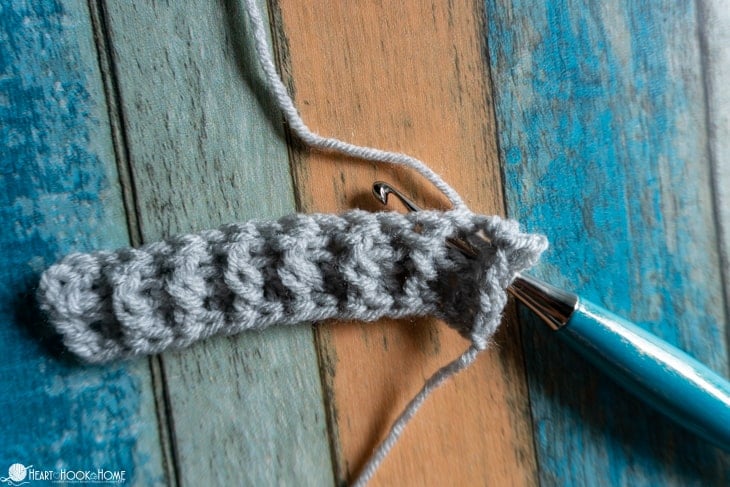
Since we are using the POST of the row below to create these stitches, you’ll need a foundation row of stitches around which to crochet. For this tutorial, I am starting with a row of double crochet and am making double crochet post stitches.

Now to start the actual post stitches! Chain two and turn. Place a regular double crochet in the first stitch. This helps to make sure that the edges stay nice and straight.

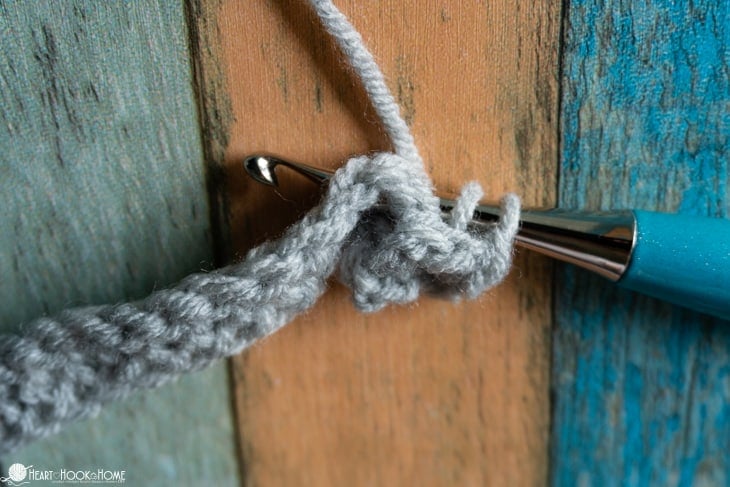
How to make a front post crochet stitch

To make a front post stitch, you’ll insert your hook from the front to back and work around the post of the stitch. Complete the double crochet stitch as normal.

front post double crochet stitch

How to make a back post crochet stitch

To make a back post stitch, you’ll insert your hook from the back to front and work around the post of the stitch. Complete the double crochet stitch as normal.

Wanna save this for later?

We'll email this post to you, so you can come back to it when you're ready.

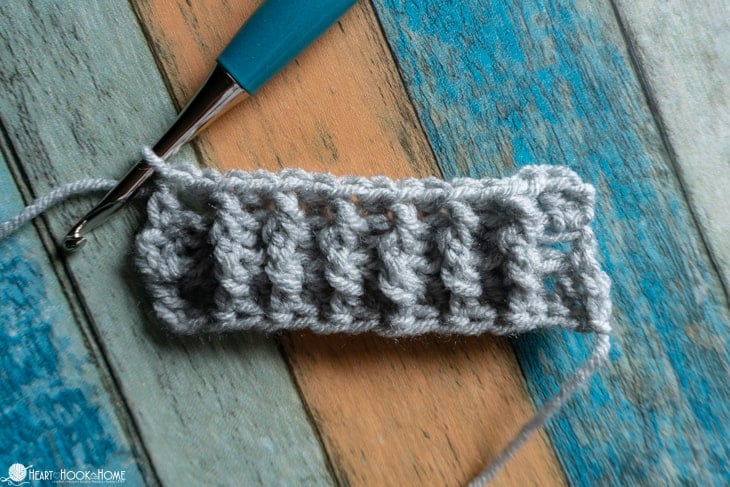
Continue alternating front post and back post stitches to the end of the row. Again, I like to start and end each row with a regular stitch to keep the sides nice and even.

When you turn your work, you’ll notice that the front posts of the previous rows now look like back posts. In order to keep the ribbing stitches lined up, you’ll back post around the previous row’s front post. See what I mean in the video tutorial below.

front post back post crochet ribbing tutorial

Here is a video tutorial of this stitch, and be sure to subscribe on YouTube!

YouTube video
Will you join me in creating this stitch as a 12″ afghan square for my stitch sampler pattern? If so, you’ll find all of that info right over here. 👍


More crochet tutorials and tricks:

How to Crochet: Foundation Half Double Crochet

How to Crochet the Lemon Peel Stitch

Triple Crochet (Treble Crochet) Stitch Tutorial

How to Crochet the Crocodile Stitch (Video Tutorial)

How to Size Crochet Beanies + Master Beanie Pattern

Similar Posts

Leave a Reply

Your email address will not be published. Required fields are marked *

This site uses Akismet to reduce spam. Learn how your comment data is processed.

23 Comments

  1. Please help! Hi Ashlea :) I love all of your posts -- thank you so much! I made a blanket with just front posts and back posts starting on a foundation row of double crochet. What do I do for the last row of my blanket? It doesn't look the same as the starting row that is beefier since the starting row is sitting on the double crochet. Help please!
    1. I think I would probably end with a row of regular half double crochets, then add a nice border!
  2. Thank you for the video on fp and bp, your instruction are so clear , I love how it looks . Will be trying this for a beanie, I want to make.
  3. Pingback: Track Stitch Tunic
  4. Thank you for your instructions for the front post and back post crochet. The video makes everything clear.
  5. Pingback: Crochet Santa Hat Pattern (Two Sizes!) - Free | The Loophole Fox
  6. Pingback: Crochet Winter Hat Pattern - Free! | The Loophole Fox
  7. Ashlea, I am so hsppy to find your tutorial on FP and BP crochet! I have avoided them for years because the directions were confusing.Your video and explanation made it all clear andeasy to understand! Thank you so much!
  8. Pingback: Rice Stitch crochet Tutorial – A-Z ENOTES
  9. Hi! Thank you for your willingness to reply. I am not a novice doing FPDC's ' or BPDC's. .however I ran across a pattern that calls for placing next stitch around "stem" of next stitch. Is that the same as next "post"?
  10. HI, I really love this pattern, but each time it says right side, I have to think does that mean the right side facing me or if the baby was wearing the sweater, their right side? This comes into play especially when I attach the edging. Thanks! Jody
    1. The right side refers to the garment itself. When you look at the garment the stitches look different on each side. For example a shell stitch curves outward on the right side (outward side) & inward on the back side. On a sweater the right side is the side you see & the back side goes against the body.
  11. Hi love the canyon hoodie very impressed with my finished garment thank you your tutorials are fantastic . Do you have a pattern for a med-large dog jacket please
  12. Ashlea, I am a newbie to crochet, well not a newbie newbie, but tried when I was in home ed in the late 1970's. My teacher got so frustrated with me that she told me ( in front of other students) to stay away from sewing machines and crochet needles. I never tried again. I always admire other people's skills and the beauty that crochet brings. But I am retiring and thought you know I am going to give it a shot again. I have been looking at all kinds of tutorials. Your written instructions and tutorials are awesome!!!! Easy to understand in beginner language!!! Thank you so much for posting all of this information!!! I am halfway through a beanie for our future granddaughter and can't believe that I am doing this!!!
  13. Just watched the front and back post half double crochet stitch video. Good reminder for me. Very well done. Clear good instructions. I loved the little white Tadaa! outline on the completed stitch.
  14. I have made the Hoodie crochet pattern which I have really enjoyed making. I just need to find out what did you use to keep the Hoodie closed? I was thinking about using buttons but the edge with the post stitches is not wide enough for the buttons. Please help me