Invisible Shoulder Seam for Crochet Garments
This post may contain affiliate links, meaning that I may earn a small commission if you make a purchase. See our disclosure policy for more information.

There’s nothing worse than spending hours and hours crocheting a new cardigan and realizing your shoulder seams are, well… wonky. Let’s make the prettiest shoulder seams you ever did see with this NEW technique for seaming. An excellent and EASY way to take your crochet game up a notch.

Invisible Shoulder Seam for Crochet Garments
There are multiple ways of joining two pieces of crochet together. Some of my favorites, or ones you may already know, include the…


The Invisible Shoulder Seam is variation of the sewing crochet techniques listed above… they all beautifully join two pieces of crochet together.
In my experience this seaming technique works best on basic crochet stitches such as the single crochet, half double crochet, and the double crochet. In this tutorial I have used double crochet for the main body of the cardigan. I have not tried with bulkier stitches (such as the Mini Bean) but the premise would be the same.
This technique is similar to the Mattress Stitch in that we are going back and forth from one piece of fabric to the other, sewing into one stitch from one side, then one stitch from the other side. The only difference? The portion of the stitch into which we insert the yarn needle. That’s the ONLY change!
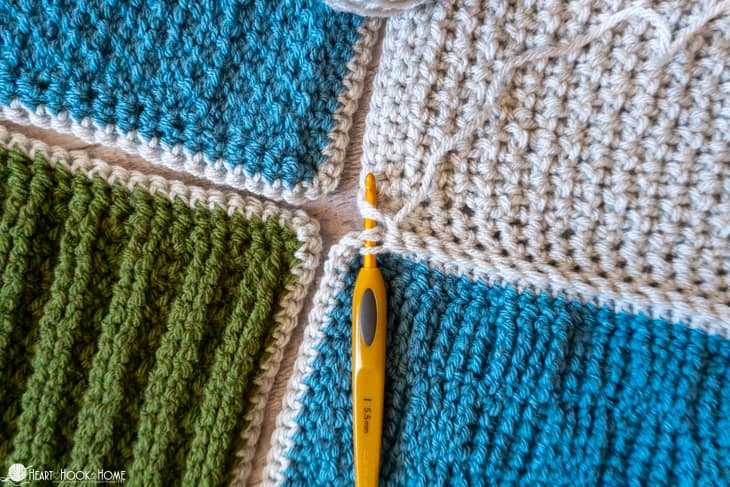
This method of joining two pieces of crochet works best when the two pieces of crocheted fabric to be sewn have the nice edges (top of the work) touching. This could be when seaming shoulders in a bottom-up constructed cardigan as in this tutorial, or granny squares laid flat where all edges will line up with all of the other squares’ edges as well.

You will need a yarn needle or a tapestry needle and a bit of the yarn left over from making the piece.
When going back and forth, you’re grabbing the upper portion of the front of the stitch instead of the top of the stitch. See what I mean in the video tutorial below.
To sew an invisible Shoulder Seam:
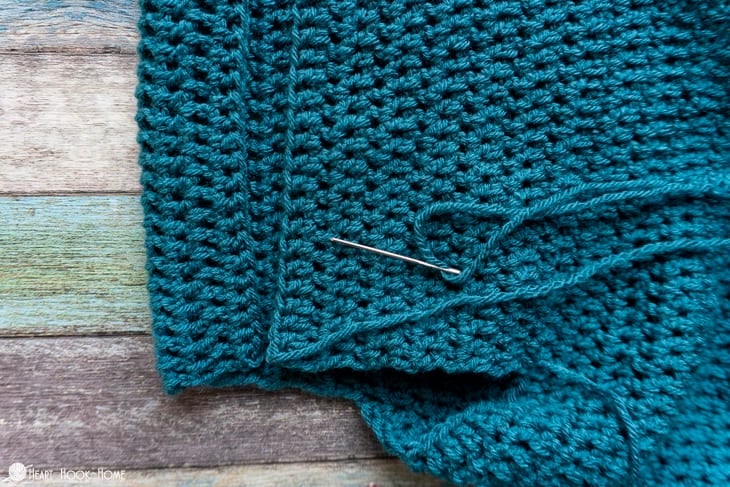
Line up the two pieces to crochet. Here I am starting at the outside (shoulder) side of the Camille Cardigan using the yarn tail left over from crocheting this portion.
Wanna save this for later?
First you’ll want to go into the tuning chain on the opposite fabric. You want the corner-most portion of the fabric so that the edges are nice and clean when you go to add the sleeve.
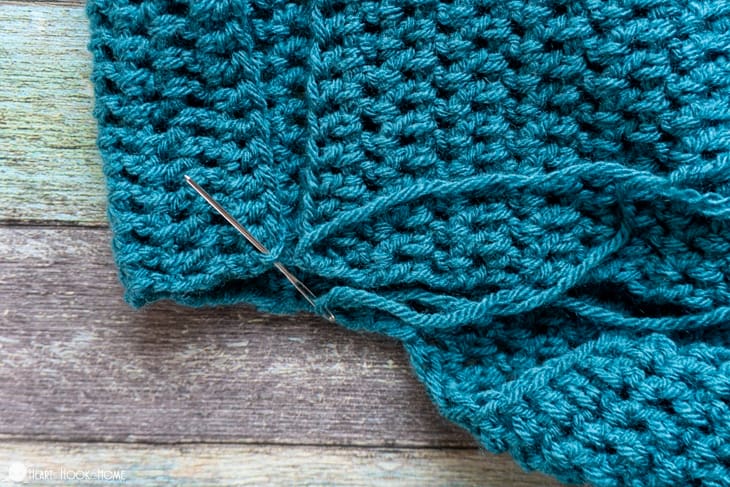
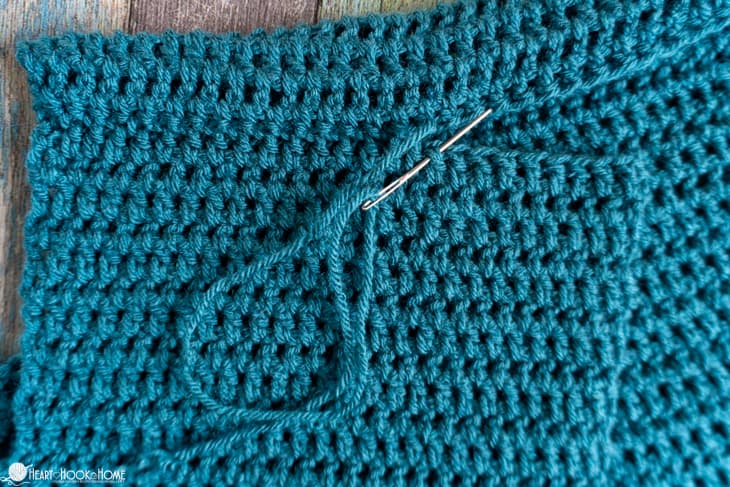
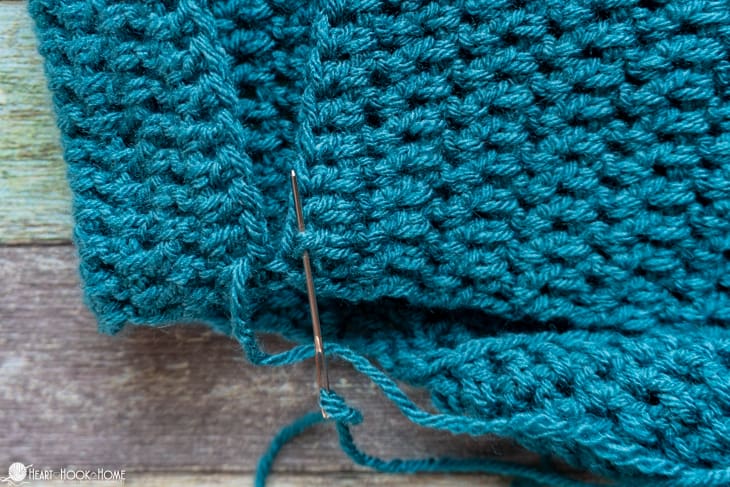
Now it is time to sew the two sides back and forth, using the upper most portion of the FRONT of each stitch. Grab the upper most portion of the stitch on the right side, then the upper most portion of the stitch on the left side.

In this case I’m seaming two pieces of fabric made using the double crochet so there are the tiny little Vs nestled under the top two loops. If seaming single crochet or half double crochet, grab a portion of the stitch located just below the top two loops (the loops you would normally crochet into).
In this photo you can clearly see the portion of the stitch under which I insert my needle:
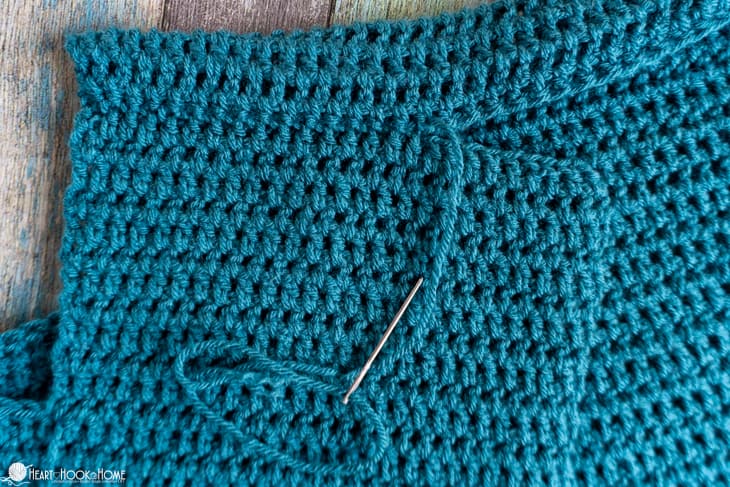
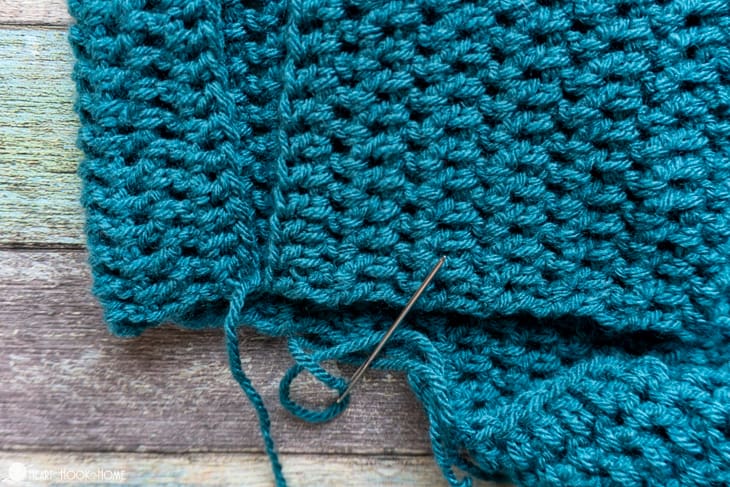
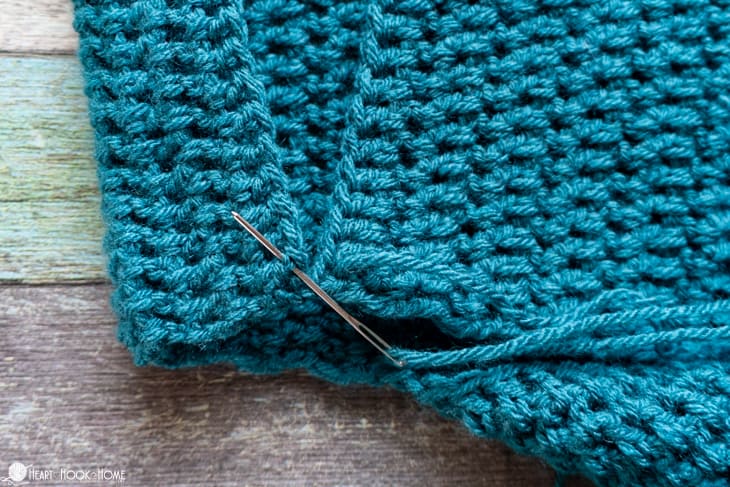
Halfway through and look how nice and SEAMLESS that seam is! 😜
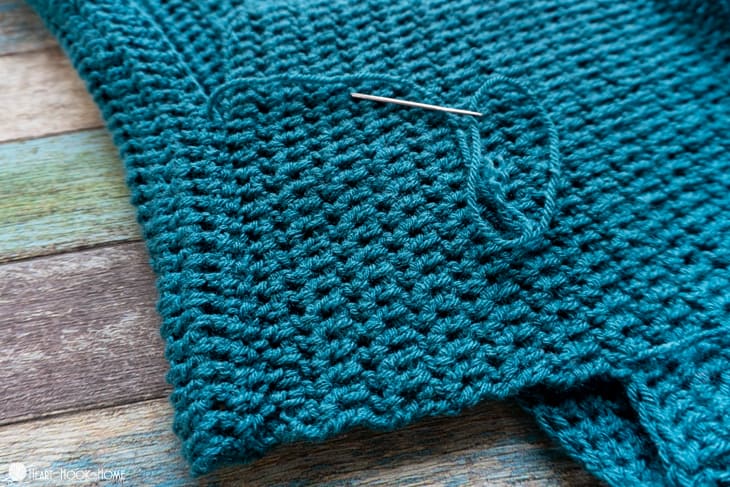
Continue seaming to the desired measurement or indicated number of stitches.
When I finish seaming my shoulders specifically, no matter which technique I use, I always leave the yarn tail hanging out so that when I am completely finished with the item I can then use those yarn tails to cinch up any inconsistencies in those areas, as they typically tend to be areas such as the neck/shoulder area that need a little more reinforcement.
Invisible Shoulder Seam Video:
If you would rather watch this video on YouTube, you can find it on my channel here. Don’t forget to subscribe while you’re there! 😉
We may not use this technique for each and every one of our cardigans or garments… but it sure is a nice alternative to the other popular methods of seaming crochet. When you give this a try, please let me know how it worked for you!
More tips and tutorials:
8 Tips for Creating More Professional Crochet Cardigans
7 Tips for Counting Rows in Crochet
10 Tips for Crocheting with Black Yarn
5 Tips for Changing Colors in Corner to Corner Crochet (C2C)


2 Comments