Newborn Sleep Sack Free Crochet Pattern
This post may contain affiliate links, meaning that I may earn a small commission if you make a purchase. See our disclosure policy for more information.
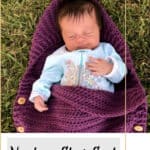


Ahhh, babies. I love the cuddles, the snuggles, the smell of their newborn hair. If you have been following the Painted Canyon Cardigan series of patterns you’ll know that we have been missing the newborn size… UNTIL NOW! We now have a newborn sleep sack, a free and EASY crochet pattern that falls right in line with the Painted Canyon style. Woot!
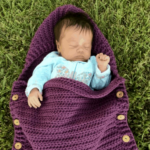
Newborn Sleep Sack Free Crochet Pattern
Of course, we have sizes that the whole family can wear, this is the free pattern for the newborn sleep sack and I’ve included instructions for preemies as well.
If you are expecting (congrats!!), if you have a newborn, or if you are breastfeeding (or trying to or planning to!), may I suggest this article I wrote about my year-long experience of exclusively pumping for our youngest? Sometimes I can’t believe I lasted that long exclusively pumping, but I’m glad I did. Our oldest was bottle-fed (because of his undiagnosed health issues). Feed your baby however you like, but if you need help producing more milk, this article may help! 😀

More sizes of the Painted Canyon Cardigan Series:
Get the infant size 6 month infant here.
Get the infant size 12 month here.
Get the child size 2/3T here.
Get the child size 4/5T here.
Get the child size 6/8 here.
Get the child size 10/12 here.
Get the ADULT sizes of this pattern (currently 0 – 28W) here.
Want all of the child sizes together? Grab all of the child sizes in one printable file on Ravelry or Etsy!

Materials:
Worsted weight (size 4) yarn
-approx. 400 yards for newborn sleep sack
Stitch markers
Crochet hook in size J/6mm
Buttons (preferably 3/4″)
Gauge:
Make sure you CHECK YOUR GAUGE!
11 hdc and 10 rows in 4” square
If you need help reading a crochet pattern, make sure you head over here and check out this detailed post.
Wanna save this for later?

PATTERN for newborn:
Row 1: Fhdc 40 (or Ch-41 and hdc in 2nd st and in each across) (40)
Rows 2 – 92: Ch-1, hdc in each st to end (40)
Mark center two sts with stitch marker (move them up each row to the new center). If an odd number stagger them so they always line up each row.
Rows 93 – 100: Ch-1, hdc to marker, hdc2tog, hdc to end. (end with 32 sts)
Fasten off leaving a long tail for sewing. Fold right sides together and sew the top of the hood.
PATTERN for preemies:
Row 1: Fhdc 35 (or Ch-36 and hdc in 2nd st and in each across) (35)
Rows 2 – 74: Ch-1, hdc in each st to end (35)
Mark center two sts with stitch marker (move them up each row to the new center). If an odd number stagger them so they always line up each row.
Rows 75 – 82: Ch-1, hdc to marker, hdc2tog, hdc to end. (end with 27 sts)
Fasten off leaving a long tail for sewing. Fold right sides together and sew the top of the hood.


Edging for both sizes:
Attach yarn at bottom right corner as pictured.

Row 1: Ch-1, hdc in the end of each row up to hood, around the top edge and down the other side making sure to place just one hdc per row as in this tutorial.
Row 2: Ch-1, hdc in first * fphdc in next, bphdc in next * repeat between ** around to end, hdc in last st.
Rows 3-4: Ch-1, hdc in first, fphdc around previous row’s bphdc (to create ribbing), bphdc around next fphdc. * fphdc around next, bphdc around next * repeat between * * to end, hdc in last st.
Fasten off and weave in tail.
Buttons:
Disclaimer: You could also add short chains to the sides to use as ties in order to eliminate the risk of choking as the baby ages. This sleep sack is intended for use with brand new babies that have no interest in shiny things such as buttons. Use your own discretion as it pertains to closures.
Fold up the bottom half of the sleep sack and decide where to place your buttons. You’ll place the buttons/ties on the top half of the sack so that you can fold up the sleep sack and use the buttons as closures. If you choose buttons that are about 3/4″ in size, they should fit through ANY of the holes on the edging of the corresponding/top side. This also makes the sleep sack adjustable as the baby grows! Bonus!!

These newborn sleep sacks whip up super quickly, and as we are expecting TWINS in the family before the end of the year (!!!), I made up an adorable set for my niece and nephew to-be. ♥ I’ll add photos of those sleep sacks to this post after I send them off to their momma!
More free patterns and resources for new Moms:
Four-Hour Fall Sweater Free Crochet Pattern
Breast Milk: Tips for Increasing Supply, Pumping and Storing Efficiently
12 Month Infant Hoodie Free Crochet Pattern
Infant Hoodie Crochet Pattern (size 6 months)
Pulse-Oximetry at Birth (I’m THAT Friend) + Why Isn’t This Standard Testing in ALL States?


146 Comments