Painted Canyon Cardigan Crochet Pattern (size 2/3T)
This post may contain affiliate links, meaning that I may earn a small commission if you make a purchase. See our disclosure policy for more information.

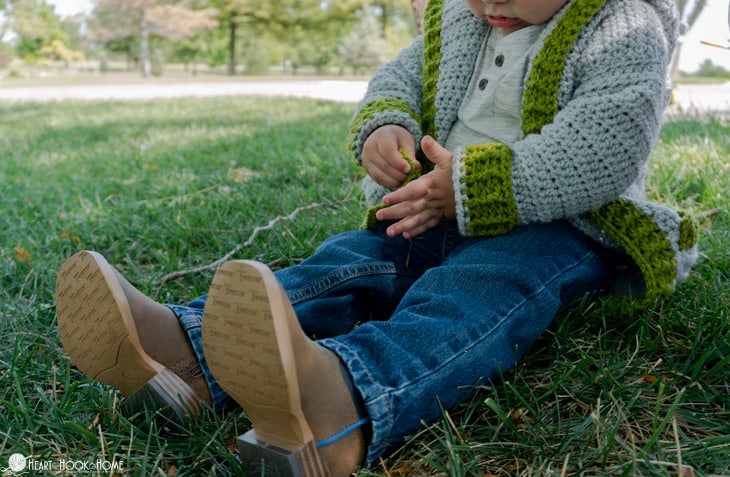
A free toddler hoodie cardigan pattern? Absolutely! This pattern is a miniature version of the Painted Canyon Cardigan, and can be made using any worsted weight yarn. If you’re on the fence about making the adult size cardigan pattern, then try this smaller pattern to get your feet wet! 😉

If you are brand new to crocheting cardigans, you’ll want to watch this series of videos. This is a Crochet Along that walks you through the entire process. Awesome! If you would like to make yours into a unicorn, head over to find the unicorn horn and ears patterns here.
 *the above cardigan uses Mandala yarn in the Valkyrie colorway.
Toddler Painted Canyon Cardigan (size 2/3T)
Materials:
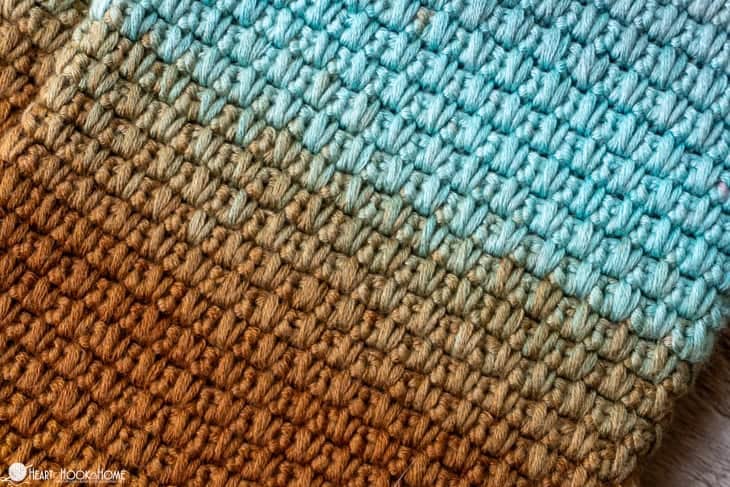
Worsted weight yarn (Dove Heather and Avocado pictured)
-approx. 600 yards for size 2/3T
Stitch markers
Crochet hook in size J/6mm

Gauge:
Make sure you CHECK YOUR GAUGE!
11 hdc and 10 rows in 4” square
Pattern Notes:
Fhdc = Foundation Half Double Crochet
Fphdc/Bphdc = Front Post (or Back Post) Half Double Crochet
Buttonholes are unnecessary. Any ⅜” buttons will fit through any opening on the edging should you choose to add them.
Want all of the child sizes together? Grab all of the child sizes in one printable file on Ravelry or Etsy! If you need help reading a crochet pattern, make sure you head over here and check out this detailed post.


Size 2/3T
Row 1: Fhdc-68. Alternately you could… Ch-69, hdc in 2nd ch from hook and in each ch to end. (68)
Rows 2 – 32: Ch-1, turn, hdc in each st to end. (68)
ARMHOLES:
Mark 20 stitches in from each side with stitch markers.
LEFT PANEL:
Row 33: Ch-1, turn, hdc in 20 sts only. (20)
Rows 34 – 46: Ch-1, turn, hdc in each st to end. (20) DO NOT fasten off. Leave attached for starting hood.
CENTER PANEL:
Attach yarn in same st as stitch marker.
Row 33: Ch-1, hdc in same st and next (29) sts. (30)
Rows 34 – 46: Ch-1, turn, hdc in each st to end. (30) Fasten off leaving ~20” tail for sewing later.
RIGHT PANEL:
Attach yarn in same st as stitch marker.
Row 33: Ch-1, hdc in same st and remaining (20) sts. (20)
Rows 34 – 46: Ch-1, turn, hdc in each st to end. (20) Fasten off leaving ~20” tail for sewing later.
SEW SHOULDERS:
Fold front sides in and line up top edges to sew shoulders. Starting at the outside, use the long tails from “right panel” and “center panel” to sew using the Mattress Stitch.
Sew shoulders for 9 stitches per side. You should have 11 stitches left on each “front” and 12 stitches along the “neck” for a total of 34 stitches.
HOOD:
Where still attached from “left panel”.
Row 1: Ch-1, turn, hdc in 11 sts. Hdc2tog (using the last two sewn sts from shoulder seam). Hdc in 12 “neck” sts, hdc2tog (using the last two sewn sts from shoulder steam). Hdc in last 11 sts. (36)
Rows 2 – 19: Ch-1, turn, hdc in each st to end. (36)
Mark two centermost stitches. Move markers up each row or just line up decreases by eye.
Rows 20 – 24: Ch-1, turn, hdc in each st to marker. Hdc2tog, hdc in each st to end. Fasten off leaving a long tail for sewing. Fold right sides together and sew the top of hood using Mattress Stitch.
EDGING:
Wanna save this for later?
Attach yarn in bottom right corner.
Row 1: Ch-1, hdc in each row end up to hood, hdc in peak of hood and down the other side, making sure to place one hdc per row end. (141)
Row 2: Ch-1, turn, hdc in first st. * bphdc around next st, fphdc around next st * repeat between * * around. Bphdc around second to last st, hdc in last. (141)
Row 3: Ch-1, turn, hdc in first st. * fphdc around next st, bphdc around next * repeat between * * around. Fphdc around second to last st, hdc in last. (141)
Row 4: repeat row 2 (and if desired, add additional edging rows in multiples of two)
Row 5: Ch-1, turn, sc in each st to end. Do not fasten off. (141)
Bottom edge: Turn work clockwise. 3sc in corner st, sc in each row end/st around entire bottom. 3sc in last /corner st. Fasten off with invisible join.
SLEEVES:
Looking at the INSIDE, attach yarn in bottom of armhole.
Row 1: Ch-1, hdc 28x evenly around opening. Join to top of first hdc with sl st. (28)
Rows 2 – 9: Ch-1, turn. Hdc in each st around. Join to top of first st with sl st. (28)
Row 10: Ch-1, turn. Hdc in all but last 2 sts, hdc2tog. Join to top of first st with sl st. (27)
Rows 11 – 12: Ch-1, turn. Hdc in each st around. Join to top of first st with sl st. (27)
Row 13: Ch-1, turn. Hdc in all but last 2 sts, hdc2tog. Join to top of first st with sl st. (26)
Rows 14 & 15: Ch-1, turn. Hdc in each st around. Join to top of first st with sl st. (26)
Row 16: Ch-1, turn. Hdc in all but last 2 sts, hdc2tog. Join to top of first st with sl st. (25)
Rows 17 & 18: Ch-1, turn. Hdc in each st around. Join to top of first st with sl st. (25)
Row 19: Ch-1, turn. Hdc in all but last 2 sts, hdc2tog. Join to top of first st with sl st. (24)
Rows 20 & 21: Ch-1, turn. Hdc in each st around. Join to top of first st with sl st. (24)
Row 22: Ch-1, turn. Hdc in all but last 2 sts, hdc2tog. Join to top of first st with sl st. (23)
Rows 23 – 25: Ch-1, turn. Hdc in each st around. Join to top of first st with sl st. (23)
Row 26: Ch-1, turn. * fphdc around first st, bphdc around next * repeat between * * around. Fphdc around last, join to top of first fphdc with sl st. (23)
Row 27: Ch-1, turn. * bphdc around first st, fphdc around next * repeat between * * around. Bphdc around last, join to top of first bphdc with sl st. (23)
Rows 28 – 29: Repeat rows 26 & 27
Row 30: Ch-1, turn, sc in each st around. Join with Invisible Join.
POCKETS:
Make two.
Row 1: Ch-12, hdc in second ch from hook and in each across (11)
Rows 2 – 8: Ch-1, turn, hdc in each st across. (11)
Row 9: Ch-1, turn, hdc in first st. * fphdc in next, bphdc in next * repeat between * * 3 more times, fphdc in next, hdc in last. (11)
Row 10: Ch-1, hdc in first st, * bphdc around next, fphdc around next * repeat between * * 3 more times times, bphdc in next, hdc in last. (11)
Row 11: Ch-1, sc in each st across. (11)
Rotate and sc in same st as last sc. Sc down row ends to corner. 3sc in corner. Sc across bottom edge. 3sc in corner. Sc up row ends. Fasten off leaving a long tail for sewing. Place bottom edge of pocket 12 rows up from bottom hem and 3 sts in (not including the edging sts). Sew into place. Repeat on other side.
Woohoo! You are done! Here are the other sizes of the Painted Canyon Cardigan:
Get the preemie and newborn sleep sacks here.
Get the infant size 6 month infant here.
Get the infant size 12 month here.
Get the child size 2/3T here.
Get the child size 4/5T here.
Get the child size 6/8 here.
Get the child size 10/12 here.
Get the ADULT sizes of this pattern (0 – 28W) here.
I hope you love this pattern as much as I do! Remember that this is the smaller size of the adult pattern, which is available here. Share photos of your little hoodie with me by tagging @HeartHookHome on Instagram and Twitter, and by sharing in the Heart Hook Home Crochet Community group on Facebook!
More crochet patterns from Heart Hook Home:
An Egg-cellent Apron: Free Crochet Pattern
Cold Shoulder Swimsuit Cover Up Crochet Pattern
Dragon Tears Fingerless Gloves Crochet Pattern


202 Comments