Four-Hour Fall Sweater Free Crochet Pattern
This post may contain affiliate links, meaning that I may earn a small commission if you make a purchase. See our disclosure policy for more information.
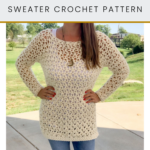


Ahhh, fall… how I have missed you. With you, you bring pumpkins, fire pits and crisp, morning air. Which is also why this new Four-Hour Fall Sweater crochet pattern is perfect for you! ♥

Four Hour Fall Sweater Crochet Pattern
This chunky sweater reminds me of football games and fire pits. It reminds me of friends and laughter, of foggy mornings, and steam rising off of a fresh cup of coffee. Yep, I’m ready!

This sweater has been one of my most popular free patterns to date. This fall I decided to give this pattern a facelift! While originally this pattern went off of body measurements (which could make it difficult to make if crocheting for someone other than yourself) the updated version includes a gauge which means it also includes stitch counts, row counts, and more detailed instructions and yardage information. The sleeve is also more tapered than the original and is so much more flattering, in my opinion.
The pattern is now written to include a wide range of sizes: XS – 5XL. I am so pleased with how this update turned out! 👐


This is a free crochet pattern. For this pattern we’ll use a super chunky yarn (or chunky, up to you!) and an oversized crochet hook. If you choose to go with a size 5 (bulky) yarn, it will be a bit more of an open weave, as the ivory pictured here. If you go with a thicker (size 6) yarn it will be more dense and definitely warmer.
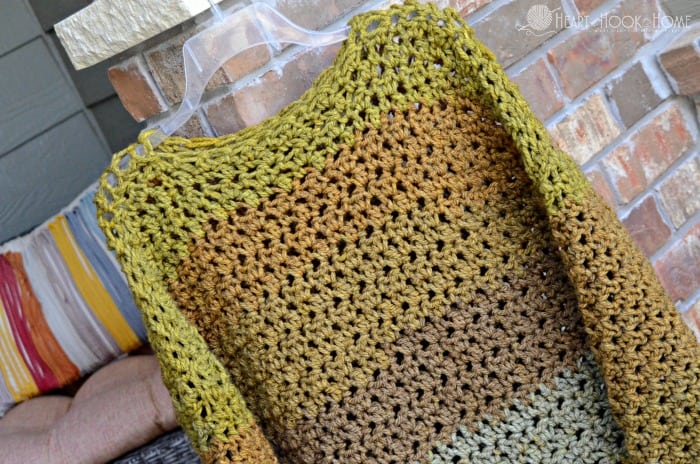
Each sweater made from this pattern is completely customizable; make it longer to wear with leggings or make the next size up for an oversized fit to wear around the house. Give it a small neck opening or a huge boat neck so it falls off the shoulder.

I named this sweater the Four Hour Fall Sweater because that’s about how long it takes me to make. It could take you a shorter amount of time or longer, depending on how quickly you crochet and how much time you can devote to the completion of it.

No matter what though, it’s the quickest clothing item I’ve ever completed! So there’s that. 😉

This pattern uses the Lemon Peel stitch. Super easy, super quick, super texture! A video tutorial for this stitch can be found here.
Want to make a not-so-chunky sweater? Then you’ll want the Easy Peasy Lemon Squeezy pullover pattern. (Which is also getting a facelift this fall!)

Get the printable file of this pattern on Ravelry, Etsy, or in the Heart Hook Home shop for an itty bitty fee. Thank you!
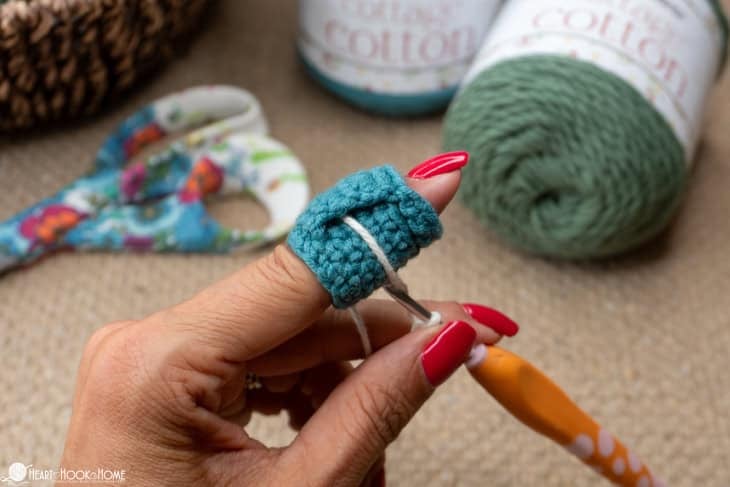
Materials:
Bulky (size 5) yarn (The Ivory pictured is Feelin’ Chunky, and Brava Bulky would work nicely as well)
-approx. (400, 460, 475, 600, 700, 800, 900, 1000, 1050) yards
Crochet hook in size Q/15mm (or here)

Gauge and Gauge Pattern:
Row 1: Ch-15, sc in 2nd ch from hook, dc in next ch. * sc in next, dc in next * repeat between * * to end. (14)
Rows 2 – 7: Ch-1, turn, * sc in next, dc in next * repeat between * * to end. (14)
Measure for gauge. 14 sts = 9” wide, 7 rows = 5” tall
Pattern Notes:
Pattern written using US terms.
The chain at the beginning of each row does NOT count as a stitch.
Body is worked from the bottom up.
“Right side” could be either, depending on which looks better to you.
If you need help reading a crochet pattern, make sure you head over here and check out this detailed post.
Sizing:
(XS, S, M, L, XL, 2XL, 3XL, 4XL, 5XL) fits up to (30”, 34”, 38”, 42”, 46”, 50”, 54”, 58”, 62”) bust
Get the printable file of this pattern on Ravelry, Etsy, or in the Heart Hook Home blog shop. Thank you!

Four Hour Fall Sweater Crochet Pattern
Make two…
Row 1: Ch-(25, 27, 31, 33, 37, 39, 43, 47, 49), sc in 2nd ch from hook, dc in next * sc in next, dc in next * repeat between * * to end. (24, 26, 30, 32, 36, 38, 42, 46, 48)
Rows 2 – 20: Ch-1, turn * sc in next, dc in next * repeat between * * to end. (24, 26, 30, 32, 36, 38, 42, 46, 48) *Place a stitch marker in the first and last stitch of row 5, for easier seaming later.
Row 21: Ch-1, turn, (sc, dc) in each of first two sts, * sc in next, dc in next * repeat between * * to last 2 sts, (sc, dc) in each of last two sts. (28, 30, 34, 36, 40, 42, 46, 50, 52)
Rows 22- 23: repeat row 2 (28, 30, 34, 36, 40, 42, 46, 50, 52)
Row 24: repeat row 21 (32, 34, 38, 40, 44, 46, 50, 54, 56)
*Place a stitch marker in the first and last stitch of this row, for easier seaming later.
Rows 25 through (31, 31, 31, 33, 34, 36, 37, 38, 38) : repeat row 2 (32, 34, 38, 40, 44, 46, 50, 54, 56)
Fasten off leaving a long tail for sewing shoulder seam.

Construction:
Lay two sides on top of one another and, using the Mattress Stitch, sew front and back together on left and right from rows 5 to 24 (where the stitch markers are). Leave long enough tails that you can adjust/loosen/tighten after completing the rest of the sweater.

Sew the top (shoulders) together from the outside in, using the Mattress Stitch for (11, 12, 14, 15, 17, 18, 20, 20, 22) stitches on each side. Before weaving in ends check that the neck hole is a good size for you. Add or remove sewn stitches to your liking.

Bottom:
Attach yarn at either bottom right corner. (Or left if you’re left handed)
Row 1: Ch-1, sc in same st and in each st to end. (24, 26, 30, 32, 36, 38, 42, 46, 48)
Rows 2 – 3: Ch-1, turn, sc in each st to end. (24, 26, 30, 32, 36, 38, 42, 46, 48)
Fasten off first side, repeat for the second side.
When finished with the second side, do not fasten off. Rotate to work up the side slit, and down the other side. 3sc in corner st, sc across bottom of sweater. 3sc in final st, rotate to sc up slit and down the other side. 3sc in corner st, sc in each st to end. Fasten off and weave in all ends.
Sleeves:
Separated out into size groups… Attach at the base of either armhole.
Size XS ONLY:
Row 1: Ch-1, sc in same, dc in next. * sc in next opening, dc in next opening * repeat between * * around. Join to top of first sc. (16)
Rows 2 – 3: Ch-1, turn, * sc in next st, dc in next st * repeat between * * around. Join to top of first sc. (16)
Row 4: Ch-1, turn, sc2tog, * sc in next, dc in next * repeat between * * until only 2 sts remain. Sc2tog in final two sts. Join to top of first st. (14)
Rows 5 & 6: Ch-2, turn, * dc in next, sc in next * repeat between * * around. Join to top of first dc. (14)
Row 7: Ch-1, turn, sc2tog, dc in next. * sc in next, dc in next * repeat between * * around. Dc2tog in final two sts. Join to top of first st. (12)
Rows 8 & 9: repeat row 2 (12)
Row 10: repeat row 4 (10)
Rows 11 & 12: repeat row 5 (10)
Rows 13 – 16: repeat row 5 (10)
Row 17: Ch-1, turn, sc in each st around. (10)
Fasten off and weave in ends using the Invisible Join. Repeat the process for the other sleeve.
Sizes S and M ONLY:
Row 1: Ch-1, sc in same, dc in next. * sc in next opening, dc in next opening * repeat between * * around. Join to top of first sc. (20, 22)
Rows 2 – 3: Ch-1, turn, * sc in next st, dc in next st * repeat between * * around. Join to top of first sc. (20, 22)
Row 4: Ch-1, turn, sc2tog, * sc in next, dc in next * repeat between * * until only 2 sts remain. Sc2tog in final two sts. Join to top of first st. (18, 20)
Rows 5 & 6: Ch-2, turn, * dc in next, sc in next * repeat between * * around. Join to top of first dc. (18, 20)
Row 7: Ch-1, turn, sc2tog, dc in next. * sc in next, dc in next * repeat between * * around. Dc2tog in final two sts. Join to top of first st. (16, 18)
Rows 8 & 9: repeat row 2 (16, 18)
Row 10: repeat row 4 (14, 16)
Wanna save this for later?
Rows 11 & 12: repeat row 5 (14, 16)
Row 13: repeat row 7 (12, 14)
Rows 14 & 15: repeat row 2 (12, 14)
Row 16: repeat row 4 (10, 12)
Rows 17 – 20: repeat row 5 (10, 12)
Row 21: Ch-1, turn, sc in each st around. (10, 12)
Fasten off and weave in ends using the Invisible Join. Repeat the process for the other sleeve.
Sizes L and XL ONLY:
Row 1: Ch-1, sc in same, dc in next. * sc in next opening, dc in next opening * repeat between * * around. Join to top of first sc. (28, 32)
Rows 2 – 3: Ch-1, turn, * sc in next st, dc in next st * repeat between * * around. Join to top of first sc. (28, 32)
Row 4: Ch-1, turn, sc2tog, * sc in next, dc in next * repeat between * * until only 2 sts remain. Sc2tog in final two sts. Join to top of first st. (26, 30)
Rows 5 & 6: Ch-2, turn, * dc in next, sc in next * repeat between * * around. Join to top of first dc. (26, 30)
Row 7: Ch-1, turn, sc2tog, dc in next. * sc in next, dc in next * repeat between * * around. Dc2tog in final two sts. Join to top of first st. (24, 28)
Row 8: repeat row 2 (24, 28)
Row 9: repeat row 4 (22, 26)
Rows 10 & 11: repeat row 5 (22, 26)
Row 12: repeat row 7 (20, 24)
Rows 13 & 14: repeat row 2 (20, 24)
Row 15: repeat row 4 (18, 22)
Row 16: repeat row 5 (18, 22)
Row 17: repeat row 7 (16, 20)
Rows 18 & 19: repeat row 2 (16, 20)
Row 20: repeat row 4 (14, 18)
Row 21: Ch-1, turn, sc in each st around. (14, 18)
Fasten off and weave in ends using the Invisible Join. Repeat the process for the other sleeve.
Size 2XL ONLY:
Row 1: Ch-1, sc in same, dc in next. * sc in next opening, dc in next opening * repeat between * * around. Join to top of first sc. (38)
Row 2: Ch-1, turn, sc2tog, * sc in next, dc in next * repeat between * * until only 2 sts remain. Sc2tog in final two sts. Join to top of first st. (36)
Row 3: Ch-2, turn, * dc in next, sc in next * repeat between * * around. Join to top of first dc. (36)
Row 4: Ch-1, turn, sc2tog, dc in next. * sc in next, dc in next * repeat between * * around. Dc2tog in final two sts. Join to top of first st. (34)
Row 5: repeat row 3 (34)
Row 6: repeat row 2 (32)
Row 7: repeat row 3 (32)
Row 8: repeat row 4 (30)
Row 9: repeat row 3 (30)
Row 10: repeat row 2 (28)
Row 11: repeat row 3 (28)
Row 12: repeat row 4 (26)
Row 13: repeat row 3 (26)
Row 14: repeat row 2 (24)
Row 15: repeat row 3 (24)
Row 16: repeat row 4 (22)
Row 17: repeat row 3 (22)
Row 18: repeat row 2 (20)
Row 19: repeat row 3 (20)
Row 20: repeat row 4 (18)
Row 21: Ch-1, turn, sc in each st around. (18)
Fasten off and weave in ends using the Invisible Join. Repeat the process for the other sleeve.
Sizes 3XL, 4XL, 5XL ONLY:
Row 1: Ch-1, sc in same, dc in next. * sc in next opening, dc in next opening * repeat between * * around. Join to top of first sc. (42, 44, 44)
Row 2: Ch-1, turn, sc2tog, * sc in next, dc in next * repeat between * * until only 2 sts remain. Sc2tog in final two sts. Join to top of first st. (40, 42, 42)
Row 3: Ch-2, turn, * dc in next, sc in next * repeat between * * around. Join to top of first dc. (40, 42, 42)
Row 4: Ch-1, turn, sc2tog, dc in next. * sc in next, dc in next * repeat between * * around. Dc2tog in final two sts. Join to top of first st. (38, 40, 40)
Row 5: repeat row 2 (36, 38, 38)
Row 6: repeat row 3 (36, 38, 38)
Row 7: repeat row 4 (34, 36, 36)
Row 8: repeat row 2 (32, 34, 34)
Row 9: repeat row 3 (32, 34, 34)
Row 10: repeat row 4 (30, 32, 32)
Row 11: repeat row 2 (28, 30, 30)
Row 12: repeat row 3 (28, 30, 30)
Row 13: repeat row 4 (26, 28, 28)
Row 14: repeat row 2 (24, 26, 26)
Row 15: repeat row 3 (24, 26, 26)
Row 16: repeat row 4 (22, 24, 24)
Row 17: repeat row 2 (20, 22, 22)
Row 18: repeat row 3 (20, 22, 22)
Row 19: repeat row 4 (18, 20, 20)
Row 20: repeat row 2 (16, 18, 18)
Row 21: Ch-1, turn, sc in each st around. (16, 18, 18)
Fasten off and weave in ends using the Invisible Join. Repeat the process for the other sleeve.
I hope you enjoyed crocheting this pattern, and the updated version if you made both! This is a fun, super quick pattern that has been one of my most popular designs to date. Please share a photo with me by tagging @HeartHookHome across all social media, and in the Heart Hook Home Crochet Community on Facebook!
More free crochet patterns:
12 Month Infant Hoodie Free Crochet Pattern
An Egg-cellent Apron: Free Crochet Pattern
Easy Peasy Lemon Squeezy Pullover Crochet Pattern
Aldi Quarter Keeper {FREE Crochet Pattern}


133 Comments