Week #14: Tunisian Basics Crochet-Along
This post may contain affiliate links, meaning that I may earn a small commission if you make a purchase. See our disclosure policy for more information.
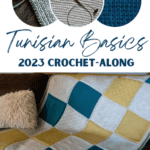
Hard to believe, but we are wrapping up the 2023 Tunisian Basics Crochet-Along today with the border and finishing. Grab your leftover yarn, your crochet hook, your yarn needle and let’s cross this finish line!

Tunisian Basics Crochet Along Week #14
I must say that I am so very pleased with how this Crochet-Along has gone. It has been a whirlwind 14 weeks culminating in a gorgeous blanket that I plan to reach for over and over again. It’s time to finish her off with an amazing border that incorporates all of the colors used.

This may just be my favorite stitch sampler style blanket to date. I love the different stitches used, and how the border uses all three of the colors to really set things off.
One of the best things about adding a border to Tunisian Crochet? The edges all have a nice, clean stitches to work into no matter if you’re working the row ends or the top and bottom edge.

Week #14: Border & Finishing
If you are new to this Crochet-Along, you will want to start here with the Materials & Information post. You will also benefit from the Ultimate Guide to Tunisian Crochet. This will not only help beginners to learn the techniques used in Tunisian crochet, there are helpful tips and notes for any skill level.

Materials:
Assembled Squares from Week #13
Remaining yarn from making the squares
Crochet hook in size 7mm
Adding the Border VIDEO:
Preparation:
Using the same color yarn that you used for joining the squares in week 13, attach anywhere EXCEPT in a corner stitch. Just pick a random spot.

Row 1: Ch-1, sc in each stitch around the entire blanket, placing 3sc in each corner stitch.


Make sure that where the squares connect at the border edge that you are not placing too many or too few stitches. We will use the yarn tails that we left last week to correct any small holes or wonkiness after we establish several rows.


Border:
Rows 2 – 5: Ch-1, sc in each st around, placing 3sc in each corner. Join with sl st to first sc.
Wanna save this for later?
Rows 6 & 7: Change to Color B. Repeat row 2
Row 8: Change to Color C. Ch-1, * Hdc in next, ch-1, sk next st * repeat between * * to corner, hdc in next to last st, ch-2, sk next(corner-most) st, hdc in next. Continue to next corner, hdc in next to last st, ch-2, sk next st, hdc in next. Continue around entire blanket. Join. (It’s okay if you have to fudge a bit, see the video above for more detail).


Row 9: Change back to Color B. Ch-1, 2sc around each ch-sp from row 8, placing 3sc around each corner ch-sp. Join to top of first sc with sl st.

Row 10: repeat row 2
Rows 11 & 12: Change to Color A. Repeat row 2
Row 13: Change to Color C. Repeat row 2. Join using Invisible Join and weave in ALL ends.

I hope you loved this Crochet-Along and that you feel accomplished and confident to continue on with Tunisian Crochet following a Heart Hook Home pattern or otherwise.
If you’re not quite ready for the crochet along to end, you are in luck! Be sure to join the ADVANCED workshop that starts on November 1st!
In this NEW workshop we will learn how to change colors, how to increase, how to decrease, how to work Tunisian Crochet in the round, and how to fix a dropped stitch when working in flat rows OR in the round, and more. Woohoo!
When you finish your blanket be sure to share a photo of it in the Heart Hook Home Crochet Community on Facebook. You can also tag me by using @HeartHookHome across all social media, and/or use the hashtag #2023TunisianCAL so we can ALL see!

More Tunisian crochet for you:
The Ultimate Guide to Tunisian Crochet (Printable Version)
How to Unkink Circular Knitting Needles and Tunisian Crochet Cords
2023 Tunisian Basics Crochet-Along: Materials, Dates & Information