Home » Hook » Straight Up EASY Vertical Stripes Sweater Free Crochet Pattern
| | | | | | | | |

Straight Up EASY Vertical Stripes Sweater Free Crochet Pattern

This post may contain affiliate links, meaning that I may earn a small commission if you make a purchase. See our disclosure policy for more information.

My momma always said that vertical stripes are slimming, so let’s crochet this vertical stripes sweater using this BRAND NEW free crochet pattern! Grab your hook ladies and gentlemen because this pattern is STRAIGHT UP EASY!

Straight up EASY Vertical Stripes crochet pattern by Heart Hook Home

This vertical stripes sweater can be made in any size from child to women’s.  I love the thinness of the yarn, the slightly airy weave, and I love the fact that we can make it 3/4 sleeve or long sleeve!  If you like, make it a bit longer and add side slits. I think I’ll try a tunic style one next.  Add a bottom hem or leave it a raw edge. I kinda like the way that looks too!

Vertical stripe crochet sweater pattern

Materials:

Crochet hook in size J (6 mm)
Lightweight (DK/size 3) yarn (Mandala in Chimera pictured)
-approx. 1,300 yards for 3/4 length sleeves (women’s size L)
-approx. 1,500 yards for long sleeves (women’s size L)
Yarn Needle for weaving in ends

Straight Up Easy vertical stripe sweater pattern

Gauge:

Technically non-essential, but 13 sts and 12 rows = 4″ square.

Pattern Notes:

We are using the SUPER easy Lemon Peel stitch for this pattern, as it is the vertical stripe version of the Easy Peasy Lemon Squeezy Sweater. A video tutorial for this stitch can be found here.

The width of this vertical stripes sweater is customizable, therefore your number of rows will be different than mine. And different than Susie’s, or Jennifer’s, or Becky’s, or… you get the idea.  Once you get going, you’ll continue making rows until the point that when you hold up the piece, one edge touches your left side and one side touches your right side.  Make a front and a back and sew together, then add sleeves.

Vertical Stripes free crochet pattern

If you’re making for someone else, you can get helpful sizing information (ie: how wide to make it) here. If you are super tall, make the sweater longer by chaining extra at the end of row 10. Conversely, if you’re on the short end you won’t chain quite as many at the end of row 10.  The armholes as written are about 13″ in circumference. For larger armholes, add about 5 stitches to the beginning chain. Need help? Shoot me an email!

Vertical Stripes Sweater Crochet Pattern

Get the ad-free, printable PDF version of this pattern here

Pin this pattern for later here

Make two

Row 1: Ch-21, sc in second ch from hook, dc in next. * sc in next, dc in next * repeat between * * to end (20) Ch-1, turn.

Rows 2 – 4: * sc in next, dc in next * repeat between * * to end (20) Ch-1, turn.

Crochet pattern for vertical stripes sweater

Row 5: (sc, dc, sc) in first st, dc in next. * sc in next, dc in next * repeat between * * to end (22) Ch-1, turn.

Row 6: * sc in next, dc in next * repeat between * * to end (22) Ch-1, turn.

Row 7: Repeat row 5 (24)

Row 8: Repeat row 6 (24)

Row 9: Repeat row 5 (26)

Row 9 of the Vertical Stripes sweater pattern finished
Row 9 completed.

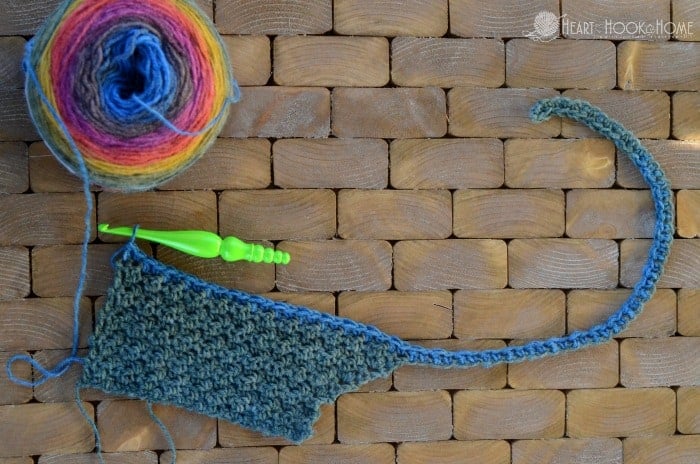
Row 10: Repeat row 6 (26 sts) AND THEN ALSO ch-51 (see photo, this will be the height of your sweater if it needs adjusting)

End of row 10!

Row 11: Sc in second ch from hook, dc in next. * sc in next, dc in next * repeat between * * to end to end (76) Ch-1, turn.

End of row 11 of the vertical stripes sweater crochet pattern

Rows 12 – desired width (for mine, in size large, I did 77 rows): * sc in next, dc in next * repeat between * * to end (76) Ch-1, turn.

***when width reached and at the TOP of the sweater, start other sleeve***

Row A: * sc in first, dc in next * repeat 12 times (26) Ch-1, turn.

Row B: sc2tog first 2 sts, sc2tog next 2 sts, * sc in next, dc in next * repeat between * * to end (24) Ch-1, turn.

Row C:  * sc in next, dc in next * repeat between * * to end (24) Ch-1, turn.

Row D: Repeat row B (22)

Row E: Repeat row C (22)

Row F: Repeat row B (20)

Rows G, H & I: Repeat row C (20)

Fasten off.

Vertical Stripes Crochet Sweater Pattern
Example of general shape needed before sewing.

Construction:

Lay front side to back side. Using your yarn needle, sew from bottom up using the Mattress Stitch until you reach the armhole opening. Repeat on other side.

Starting at the outer shoulder, sew the top together using the Mattress Stitch for about 8 – 10” on each side. I recommend trying it on at this point to make sure the neck hole isn’t too large or too small.

Sleeves:

Attach yarn at base of arm hole with slip stitch. Ch-1, sc in same st, dc in next. * sc in next, dc in next * repeat between * * around, do not join. Continue in spiral making sure the single crochets go into double crochets of the previous row and visa versa until sleeve length reached. Fasten off and weave in ends.

Bottom Hem: 

If desired, attach yarn at bottom hem, near one of the side seams. Ch-1 and sc in each sp around for as many rows as you like. I did two rows of blue myself.

Straight Up Easy vertical stripe sweater pattern

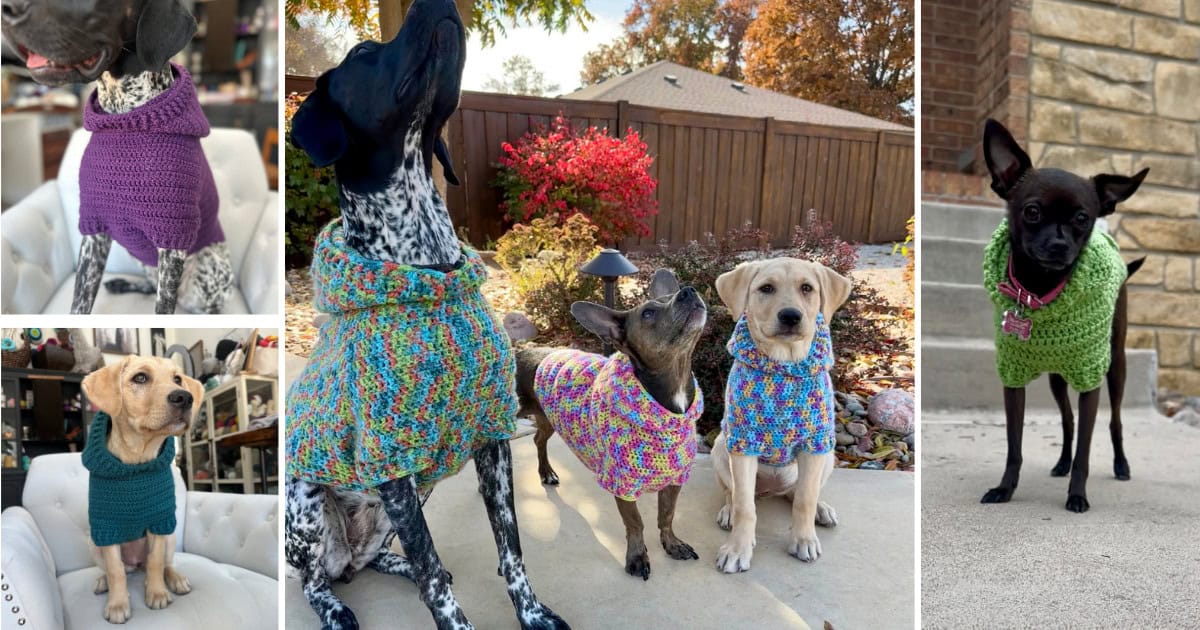
That’s it folks! I am currently working on a faster, chunkier version of this sweater (see above) and I’ll share that under the “crochet patterns” section of Heart Hook Home as soon as it is finished. I’m also working on a scoop neck version. Woot!

When you make your own STRAIGHT UP EASY vertical stripes sweater, be sure to tag me using @HeartHookHome on Twitter and Instagram, and share a photo in the Heart Hook Home Crochet Community on Facebook!

More free and awesome patterns:

Four-Hour Fall Sweater Free Crochet Pattern
Newborn Sleep Sack Free Crochet Pattern
Child Size Unicorn Hoodie Crochet Pattern (size 4/5T)
Simple Scarf for Men Free Crochet Pattern
Child Size Easy 30-Minute Beanie Crochet Pattern
Easy Peasy 30-Minute Beanie Crochet Pattern

Similar Posts

Leave a Reply

Your email address will not be published. Required fields are marked *

This site uses Akismet to reduce spam. Learn how your comment data is processed.

21 Comments

  1. Hi Ashley! Love the pattern but could you just give me the names of the worsted and bulky version of this sweater. TYI
  2. Hi Ashlea, I love this pattern. I am wondering how wide to make mine. I usually wear a size medium top but large slacks to accommodate my hips. I was thinking about making 77 rows like you did for a size large but in holding it up now it reaches shoulder to shoulder at row 67. The only thing is I don't want it to be too snug around my stomach and hips. What do you suggest? I'm almost finished with the first side.
  3. Hi there, I am a beginner and can't visualise the start and end point of the front (or back) piece from reading the pattern alone. Looking at your photo that shows one flat completed front (or back) piece and the two balls of yarn, and looking from left to right, the front (or back) starts white, becomes green, then purple, then red. Does the pattern start at the top left shoulder (white) and move up and down towards the middle (green and purple), and end at the top right shoulder (red)? Or does it start at the top left edge moving towards the top right edge (the neckline), then move downwards, gradually tapering at each shoulder before going straight down? Or does it start at the bottom, move upwards and gradually widen at each shoulder? Sorry to be a pain, but I don't have enough yarn to a solid colour, so trying to figure out how to position my yarn changes to a new colour so I still achieve a vertical stripe effect. Many thanks in advance, Lisa
    1. Hi Lisa! Since this piece is worked vertically, you are starting panel at one shoulder and will be finishing at the other shoulder. I hope this helps!
  4. Hello this a beautiful sweater. I was wondering how I would adjust the pattern if I wanted to make is with worsted yarn. What size hook and how many should I chain to start. Thanks so much.
  5. This is such a great pattern! Thanks so much for the brilliant idea. I just started the Easy Peasy/Lemon Squeezy sweater and can't wait to finish it and make this one. I always want stripes, but don't want horizontal ones. Genius idea. C.
  6. Hi Ashlea! I love this sweater, it's autumn in Uruguay (South America) and I'm trying to crochet this to keep my 8 yr old son warm this winter :) I'm having a little trouble making sense of the adjustments I need to make for it to be smaller. I chained 15 instead of 21 for the arm opening and I guess I should do less rows too, but I'm not quite sure. Does making 7 instead of 9 sound good to you? I've got trouble imagining the outcome haha. I'll of course make a shorter chain for the length and continue to work the pattern to the desired width. I'd appreciate any advice. Thanks so much for sharing this lovely and versatile pattern! :)
  7. You are really a talented person..I found that there is a similar style sweater in this website.And I want to buy this one.This a rainbow sweater.Can you give me some advice?http://violet.ebcoo.net/product/women-rainbow-striped-pullover-sweaters-18-winter-and-autumn-turtleneck-loose-oversizd-knit-jumpers-fashion-colorful-outerwear/
    1. I’m wanting to make the sleeves a little wider is why I’m asking. Thank you forcsharing. This is the first sweater I think I can make.
      1. Hi Teena! Yes, the pattern begins with the sleeve opening, so if you wanted to make that a bit larger, then just add a couple more chains. Just make sure that your starting chain count is an odd number so that your 1st row stitch count is even. Hope this makes sense!
  8. Pingback: Straight Up EASY Vertical Stripes Sweater Free Crochet Pattern – Zipedo
  9. Hi Ashlea! If you wanted a more open neck, like a boat neck, would you leave of couple of starting/ending rows on he front and back pieces, or modify when stitching together? Thanks!!
    1. Hi! You could make the torso portion longer if you wish, just add 10 chains on when you do the LONG chain after the first sleeve. Then just continue until you get to the width needed and start the other armhole. Hope that helps!
  10. Hi Ashlea, I'm having a problem with row 10. It says repeat row 6 and chain 51. My question is: do u chain 1 in addition to 51 otherwise the count is wrong. Please help me. Thanks
    1. Hi! The 51 is what's needed since you'll of into the 2nd chain from the hook. That will essentially make 50 sts instead of 51. Does that help?
      1. I think I was asking wheather u chain 1 at the end of row 6 in addition to chain 51 My count was: 26+ 1(chain 1)+ 50(2nd chain from hook) Still makes it 77 So, what I did is this. I chained 1 at the end of row 6 as indicated in the pattern and chained only 50 because 26 remaining stitches makes it 77 So, maybe u need to adjust row 10. After 26 st, do not chain 1 but DO CHAIN 51 I hope I made myself clear. Thank u for understanding