Home » Hook » How to Make an Invisible Join in Crochet
| |

How to Make an Invisible Join in Crochet

This post may contain affiliate links, meaning that I may earn a small commission if you make a purchase. See our disclosure policy for more information.

One way to take your crochet work up to professional level? By learning How to Make Invisible Join in Crochet!


In typical crochet, when finishing your project, you will notice a bump where you placed your fastening off knot. Instead of trying to pull that knot down into the stitch when you weave in the end – or worse yet, letting it simply hang out for all to see – do the Invisible Join and even YOU won’t be able to tell where you ended. Woot!

The Invisible Join is particularly helpful when crocheting in the round. When working in the round you can either: join with a slip stitch at the end of each row or work in a spiral. Working in a spiral means that instead of slip stitching to the top of the first stitch of that row, you’ll instead place a stitch marker and keep on crocheting without joining. Spiral rounds are most often used in amigurumi (a.k.a. stuffed crochet).

Invisible Join in Crochet

*video tutorial below

1. Finish the last round as usual.

How to Make an Invisible Join in Crochet Part 1

Do NOT join, instead pull the yarn right on through the last stitch.

How to Make an Invisible Join in Crochet Part 2

Thread your yarn needle.

How to Make an Invisible Join in Crochet Part 3

Insert the needle into both loops the first actual stitch of this round (not the chain).

Wanna save this for later?

We'll email this post to you, so you can come back to it when you're ready.

How to Make an Invisible Join in Crochet Part 4

Go back into the back loop only of last stitch of the round.

How to Make an Invisible Join in Crochet Part 5

Tighten it just enough so that the join looks like a regular ol’ stitch. Weave in the end!

How to Make an Invisible Join in Crochet Part 6

Doesn’t that look so much nicer than trying to conceal a knot?

How to Make an Invisible Join in Crochet Part 7

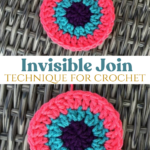
Next time you find yourself working in the round (joining or spiral!) try the Invisible Join and see what you think! Want to try it right this second? Make a coaster real quick:

Coaster Crochet Pattern:

Row 1: Magic Circle, 10 dc in circle. Join to top of first dc with sl st. (10)
Row 2: Ch-2, 2dc in each st around. Join to top of first dc with sl st. (20)
Row 3: Ch-2 *dc in next st, 2dc in next* repeat around. Join to top of first dc with sl st. (30)
Row 4: Ch-2 *dc in next 2 sts, 2dc in next* repeat around. Join to top of first dc with sl st. (40)
Fasten off using Invisible Join!

Video tutorial for Invisible Join:

YouTube video
And here are my favorite products to learn how to do the Invisible Join:


This post may contain affiliate links which won’t change your price but will share some commission.

More crochet tips and tutorials:

How to Crochet the Invisible Decrease for Amigurimi Crochet
What to Do When You Forget Which Crochet Hook Size You Used
How to Keep Straight Edges in Crochet
Understanding Crochet Gauge and How to Measure It
Russian Join Tutorial for Crochet and Knitting

Similar Posts

Leave a Reply

Your email address will not be published. Required fields are marked *

This site uses Akismet to reduce spam. Learn how your comment data is processed.

13 Comments

  1. Your video is very helpful, I usually slip stitch which leaves it looking a little odd at times. I do have a question though. If I am working in rows, so my piece has a straighter look to it, can I use this to join the piece in-between rows? Will it leave my piece with a seam like doing slip stitch, chain one does?
  2. I am so happy I found your videos. They are so beautiful and very helpful. Thank you so much. Do you have any Poncho or shawl patterns?
    1. Hi Dee! I am so glad you find them helpful! I have many shawl and poncho patterns which can all be found on this site...you can leisurely scroll through the crochet patterns tab, or do a search for them =)
  3. Pingback: Track Stitch Tunic
  4. This is a great tip, and do you have advice on keeping the ends of rows even and without seam lines. Especially when making a hat with a variety of stitches used to give the hat textures. That seamline just doesn't give a polished finish.
  5. This is all well and good, but I want to be able to join it without having to cut my yarn every single time I want to do a new round. That just seems like a complete pain!
    1. Hi Jay! This method isn't meant to be done at the end of every round of your project. It is an alternative to the fastening off knot that is usually done at the end of an in the round project. Hope this helps!
  6. Pingback: Coffee Cup Cozy Crochet Pattern - SeeMelissaCraft
  7. Pingback: 18" Doll Vest Crochet Pattern - SeeMelissaCraft
  8. Pingback: Corona Beach Coverall | Free Crochet Pattern | Sizes S, M, L, XL, XXL – Stardust Gold Crochet
  9. Oops! I meant to post my last comment on the Easy Peasy Lemon Squeezy pullover pattern, not this one.
  10. I loved making this! I ended up doing the short sleeve version. When I got to the sleeve portion I switched my hook to a 6mm so the sleeves hugged my upper arm more. For the bottom hem I used a 6.5mm hook and did 8 rows of single crochet. Thank you so much for sharing. I may try it with a lighter weight yarn next time for summertime. This lemon peel stitch would make a great baby blanket too I think.