Heart Hook Home

crochet, yarn, heart (CHD) & food

  • About
  • Heart
  • Shop
  • Crochet Tutorials
  • Crochet Patterns
  • Contact

Creighton’s Blanket Pattern: Part TWO

This post may contain affiliate links, meaning that I may earn a small commission if you make a purchase. See our disclosure policy for more information.

July 24, 2018 Ashlea 27 Comments

4087shares
  • Share 274
  • Tweet
  • Reddit

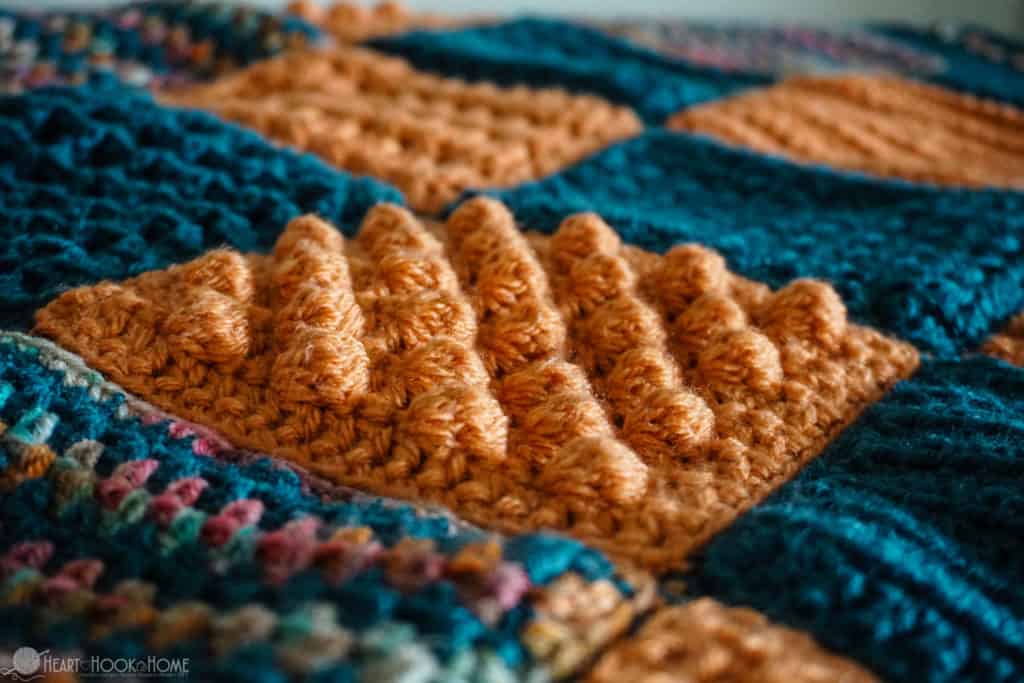
Are you ready to finish your version of Creighton’s Blanket? I sure hope so! In part TWO of this blanket pattern we compile the squares, then add the border. This crochet stitch sampler blanket is so fun to make and we are so close to being done!

Part two of Creighton's blanket pattern

Creighton’s Blanket Pattern: Part TWO

First things first, make sure that you have the correct number of squares for your desired blanket size. I am making the “small throw” size which consists of 56 squares. Since there are seven square patterns, I decided to do eight of each square pattern, four of each color. Find all of the square patterns in part one.

Block the Squares

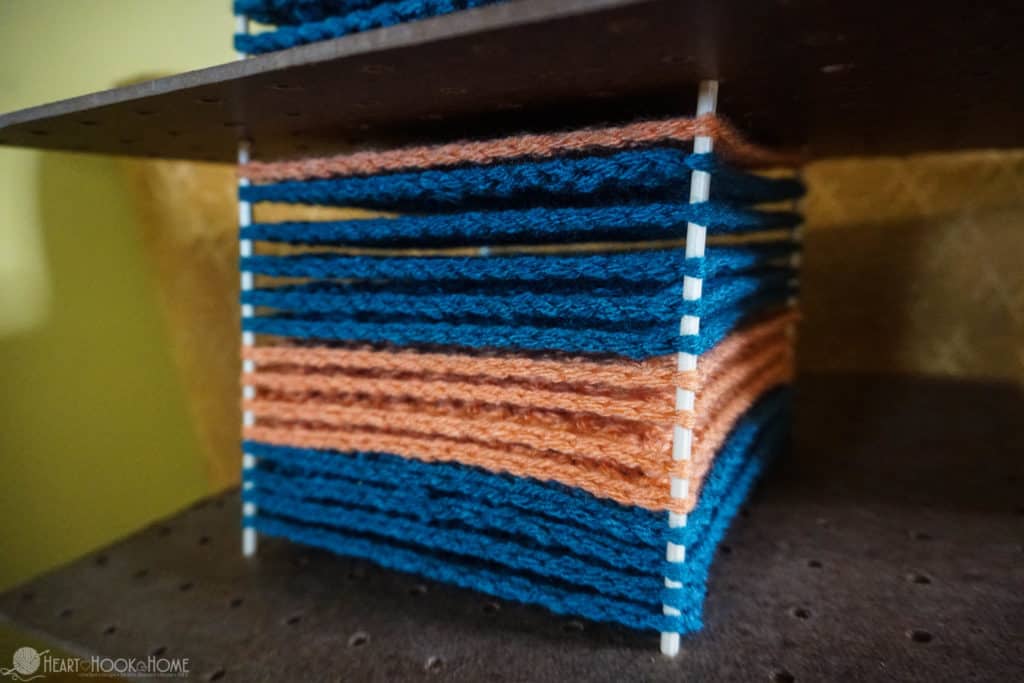
How to block crochet squares for blanket pattern

Perhaps the most tedious/boring aspect of any crochet project is blocking. Blocking is an important step though, as it helps to ensure that each square is the same size and dimension even if the stitch counts are different (which, of course, ours are). Here’s a tutorial for blocking crochet. No one will call the cro-po (crochet police) on you if you don’t block the squares, but consider this fair warning that the finished result may be a bit wonkier if you don’t.

Decide lay out of squares
How to sew together crocheted squares

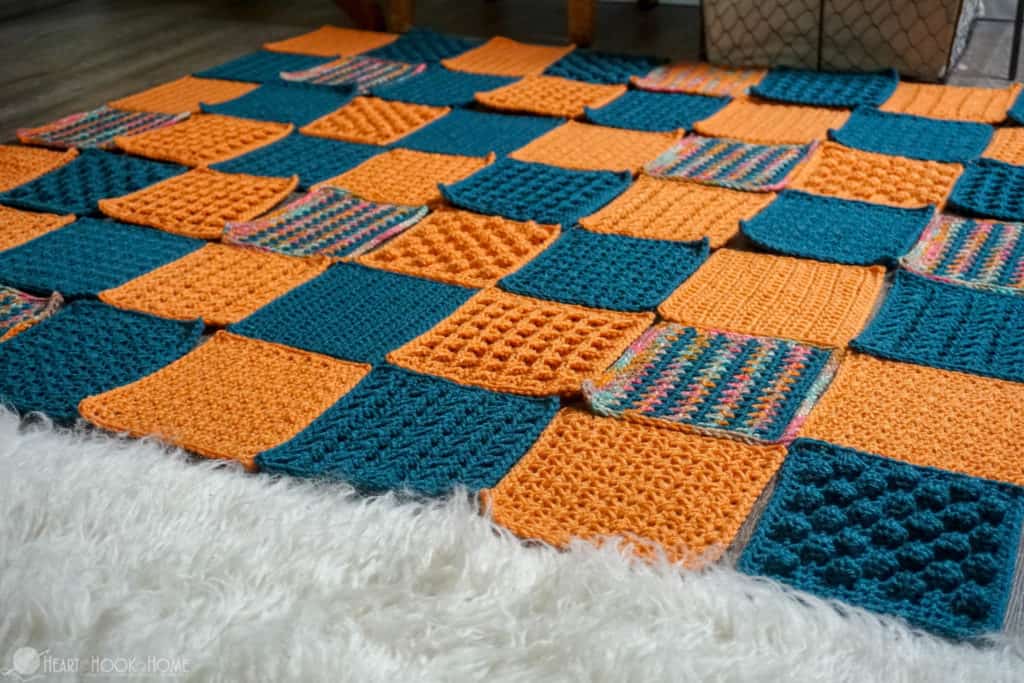
Once you have the desired number of squares completed, and blocked, it is time to decide how they will be positioned. To do this I stacked the squares according to the stitch used, then made sure to pull evenly from each stack as I played with the layout of the squares making sure not to place two like squares directly next to one another.

This may have been my favorite part of the blanket! I do recommend looking closely at each square as it is placed to make sure it is not sideways or upside down.

Tip for sewing squares together

Before we discuss the different means used to sew the squares, one thing I strongly advise, no matter the method, is to not sew together too tightly! Stitching too tightly will cause the seams to pucker and may result in the finished squares having a “poufy” appearance. If you are using the Mattress Stitch, you will need to remain very aware of how tightly you sew, if you are using the slip stitch method, I recommend going up a hook size – or even two!

I can not stress enough the importance of staying LOOSEY GOOSEY while attaching the squares.

Mattress Stitch or Slip Stitch?

Next, you will decide HOW you will sew the squares together. I’ll show you the difference…

You will notice that since we used different stitches, and a different number of rows for each of the square patterns, the stitch counts are not all the same. AND THAT’S OKAY! There is a trick to keeping the seams as flat as possible: stitch markers!

On the edges to be sewn, use stitch markers to note both the corners and the middle of the squares when laid flat. Use as many stitch markers as needed to make sure both corners line up evenly. No one (not even you!) will be able to tell if you have to skip a stitch on either side in order to make the corners line up, but if you need to skip more than a couple of stitches it is best to space them out along the length of the seam.

Creighton's Blanket stitch sampler

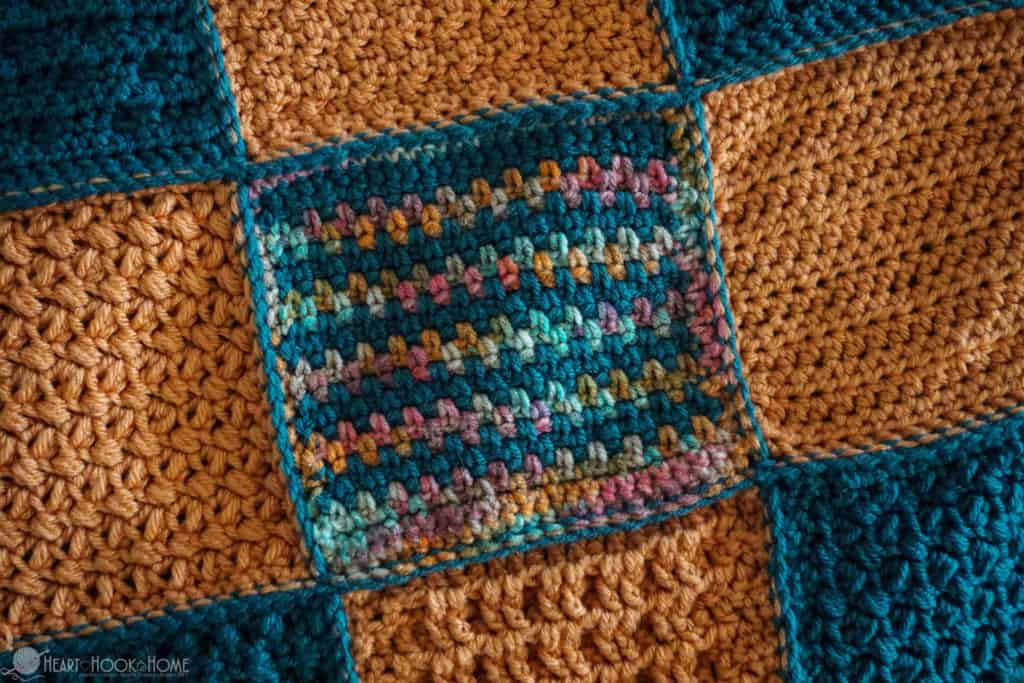
In the first rendition of the Creighton’s Blanket pattern (the blue and silver) I used the Mattress Stitch and needle and yarn to sew my squares together. I simply worked with the squares as they were laid out, right sides facing up. Start from the bottom of the blanket and work your way up an entire row, sewing back and forth securing the edges together. Add the next vertical row and then the next, all the way to the end. When all vertical edges are seamed, turn the work clockwise and sew up the horizontal edges.
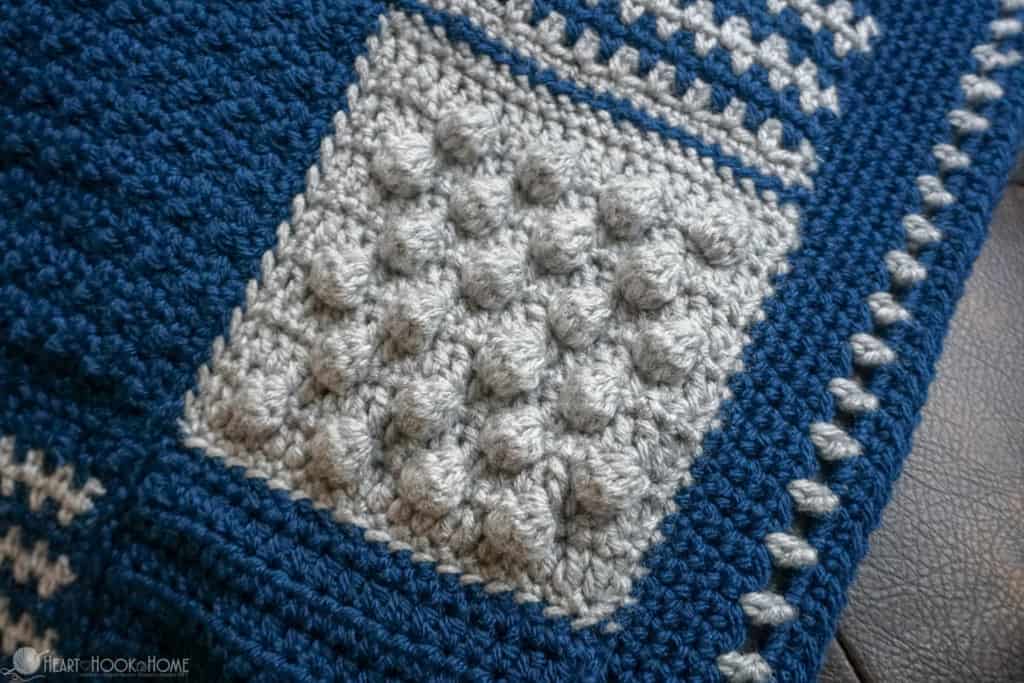
Sewing two pieces of crochet blanket together

The other method is the slip-stitch-outside-loop method. This is certainly faster but there is a learning curve! Here is the top side:
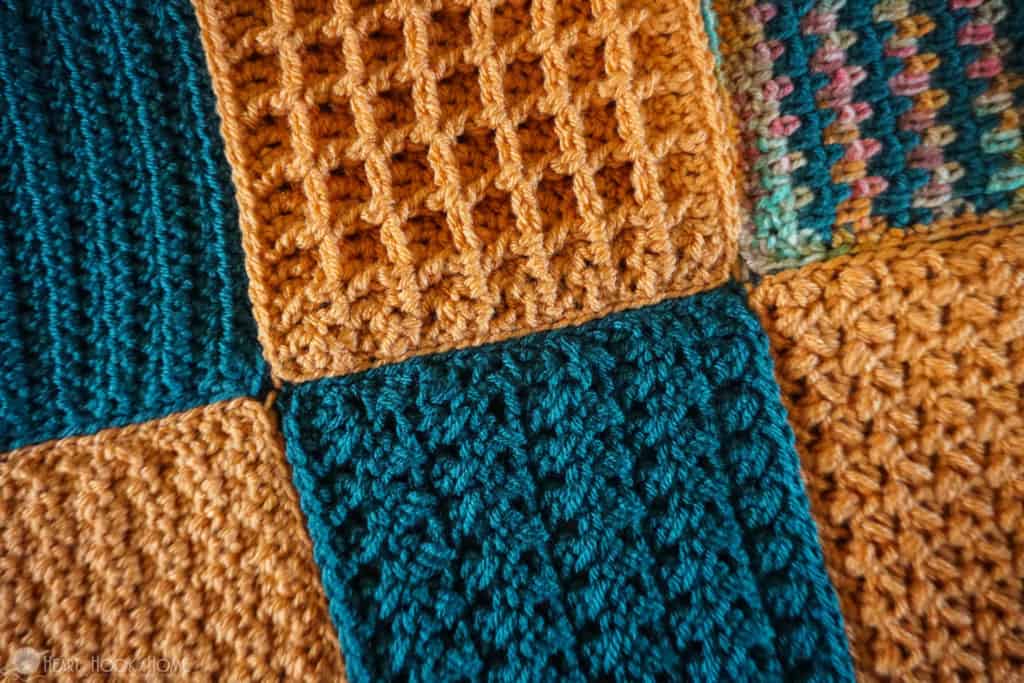
Sewing two pieces of crochet together

And here’s the back side:

How to slip stitch crochet together

To do the slip-stitch-outside-loop method of joining, lay the squares together with the right sides facing each other as pictured. Use the stitch markers to keep the edges even as described above.
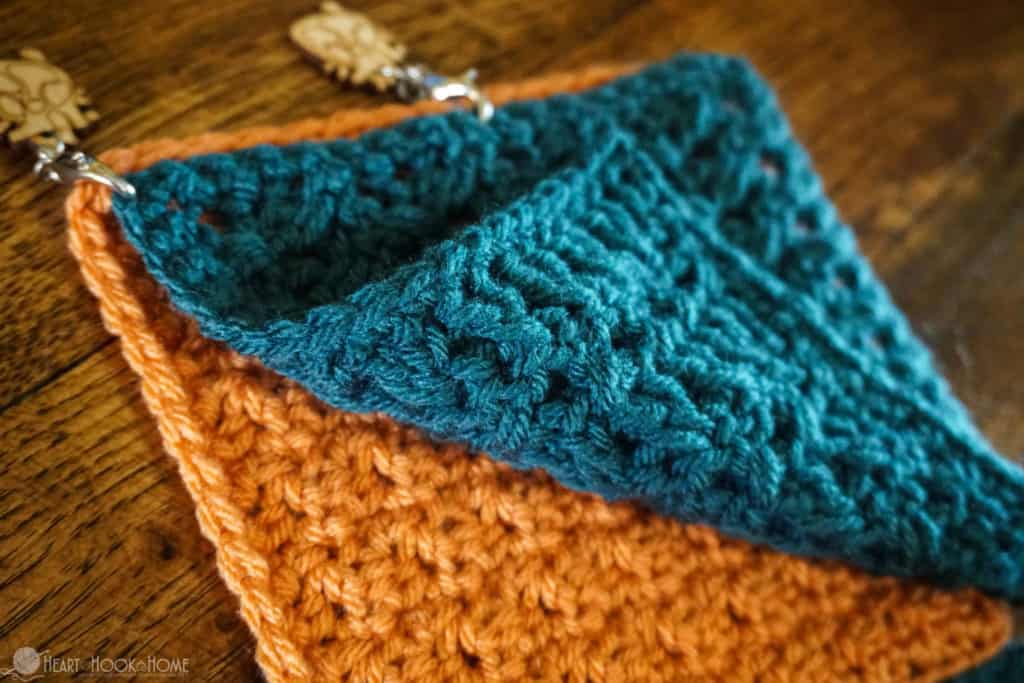
Using stitch markers to line up edges in crochet

Insert your hook in the outer corner using ONLY the OUTSIDE loops of each.

How to slip stitch outside loop only two crocheted squares together

Slip stitch along the length of the edge using the OUTSIDE loops only, making sure that when you get to the middle stitch markers everything is still lined up. Remember that if you need to skip a stitch on either square to keep them lined up – that’s okay!

Sewing a crocheted blanket together

At the end of these two squares grab the next two in the sequence and place them right sides together. Use the stitch markers to line up the edges as before and continue slip stitching until you reach the top of the row.

Skipping stitches if necessary

Again, make sure that when you get to the “middle” stitch marker that the stitches are lining up nicely before moving on.

Tutorial for sewing granny squares

Once all vertical rows have been seamed, flip the blanket so that you are looking at the wrong side, turn it clockwise, and seam up the horizontal edges. Make sure that all stitches at the intersections have been worked.

To be honest, both methods worked up beautifully. Slip stitching the squares together is definitely the easier (and the faster) of the two methods. I recommend testing different seams with the different methods before deciding.  You do what is most comfortable for you, just remember to keep it loose!

Adding the border

Adding the border is the last and perhaps the easiest step of the entire blanket pattern.

Row 1: Attach at any corner. Ch-1, sc in each st around, placing 3sc in each corner. Join with sl st to first sc.
Rows 2 – 6: Ch-1, sc in each st around, placing 3sc in each corner. Join with sl st to first sc.
Row 7: Change to accent color. Ch-1, * Hdc in next, ch-1, sk next st * repeat between * * to corner, hdc in next to last st, ch-2, sk next st, hdc in next. Continue to next corner, hdc in next to last st, ch-2, sk next st, hdc in next. Continue around entire blanket. Join. (It’s okay if you have to fudge a bit to get the corners right – no one will know).
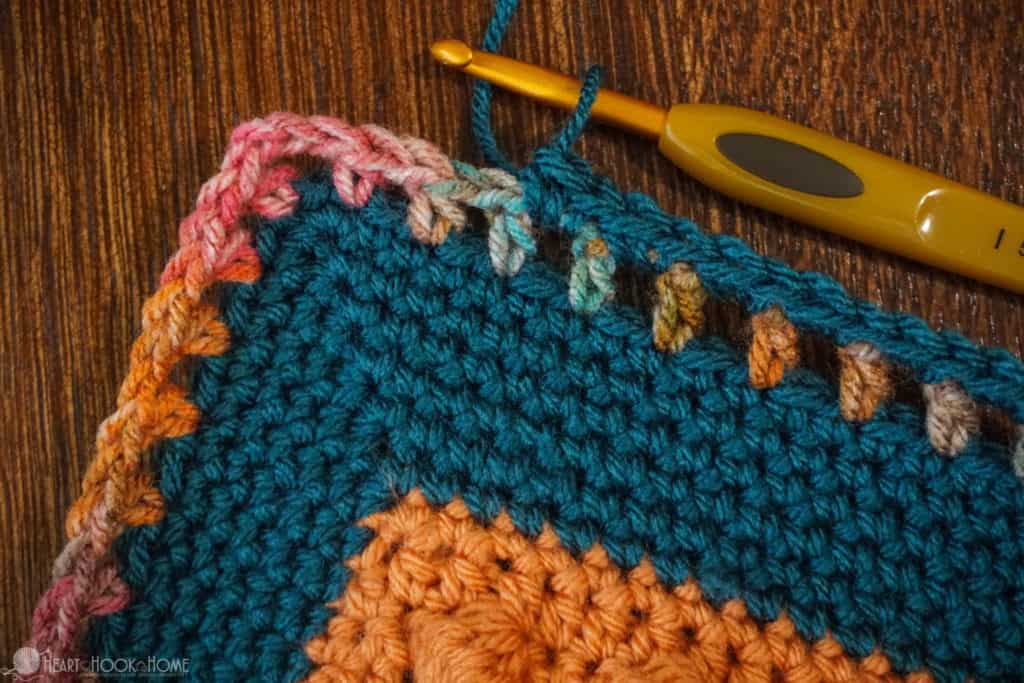
Adding a border in crochet

Row 8: Change back to main border color. Ch-1, 2sc around each ch-sp from row 7, placing 3sc around each corner ch from row 7. Join to top of first sc with sl st.

How to add a border to a blanket

Rows 9 – 10: Ch-1, sc in each st around entire blanket, placing 3sc in each corner. Join to top of first sc and weave in ALL ends.

YOU. ARE. DONE!

Creighton's Blanket: Free Crochet Pattern

I learned a lot with Creighton’s Blanket pattern, and I hope you have learned a lot making yours as well! I always try to come up with new and exciting projects, introducing new techniques and and skill-sets along the way. You never know what is coming next! 😉
Creighton's Blanket

When you finish your version of Creighton’s Blanket pattern, I would love it if you would tag me with @HeartHookHome on social media so I can see!

Creighton's Blanket Pattern

More fun crochet projects:

Penelope the Pin Cushion: Octopus Crochet Pattern
Sunday Ballet Slippers Free Crochet Pattern
12 Month Infant Hoodie Free Crochet Pattern
Jack Sparrow Inspired Halloween Beanie Free Crochet Pattern
Aldi Quarter Keeper {FREE Crochet Pattern}

Acrylic, Baby, Blankets, Crochet Patterns, Free Patterns, Half Double Crochet, Hook, Lemon Peel, Mini Bean (aka Elizabeth), Moss Stitch, Patterns by Stitch, Patterns for the Home, Special Stitches, Yarn Type blanket, blanket pattern, crochet along, crochet pattern, FREE crochet pattern, FREE pattern, patterns for the home, special, stitch sampler crochet pattern

Comments

  1. Kathleen Blout says

    February 27, 2021 at 12:00 am

    how to put the squares together.... need the tutorial of how to crochet pieces together..... ? Thank you
    Reply
  2. Nadine says

    February 11, 2021 at 6:52 am

    I made this with chenille, and I switched out the waffle stitch because I couldn’t get it right! The blanket will be donated to the auction fundraiser at my son’s school. I tried to post a photo but can’t figure out how to do it. Thanks for the fun project!
    Reply
  3. Cathy says

    January 17, 2021 at 11:49 am

    I’m at the point where I’m ready to start stitching the squares together. I can’t tell from the directions though do you use all one color yarn to stitch them together? I’m doing it in the white and blue I hope to start stitching together As soon as I get your reply
    Reply
  4. rae says

    December 29, 2020 at 5:20 pm

    Hi, Love this blanket. I will be making newborn blanket for my husband's boss' grandson. Which color do you sew the squares together with? Is it 925 yds of each color? Thank you for this beautiful blanket.
    Reply
  5. Rebecca says

    December 6, 2020 at 7:31 am

    My squares are not coming out 6x6 well some are and some are 7x7 is there anyway to fix this? Or do I just have to start over? Thank you for any help.
    Reply
  6. Debbie says

    March 22, 2020 at 8:19 am

    Is there somewhere that I can print this pattern? (Creightons blanket)
    Reply
    • Heart Hook Home says

      March 22, 2020 at 8:17 pm

      Hi Debbie! I have an ad-free pdf version available for purchase on Ravelry which can be found here: https://www.ravelry.com/patterns/library/creightons-blanket
      Reply
  7. Kari says

    December 10, 2019 at 9:06 pm

    Just finishing up this blanket my my daughter at college. I did it in green and white. It’s coming out beautiful. You did an excellent job of explaining the different stitches and I learned a lot.
    Reply
  8. Tracey Donovan says

    November 4, 2019 at 4:43 pm

    What color is used to stitch the squares together?
    Reply
  9. Annette Kilwein says

    March 3, 2019 at 12:26 pm

    cant wait to get started just have to figure color pattern thanks so much
    Reply
  10. LINDA says

    February 25, 2019 at 7:49 am

    Hi I just discovered this blanket and love it. I was wondering if you can tell me what type of yarn you used for the orange, dark blue, and variegated colors. thank you so much. Linda
    Reply
    • Heart Hook Home says

      February 25, 2019 at 1:32 pm

      Hi Linda! I used Hobby Lobby's I Love This Yarn for that one.
      Reply
      • Linda says

        February 25, 2019 at 8:38 pm

        Great. Thank you so much
        Reply
  11. Trish M says

    January 3, 2019 at 8:24 am

    I LOVE this pattern. I would suggest that the pattern needs to be explicit for the border section on how to do corners (Add 3 sc to the corner). I followed the pattern and my edges curled. I would do this project again. Thank you for posting it and your videos on how to do specific stitches. That was a life-saver.
    Reply
  12. Yolanda D. says

    November 24, 2018 at 2:01 pm

    Do you cut the yarn after slip stitching each square or do you carry it on to the next set?
    Reply
    • Ashlea says

      November 25, 2018 at 9:27 am

      Hi Yolanda! I carry it from one square to the next.
      Reply
  13. Agatha says

    November 2, 2018 at 2:53 pm

    That's so nice,l'm interested l will start soon,God bless you.
    Reply
  14. Maven says

    October 13, 2018 at 1:26 am

    What kind of yarn did you use for the blue, orange, and multi-color blanket?
    Reply
  15. Claudia says

    September 30, 2018 at 8:21 pm

    Will you be posting a printable PDF any time soon?
    Reply
    • Heart Hook Home says

      October 8, 2018 at 10:06 am

      Hi Claudia! I have the pattern on ravelry...you can find it here: https://www.ravelry.com/patterns/library/creightons-blanket
      Reply
  16. Renee Russell says

    September 18, 2018 at 1:13 pm

    Ashlea, You always make this look so easy. I'm actually going to attempt this one. I really appreciate you sharing your knowledge and fabulous ideas. It makes a world of difference to know that I can make something this nice and not be completely overwhelmed. I always feel like I'm not quite fast enough compared to some of the others in our community, so this is just my speed. Thanks, again!
    Reply
    • Ashlea says

      September 19, 2018 at 10:35 am

      Aww thank you, Renee! I can't wait to see it.
      Reply
  17. Patty says

    September 9, 2018 at 12:32 am

    Do you block your squares even if it is acrylic Yarn?
    Reply
    • Heart Hook Home says

      September 12, 2018 at 8:37 pm

      Hi Patty! Yes, I do. It helps shape them up real nice and ensures that they are all the same size before stitching together.
      Reply
  18. Jenny says

    July 31, 2018 at 12:22 am

    Thank you so very much for sharing your talent. You give easy to follow instructions and the pictures make each step clear. Love this blank! It is one I want to do.
    Reply
    • Heart Hook Home says

      August 1, 2018 at 10:13 pm

      I am so glad you like it!!
      Reply
  19. Terri says

    July 25, 2018 at 7:32 am

    That is a beautiful piece, can't wait to try it. Thank you.
    Reply

Leave a Reply Cancel reply

Your email address will not be published. Required fields are marked *

Recipe Rating


This site uses Akismet to reduce spam. Learn how your comment data is processed.

Welcome!

beard

Hi! I’m Ashlea, the Kansas mom, and wife, that runs this crochet, food, and heart (CHD) blog.  I am a frugal, yarn loving crochet addict that enjoys good food and fine wine – or an occasional whiskey. 😉 Read more about me here and see my favorite Amazon products here.

Let’s Connect!

  • Facebook
  • Instagram
  • Pinterest
  • Twitter
  • YouTube

SEARCH

Support Heart Hook Home

I was asked recently if there was an easy way to support the Heart Hook Home blog without spending an extra dime. The answer is a resounding YES (and thank you)!

I love to share my knowledge and ideas, and I love that YOU love them enough to share them as well! You are free to sell products made from my patterns, all I ask is that you do not use my images to represent your work and that you link back to my pattern in your listings.

Want to share my content on your blog/social media? Thank you! Please see my Terms of Use before doing so.

Here are my privacy policy and disclosure policies.

Instagram

© Copyright 2021 Heart·Hook·Home · All Rights Reserved · Site Design Carol Jones Media · All Logos & Trademark Belongs To Their Respective Owners·

4087shares
  • 274