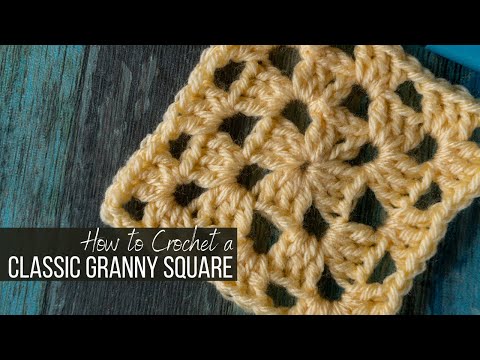
How to Crochet a Classic Granny Square
This post may contain affiliate links, meaning that I may earn a small commission if you make a purchase. See our disclosure policy for more information.

Looking to make a classic granny square? Granny squares are some of the quickest and easiest things to crochet. Make several small squares to sew them together to make a larger project, or keep going to make one single granny square as large as an afghan. Let’s learn how with this written and VIDEO tutorial!

Classic Granny Square Tutorial
There are all kinds of granny square patterns – and about a million different ways to make them. You can find patterns for some with flowers on them, some that are basic squares and some that have spirals or other elaborate designs.
I really like this collection of different Granny Square patterns. This way you can play around with bunches of designs and decide which you like best – but first let’s start with the basics.

About granny squares:
For the classic Granny Square, you’ll only need a small piece of yarn and your favorite hook.
When crocheting virtually any classic granny square, you’ll always start in the middle and work your way out.
Start with either a Magic Circle or by making a chain four and joining to the first chain made to form a circle.
Scroll down to watch the full video tutorial for the Classic Granny Square.
Join me in my Stitch Sampler Afghan to use this tutorial to its fullest potential!

Granny Square instructions:
Make a Magic Circle (or ch-4, join to first ch to form a circle).

Chain three. This will count as the first double crochet of the round (and each round).

Double crochet two more times in the circle. This is considered the first of four sides to the square.

Chain three. This is considered the first corner of the square.

Double crochet three more times in the square. This is the second side of the square.

Chain three for the next corner, and place three more double crochets in the circle. This is the third side of the square.

Chain three for the next corner, and place three more double crochets in the circle. This is the fourth side of the square.

Chain three for the final corner, and join to the top of the first chain three made. First round of the granny square made!


To start the next round (and each round)… Slip stitch in the next two double crochets. Slip stitch around the chain-space of the first corner. You are now ready to start the second round of classic granny pattern.

Chain three. Again, this counts as the first double crochet of the round. In this chain-space, place two more double crochets, chain three, and crochet three more double crochets.


Wanna save this for later?

Corner made!
Chain one to get to the next corner.

Double crochet three times, chain three, and double crochet three more times. (Corner made!) Chain one to get to the next corner. Repeat this sequence around the entire square. (If you need more help, please see the video tutorial below.)

When you get back around to the beginning, join to the top of that chain three.

To start a new round, you’ll slip stitch in the first two double crochets and the chain space. You are now ready to start round three of the classic granny square pattern.

Chain three, double crochet twice in the same chain-space. Chain three, and make three more double crochets in that same chain space. Corner made!

Chain one and make three double crochets in between the sets of the previous round. Chain one. In the next corner place (3dc, ch-3, 3dc) in chain-space.

Chain one, 3dc in between the sets of the previous round. Chain one. When you get back around, join to the top of the beginning chain three. Third round complete!

To continue adding granny square rounds:
1. Slip stitch in next two stitches and in the corner chain-space.
2. Chain three, double crochet twice in chain-space, chain three, double crochet three more times in same chain-space. (Corner made!)
3. Chain one, 3dc in the chain-space from the previous row, chain one, 3dc in the chain space from the previous row, chain one, etc… until you reach the next corner.
4. In corner stitch place (3dc, ch-3, 3dc).
5. Repeat step three.
Continue around until you reach the beginning chain three of the round. Join to the top of that chain three.
Simply continue growing the granny square until it is the desired size.
If you are a more visual learner, make sure to watch the VIDEO tutorial below!
More crochet tutorials for you:
Waffle Stitch Crochet Tutorial
How to Crochet the Feather Stitch


24 Comments