Crochet Stitch Sampler Afghan Pattern
This post may contain affiliate links, meaning that I may earn a small commission if you make a purchase. See our disclosure policy for more information.
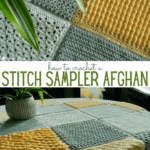

If you’re looking for an excellent way to learn new crochet stitches, or if you prefer smaller crochet projects during the warmer months, this crochet stitch sampler afghan pattern is for you! Join me as I make 12″ squares that we will then attach to create a gorgeous stitch sampler blanket.

Crochet Stitch Sampler
I don’t know about you, but my crochet game always seems to slow down in the summer months. That could be simply because it’s hot out, or because we are out and about enjoying the sun. I am taking the opportunity this summer to go back through my old crochet tutorials. I am retaking the photos, reshooting the video tutorials, and generally making lots of updates. Some of which were very badly needed. 😅
Since I have to make a new swatch of each stitch as I update them for photos etc, I thought why not make them all 12″ squares?! When I’m finished updating all of the tutorials that need it, I’ll have a good stash of squares that I will then compile into a crochet stitch sampler afghan. I’m so excited to share these updated tutorials and the afghan idea with you!

Here’s how the Stitch Sampler will work…
The crochet stitch tutorials I plan to update include (but are not limited to) my Lemon Peel stitch tutorial, my Waffle Stitch tutorial, my Mini Bean tutorial, my Waistcoat stitch tutorial, my Front Post/Back Post stitch tutorial, my Corner to Corner tutorial, my Moss Stitch tutorial, my Crocodile Stitch tutorial, my Treble Crochet stitch tutorial, and more.
I will also be adding new to Heart Hook Home tutorials, including the Basket Weave, the Blanket Stitch, and more.
Although I have no definitive schedule for which date each tutorial will be updated, I plan to do at least one per week. Each time I update another tutorial I will add the corresponding 12″ square pattern to this post below. Since I have already revamped the Lemon Peel stitch post, that is the first square pattern available for you to start on!
I hope you love this idea, and that you will join me as I both update old tutorials and add a few new ones to the mix as well. 😍 If you need help reading a crochet pattern, make sure you head over here and check out this detailed post.
Find PART TWO here!

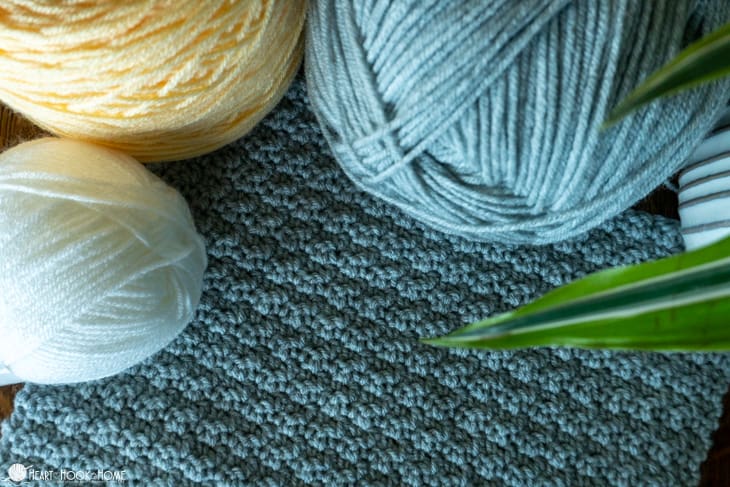
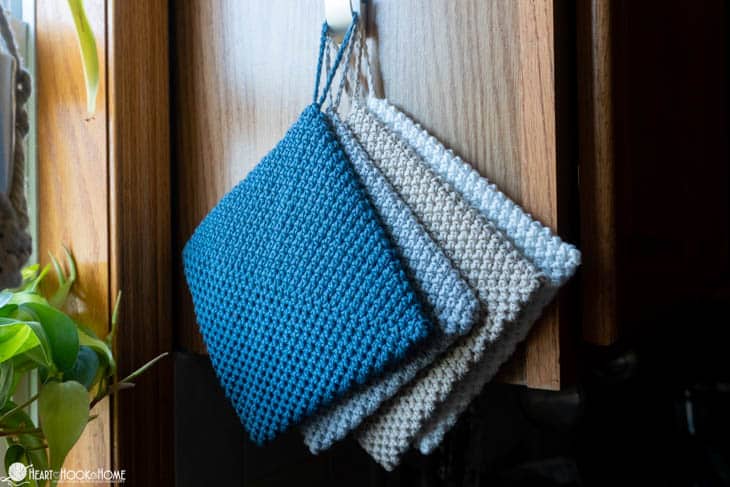
For all of these squares I am using Brava Worsted yarn in the “Dove Heather”, “Custard”, and “White” colorways. Note that you could purchase these in the regular size (218 yard) skeins, or all of these colors are available in the ginormous Brava 500 skeins, which have 1090 yards each! 😲
For the hook I am using my Furls Odyssey in size H/5mm. You could, of course, use whichever brand of hook you like.
Afghan Square Patterns
And now it’s time for the square patterns! Keep checking back this summer as I add more and more square patterns to this list.
Note that because these stitches are all different widths/heights not all of the squares will have the same number of stitches/rows. As long as the squares are all 12″ that is perfectly fine! When compiling these squares at the end of this project, we will learn how to stitch together two items that do not necessarily match counts. Woot!
Lemon Peel:
Head over for the full Lemon Peel stitch tutorial if needed. This square should use approximately 157 yards of yarn.
Row 1: Ch-37, sc in second ch from hook, dc in next. * sc in next, dc in next * repeat between * * to the end of the row. (36)
Rows 2 – 35: Ch-1, turn, * sc in next, dc in next * repeat between * * to the end of the row. (36)
Border: Rotate the square and sc evenly down row ends, 3sc in corner, sc across bottom edge, 3sc in corner, sc evenly up row ends, 3sc in corner, sc across, placing 2 sc in same as first border stitch. Fasten off using Invisible Join.

Waffle Stitch:
Head over for the full Waffle Stitch tutorial if needed. This square should use approximately 178 yards of yarn.
Row 1: Ch-44, dc in 3rd ch from hook and in each chain to end. (42)
Row 2: Ch-2, turn, dc in first stitch. * Fpdc around next st, dc in next 2 sts * repeat between * * 12 more times. Fpdc around next st, dc in last st. (42)
Row 3: Ch-2, turn, dc in the first 2 sts. * Fpdc around next 2 sts, dc in next st * repeat between * * 12 more times. Dc in last st. (42)
Rows 4 – 29: alternate rows 2 & 3 (42)
Row 30: repeat row 2 (42)
Border: Rotate the square and sc evenly down row ends, 3sc in corner, sc across bottom edge, 3sc in corner, sc evenly up row ends, 3sc in corner, sc across, placing 2 sc in same as first border stitch. Fasten off using Invisible Join.

Blanket Stitch:
Head over for the full Blanket Stitch tutorial if needed. This square should use approximately 162 yards of yarn.
Row 1: Ch-42, 2dc in 3rd ch from hook. * sk-2 chs, (sc, 2dc) in next ch * repeat between * * 11 more times. Sk-2 chs, sc in last ch. (39)
Rows 2 – 31: Ch-2, turn, 2dc in first st. * sk-2 sts, (sc, 2dc) in next st* repeat between * * 11 more times. Sk- 2 sts, sc in turning ch. (39)
Border: Rotate the square and sc evenly down row ends, 3sc in corner, sc across bottom edge, 3sc in corner, sc evenly up row ends, 3sc in corner, sc across, placing 2 sc in same as first border stitch. Fasten off using Invisible Join.

Feather Stitch:
Head over for the full Feather Stitch tutorial if needed. This square should use approximately 202 yards of yarn.
Note that we are starting with a Foundation Half Double crochet because I like the stability that gives the entire square when paired with a finishing Half Double Crochet row. 😁
Row 1: Fhdc-39 (or you can ch-40, hdc in 2nd ch from hook and each ch to end). (39)
Row 2: Ch-1, turn, hdc in first st. * ch-1, sk next st, hdc in next * repeat between * * to end. (39)
Row 3: Ch-1, turn, hdc in first st, ch-1. * Yo and pull up a loop in same ch-sp (3 loops on hook), yo and pull up a loop in the skipped st directly below from row 1 (5 loops on hook), yo and pull up a loop in next ch-sp (7 loops on hook). Yo pull through all 7 loops, and ch-1 to close the stitch. * Feather stitch made. Repeat between * * to end, hdc in last st. (18 feathers and 1 hdc in each end of row)
Rows 4 –33: Ch-1, turn, hdc in first st, ch-1. * Yo and pull up a loop in same ch-sp (3 loops on hook), yo and pull up a loop in the ch-sp directly below from previous row (5 loops on hook), yo and pull up a loop in next ch-sp (7 loops on hook), yo pull through all loops, ch-1. * Repeat between * * to end. Hdc in last st.
Row 34: ch-1, turn, hdc in each st to end. Do not fasten off.
Border: Ch-1, and turn. Sc across, 3sc in corner. Rotate the square and sc evenly down row ends, 3sc in corner, sc across bottom edge, 3sc in corner, sc evenly up row ends, 2sc in same as first border stitch. Fasten off using Invisible Join.

Mini Bean Stitch:
Head over for the full Mini Bean Stitch tutorial if needed. This square should use approximately 165 yards of yarn.
Row 1: Ch-45, Mb in 3rd ch from hook. * sk-next ch, Mb in next * repeat between * * to end. (22 Mbs)
Rows 2 – 35: Ch-1, turn, Mb across. (22 Mbs)
Border: Rotate the square and sc evenly down row ends, 3sc in corner, sc across bottom edge, 3sc in corner, sc evenly up row ends, 3sc in corner, sc across, placing 2 sc in same as first border stitch. Fasten off using Invisible Join.

Classic Granny:
Head over for the full Classic Granny Square tutorial if needed. This square should use approximately 125 yards of yarn.
Round 1: Magic Circle. Ch-3, 2dc in circle, ch-3. * 3dc in circle, ch-3 * repeat between * * two more times. Join to top of first chain 3.
Round 2: Sl st in next 2 sts, sl st around ch-sp. Ch-3, (2dc, ch-3, 3dc) in ch-sp. * Ch-1, (3dc, ch-3, 3dc) in corner * repeat between * * two more times. Ch-1, join to top of first chain 3.
Round 3: Sl st in next 2 sts, sl st around ch-sp. Ch-3, (2dc, ch-3, 3dc) in ch-sp. * Ch-1, 3dc in ch-sp, ch-1, (3dc, ch-3, 3dc) in corner * repeat between * * two more times. Ch-1, 3dc in ch-sp, ch-1, join to top of first chain 3.
Round 4: Sl st in next 2 sts, sl st around ch-sp. Ch-3, (2dc, ch-3, 3dc) in ch-sp. * Ch-1, 3dc in ch-sp, ch-1, 3dc in next ch-sp, ch-1, (3dc, ch-3, 3dc) in corner * repeat between * * two more times. Ch-1, 3dc in ch-sp, ch-1, 3dc in next ch-sp, ch-1, join to top of first chain 3.
Rounds 5 – 10 (or until 12”) continue growing granny square.
Border: Sc in next 2 sts, * (2sc, ch-1, 2sc) around corner ch-sp, sc in each dc and ch-sp to corner * repeat between * * three more times. Fasten off using Invisible Join.

Moss Stitch:
Head over for the full Moss Stitch tutorial if needed. This square should use approximately 135 yards of yarn.
Row 1: Fsc-44 (or Ch-45, sc in 2nd ch from hook and in each to end.) (44)
Row 2: Ch-2, sk-first st, sc in next. * Ch-1, sk-next st, sc in next * repeat between * * to end. (44)
Rows 3 – 48: Ch-2, turn, sc in next ch-sp. * Ch-1, sc in next ch-sp * repeat between * * to end. (44)
Border: Ch-1, turn, sc in each st/ch-sp to end. 3sc in corner st, sc evenly down row ends, 3sc in corner st, sc across bottom edge, 3sc in corner st, sc evenly up row ends, 2sc in last. Fasten off using Invisible Join.

Sultan Stitch:
Head over for the full Sultan Stitch tutorial if needed. This square should use approximately 120 yards of yarn.
Row 1: Ch-45, (dc, ch-2, dc) in 6th ch from hook. * Sk-3 chs, (dc, ch-2, dc) in next ch * repeat between * * until only 3 chs remain. Sk-2 chs, dc in last ch. (42)
Row 2: Ch-3 (counts as dc here and throughout) turn, 4dc in each ch2-sp to end. Dc in top of turning chain. (42)
Row 3: Ch-4 (counts as dc + ch-1 here and throughout) turn, dc in space between first 2 dcs. * sk-4 sts, (dc, ch-2, dc) in between next set of dcs * repeat between * * to end. (dc, ch-1, dc) in space before turning ch. (42)
Row 4: Ch-3, turn, 2dc in first ch-sp. 4dc in each ch2-sp to end, 3dc in turning space. (42)
Row 5: Ch-3, turn, sk-first 3 sts, * (dc, ch-2, dc) in space between next set of dcs, sk-4 sts * repeat between * * to end. Sk last 2 sts, dc in top of turning ch. (42)
Rows 6 – 21: repeat rows 2 – 5 (42)
Wanna save this for later?
Row 22: repeat row 2 (42)
Border: Rotate square and sc evenly down row ends. 3sc in corner st, sc across bottom edge. 3sc in corner st, sc evenly up row ends. 3sc in corner st, sc in each st across, 2sc in same as starting.
Sc evenly around entire square, placing 3sc in each corner st. Fasten off using Invisible Join.

Crocodile Stitch:
Head over for the full Crocodile Stitch tutorial if needed. This square should use approximately 260 yards of yarn.
Row 1: Fdc-39, (or ch-41, dc in 3rd ch from hook and in each to end.) (39)
Row 2: Ch-3 (counts as dc here and throughout), 2dc in next st. * ch-1, sk-2 sts, 2dc in next st * repeat between * * to end. Dc in last st. (40 sts or 13 V-sts)
Row 3: Ch-1, Croc around first V-st. * sl st in center of next V-st, croc in next V-st * repeat between * * to end. Sl st to top of ch-3. (7 scales)
Row 4: Ch-3, 2dc in center of scale. * ch-1, 2dc in between scales, ch-1, 2dc in center of next scale * repeat between * * to end. Dc in top of final dc (behind scale). (13 V-sts)
Row 5: Turn, sl st in 2 sts, turn back, * croc in next V-st, sl st in center of next V-st * repeat between * * to end. Sl st to top of ch–3. (6 scales)
Row 6: Ch-3, 2dc in center of next V-st. * ch-1, 2dc in center of next scale, ch-1, 2dc in between scales * repeat between * * to end. Dc in last st. (13 V-sts)
Row 7: Ch-1, Croc around first V-st. * sl st in center of next V-st, croc in next V-st * repeat between * * to end. Sl st to top of ch-3. (7 scales)
Rows 8 – 31: repeat rows 4 – 7
Border: Ch-1, sc across top of croc scales, 3sc in corner st. Sc evenly down row ends, 3sc in corner st. Sc across bottom, 3sc in corner st, sc evenly up row ends, 2sc in last. Fasten off using Invisible Join.

Front Post/Back Post:
Head over for the full Front Post/Back Post stitch tutorial if needed. This square should use approximately 200 yards of yarn.
Row 1: Fdc-41 (or ch-43, dc in 2nd ch from hook and in each to end.) (41)
Row 2: Ch-2, turn, hdc in first st. * Fpdc around next st, Bpdc around next * repeat between * * 18 more times. Fpdc around next, hdc in top of final st. (41)
Row 3: Ch-2, turn, hdc in first st. * Bpdc around next st, Fpdc around next * repeat between * * 18 more times. Bpdc around next, hdc in top of final st. (41)
Row 4: Ch-2, turn, hdc in first st. * Fpdc around next st, Bpdc around next * repeat between * * 18 more times. Fpdc around next, hdc in top of final st. (41)
Rows 5 – 30: repeat rows 3 & 4 (41)
Border: Rotate square and sc evenly down row ends. 3sc in corner st, sc across bottom edge. 3sc in corner st, sc evenly up row ends. 3sc in corner st, sc in each st across, 2sc in same as starting. Fasten off using Invisible Join.

Waistcoat:
Head over for the full Waistcoat stitch tutorial if needed. This square should use approximately 174 yards of yarn.
Row 1: Ch-41, sc in 2nd ch from hook and in each to end. (40)
Rows 2 – 55: Ch-1, turn, Sc in first, wc in next 38 sts, Sc in last. (40)
Border: Rotate square and sc evenly down row ends (I find that with this stitch it is best to place one sc in every other row end when working down/up the sides). 3sc in corner st, sc across bottom edge. 3sc in corner st, sc evenly up row ends. 3sc in corner st, sc in each st across, 2sc in same as starting. Fasten off using Invisible Join.

Alpine Stitch:
Head over for the full Alpine stitch tutorial if needed. This square should use approximately 153 yards of yarn.
Row 1: Fdc-39 (or ch-40, dc in 2nd ch from hook and in each to end. (39)
Row 2: Ch-1, turn, sc in each st to end. (39)
Row 3: Ch-2, turn,* dc in next, fptc around st two rows down * repeat between * * to end. Dc in last. (39)
Row 4: repeat row 2 (39)
Row 5: Ch-2, turn, dc in first 2 sts * Fptr around dc from two rows down, dc in next * repeat between * * until 3 sts remain. Fptr around next, dc in remaining 2 sts. (39)
Row 6: repeat row 2 (39)
Rows 7 – 34: repeat rows 3 – 6 (39)
Row 35: repeat row 3 (39)
Border: Rotate square and sc evenly down row ends. 3sc in corner st, sc across bottom edge. 3sc in corner st, sc evenly up row ends. 3sc in corner st, sc in each st across, 2sc in same as starting. Fasten off using Invisible Join.

Herringbone Double Crochet:
Head over for the full Herringbone Double Crochet tutorial if needed. This square should use approximately 129 yards of yarn.
Row 1: Ch-36, hbdc in 3rd ch from hook and in each to end. (34)
Rows 2 – 25: Ch-2, turn, hbdc in each at to end. (34)
Border: Rotate square and sc evenly down row ends. 3sc in corner st, sc across bottom edge. 3sc in corner st, sc evenly up row ends. 3sc in corner st, sc in each st across, 2sc in same as starting. Fasten off using Invisible Join.

Treble Square:
Head over for the full Treble Crochet tutorial if needed. This square should use approximately 126 yards of yarn.
Row 1: Fsc-37 (or ch-38, sc in 2nd ch from hook and in each to end.) (37)
Row 2: Ch-1, turn, sc in each st to end. (37)
Row 3: Ch-3, turn, Tr in each at to end. (37)
Rows 4 – 6: Ch-1, turn sc in each at to end. (37)
Rows 7 – 26: repeat rows 3 – 6 (37)
Row 27: repeat row 3
Rows 28 & 29: repeat row 4
Border: Rotate square and sc evenly down row ends. 3sc in corner st, sc across bottom edge. 3sc in corner st, sc evenly up row ends. 3sc in corner st, sc in each st across, 2sc in same as starting. Fasten off using Invisible Join.

Corner to Corner:
Head over for the full Corner to Corner crochet tutorial if needed. This square should use approximately 138 yards of yarn.
Crochet a corner-to-corner square that is 16 squares wide.
Border: Rotate square. * Ch-2, sc in between blocks * repeat to corner, ch-2, 3sc in corner st. Continue all the way around the square in the same manner. Fasten off using Invisible Join.

We now have 15 total squares in our pattern selection. You choose how many you make, and in what colors.
Since each square is 12″ tall and wide, you can easily determine the end size of your afghan. For example…
*Note that the dimensions listed here are before adding the border, which will add approximately 4″ to both width and height.

Make sure you share photos of your squares in the Heart Hook Home Community on Facebook and head over to THIS POST for part two – in which we assemble our squares and add the border!


More fun blanket patterns:
Creighton’s Blanket: Free Stitch Sampler Crochet Pattern
Open Ripple Chevron Blanket: Free Crochet Pattern
Waffle Blanket Free Crochet Pattern


39 Comments