Crochet Stitch Sampler Afghan Pattern: Part 2 (Assembly & Border)
This post may contain affiliate links, meaning that I may earn a small commission if you make a purchase. See our disclosure policy for more information.
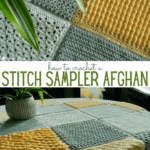
Woohoo! We have made it to the fun part of the Crochet Stitch Sampler Afghan pattern: part TWO! In part two we will assemble all of our squares into one blanket, then add the border and finish her off. I hope you’re as ready as I am!

Crochet Stitch Sampler Afghan Part 2


By now you should have completed as many 12″ afghan squares as desired in part ONE of the Crochet Stitch Sampler Afghan pattern. Whether that is 9 squares for a baby blanket, or up to 48 squares for the king size blanket.
It is preferable that you block the squares to all the same size before starting this portion. While blocking is not absolutely necessary, you will absolutely thank yourself when you realize how much easier this process goes when the squares are as close as possible to the same size.


Not all of the squares in the Stitch Sampler pattern post are exactly 12″. Because of the nature of some of the stitch sets used (for example some require a stitch multiple of 3 + 2 while others require a stitch multiple of 4 + 2) the number of stitches will never be the same along the sides to be sewn. That’s right… practically (probably) never.


Learning how to connect two pieces of crochet that do not match stitch counts is such an important skill to master! By the time you’re finished with this Stitch Sampler blanket you’ll be a pro and ready to tackle more complicated crochet projects – promise!
Important: I originally intended to record a video tutorial for this entire process – and I still will. Things have been incredibly hectic in my world lately and I am not able to record videos for the time being. I have already started on a smaller size blanket, and when I have everything settled back down and the ability to record videos again, I will record myself assembling that blanket and get the video portion added to this post! Thank you for understanding and remaining patient with me. ♥

In this post we will learn two different methods of sewing pieces of crochet together, including the Mattress Stitch and the outside-loop-only Slip Stitch. We will then add the fun, decorative border to the assembled squares.

Determine Square Layout
First things first, let’s decide on the layout of the squares.
Take your time on this part!
Lay all of the squares out exactly how you want them. Make sure that all squares are oriented the correct direction, and right side up.
I prefer not to have any of the same color squares touching, and I also like to make sure that no two stitch sets are touching. (For example, no two waffle stitch squares are right next to each other.)
This can take some serious maneuvering, which is why I HIGHLY recommend taking a photo of your finished layout before starting any sewing, attaching, or moving the squares.
I also recommend doing the assembly step in one sitting if possible. You don’t want to have to lay things out twice, so if you can get it all done at once that is ideal.

Preparing to attach the squares
Because none of our squares have the same number of stitches, it is important that you line up the edges and “pin” them in place using stitch markers. In the photo below the yellow square has quite a few more stitches on the border than the white square does.
When you “pin” the bottom corners, the top corners, AND the center (6″ mark) of the squares, it helps to make sure that you are on track. When you hit the half way mark successfully, you’ll know that you’re on track to end evenly as well!
Note: I only use stitch markers like this on the squares I am actively attaching. Once they are attached, remove the markers and pin the next two squares, then the next two, the next two, etc.

If you know me and my crochet style, you know that I like to use the Mattress Stitch for sewing all kinds of crochet. I use this almost exclusively for seaming, attaching, sewing shoulders, and more.
You will be shocked to learn that attaching afghan squares is one of the only times that I do NOT prefer to use the Mattress Stitch (option #1 below).
I find that method in this case to be tedious, time consuming, and there are more ends to weave in. This is because you can only cut a strand of yarn so long to use it for sewing before it gets weakened by pulling it through each stitch (or your arm gets tired).
I also prefer the way the slip stitching method (option #2 below) looks. It is easier to go loosey goosey – which is extremely important in this step! I can not stress how important it is to stay nice and loose. You may even find it helpful to go up a hook size or two when using the slip stitching method.
No matter which method you use, start at the bottom and work your way up the entire blanket. Then go to the next column and seam all the way up, then the next column, and the next, etc. When all vertical lines have been attached, switch to attaching all horizontal lines.

(Option #1) Assemble using the Mattress Stitch
If you are using the Mattress Stitch to sew your squares together, you’ll start at one corner and sew back and forth between the two squares as evenly as possible. Again, make sure that you are hitting each stitch marker at the same time on both sides. If you need to skip a stitch on one square to stay on track (and to hit the 6″ stitch marker at the same time) that is perfectly fine! You won’t be able to tell later.

Seam up the entire strip of the blanket, then start back at the bottom and do the next row of squares all the way to the top, then the next row, then the next etc until you run out of vertical lines to attach.
When you’re done sewing all vertical lines, it is time to sew all of the horizontal edges together. Start at one side and sew all the way across the entire width of the blanket, then start again for the next row, then the next, until you run out here as well.
The Mattress Stitch in this instance takes F-O-R-E-V-E-R so I recommend at least trying the slip stitch method before deciding this is the way to go.
(Option #2) Assemble using Outside-Loop-Only Slip Stitch

Wanna save this for later?
There is a video tutorial from a different project that will walk you through this process… If you would rather watch this video on YouTube, you can find it on my channel here. Don’t forget to subscribe while you’re there! 😉
Using the outside-loop-only and slip stitching is so much faster than option #1, the Mattress Stitch. Not only is it faster, but it looks nicer in my opinion and you can quickly rip out a portion if needed (say you get off track a bit and realize the corners won’t match up). It is so much easier to rip out a few inches of slip stitches than it is to undo seaming using the yarn needle as in option #1!

For this method you’ll sandwich the “right sides” together so that you’re looking at the “wrong side” of the fabric. Then insert your hook in only the outside loop on one square, and the outside loop on the other square. See the photo below.

You will quite literally slip stitch the two squares together using those two loops from one corner to the other.
I still highly recommend “pinning” the squares into place as with option #1. I also recommend staying super loose with your stitching. You might even go up a hook size.
Pay attention to how many stitches there are until you hit the next “pin” stitch marker. If there are 7 stitches on one square but only 6 on the other, it is perfectly fine to completely skip over that extra stitch to keep on track. I promise you no one will be able to see it when you’re done, not even you!
If there are, for example, 10 stitches on one square and only 6 on the other, it is still okay to skip those 4 stitches, but try to space them out along the square as much as possible so not all of the skipping takes place in the same few inches.

My best tips for sewing these squares together using the outside-loop-only slip stitch are:
1. Stay loose! I can not stress to you how important that is. In fact, try seaming with your first two squares, then flip it over to look at the “right side” of the seam. See if the seam is bunched up at all or if the seam looks too tight. Chances are you’ll need to loosen up, so rip that out and start again with a hook size or two larger. Flip that over and look at the “right side” of the seam again and see how nicely and cleanly the seam lays with no bunching or puckering.

2. Do not force the stitches to line up. This is important! It is 100% okay if you need to skip a stitch on one of the squares to keep the corners lined up. What is NOT okay is forcing the stitches to line up or crocheting too tightly.

3. On the corner-most stitches, use both loops of each square. You want the intersections to be nice and sturdy!


4. Do not weave in any of the ends from attaching until you’ve done at least the first row of the border. (You should have one yarn tail at each junction around the entire blanket). This just helps to close up any small holes or inconsistencies after the fact.
Border:
For the border of this blanket we are going to start with one row of single crochet. Because there are so many possible sizes of this blanket, there are no stitch counts listed. Follow along with me…
Row 1: Attach anywhere EXCEPT in a corner. Just pick a random spot. Ch-1, sc in each stitch around the entire blanket, placing 3sc in each corner stitch.
Row 2: Ch-1, do not turn, * sc in next st, ch-3, 2dc in same as sc, sk-2 sts * repeat between * * to corner stitch. Make (sc, ch-3, 2dc) in corner stitch, and rotate blanket to work all the way around to the beginning.
Note: If you need to skip just one stitch in order to place the corner stitch correctly, or to skip three stitches instead of two, that is perfectly fine!
Row 3: Ch-3, turn, * sc in 3rd chain of next ch-3, then ch-2 * repeat between * * to corner. In each corner make a ch-2, dc in the sc from previous row, ch-2 (see photo below). Repeat between * * to the next corner where you’ll make a ch-2, dc in sc from previous row, ch-2 and continue with the repeats to the next corner.

When you reach all the way back to the first chain made, sc in the top of the final ch-3 and join.
Row 4: Ch-1, turn, (sc, ch-3, 2dc) in each sc around entire blanket.
Fasten off using Invisible Join. Weave in all of the ends from attaching the squares.
As soon as I am able I will get that VIDEO tutorial added to this post. If you have any questions in the meantime don’t hesitate to shoot me an email and I’ll be happy to help!

I hope you enjoyed crocheting this stitch sampler afghan with me. Please share a photo in the Heart Hook Home Crochet Community on Facebook or by tagging @HeartHookHome across all social media.

More crochet for you:
Creighton’s Blanket: Free Stitch Sampler Crochet Pattern
Alpine Baby Blanket Crochet Pattern
10 Beginner-Friendly Baby Blanket Crochet Patterns
Open Ripple Chevron Blanket: Free Crochet Pattern


6 Comments