Crochet Target Practice for Baseball, Football
This post may contain affiliate links, meaning that I may earn a small commission if you make a purchase. See our disclosure policy for more information.


It’s summer, it’s hot, and it seems like all my kids want to do is sit inside and watch YouTube videos. Not on my watch! Get yourself OUTSIDE and PLAY! Get dirty, scrape up your knees, get some grass stains on your shoes, and enjoy your childhood. My younger son plays baseball, football, basketball, and he’s played soccer as well. He wants to be the pitcher for his team next year. To help him do so, I whipped up a Crochet Target Practice for him using t-shirt yarn, a tomato cage, and PVC pipe.

Crochet Target Practice Pattern
For this pattern you will use the top (12″) ring of a small tomato cage, t-shirt yarn, springs, key rings, hooks, and PVC pipe.

You will crochet around the tomato cage for the first row, then continue making rows turning the circle into a square. Then you’ll attach the finished product to a frame constructed out of PVC pipe. If you need help reading a crochet pattern, make sure you head over here and check out this detailed post.

Materials for target:
T-Shirt yarn (approx. 260 yards)
*2 skeins of Fox Yarn Co used
Small Tomato cage
*you only need the 12″ ring
Crochet hook in size 10mm
Pattern:
Carefully remove just the 12″ ring of the tomato cage with wire cutting snips without breaking the circle.
Round 1: Fasten on and dc evenly around the tomato cage for 60 sts. Join to the top of the first dc.
Round 2: Ch-3, tc in same st as join, dc in next 12 sts, tc in next. In next st, (2tc, ch-2, 2tc). * tc in next, dc in next 12 sts, tc in next, (2tc, ch-2, 2tc) in next * repeat between * * around. Join to top of first tc.
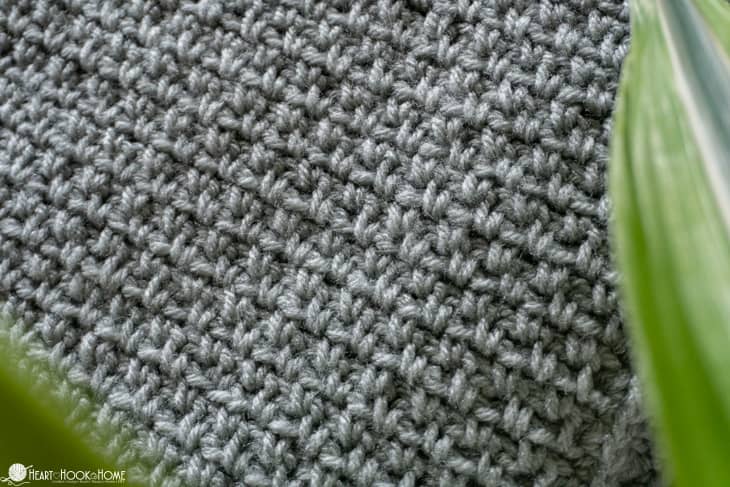
Round 3: Ch-3, tc in same as join. * dc in each st to 2nd to last st of this “side”. Tc in next, skip next st, (2tc, ch-2, 2tc) in ch-2 sp, skip next st, tc in next. (see photo) * repeat between * * around. Join to top of first tc.


Rows 4 – 9: Continue in rounds as the piece grows, should be about 9 rounds.
When you don’t have enough to complete another full row…
Final round: Sc in each st around, placing 2 scs in each of the ch-2 spaces from the previous row.

Fasten off and weave in all ends. Continue the project by constructing a PVC stand…
Materials for stand:
Wanna save this for later?
(7) pieces of ¾” PVC cut to 36″ each
(2) pieces of ¾” PVC cut into 24” each
Up to an additional 8’ of ¾” PVC pipe
(4) elbows for ¾” PVC pipe
(2) caps for ¾” PVC pipe
(4-6) tees for ¾” PVC pipe
(4) ½” x 2-5/16” x .062” extension springs
(4) 3/16” screw eyes hooks
(4) 1″ key rings
Construction of Stand:

For the top:
Connect (4) sections of the 36” PVC pipe sections to form a square using 2 elbows on the top and two tees on the bottom like so.

For the base:
There is a base “front” and a base “rear”. Start with the rear by connecting the (3) remaining 36” sections of PVC pipe using 2 elbows on what will be the rear corners and then 2 tees on what will be the center.

To form the base “front” insert the (2) 24” sections into the opposite end of the tee and cap them with the (2) caps.
Now you’ll connect the target portion to the BASE using (2) more pieces of PVC. The length of these pieces will determine the height of the target. Cut to desired length (shorter for baseball, taller for football) and insert between the top and the base.

Support Beam
Add a support beam. This bar will run from the middle of the bottom bar of the target to the middle of the rear BASE bar. The length of this piece will vary depending on the height of the target. Find the center of those two pieces and cut then in half, add tees to each end and insert your PVC support beam.

Attach the (4) Key Rings to the (4) corners of the crocheted target. Drill a pilot hole into each of the (4) inside corners of the stand. Add (4) Screw Eye Hooks and (4) Extension Springs and attach the target.
**NOTE** Using PVC glue on all of the joints is recommended, however I opted to leave the glue off of the tops of the tees on the base so I can break it down into 2 pieces (target and base) for easy storage. I also left it off of the optional support bar and the 2 tees that connect to it. That way I could raise and lower it as needed.
Paul and I always have so much fun creating outdoor projects for our family and kids. I’ve been wracking my brain to think of other outdoor activities where we can incorporate yarn, so hopefully I can come up with something cool! Ha!
More DIY and outdoor fun:
How to Make a Ladder Golf Game Set Using PVC Pipe
Copycat Wallaby Darned Recipe
DIY: Portable Photography Floor for Photo Staging
Not Yet Bloody Mary Mix – a Spicy Make-Ahead Bloody Mary Concentrate
DIY Photo Card Display Stick


5 Comments