Car Waste Basket: Free Crochet Pattern
This post may contain affiliate links, meaning that I may earn a small commission if you make a purchase. See our disclosure policy for more information.


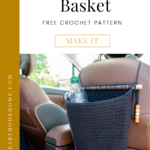

I don’t care who you are, you could benefit from a waste basket in your car. Whether this will replace one you’ve bought from a store, or you’re crocheting your own for the first time, this car waste basket crochet pattern is the perfect solution.

Car Waste Basket Crochet Pattern
It is inevitable that you’ll have trash in your car that needs thrown away. That could be a gum wrapper, a straw wrapper, used napkins, water bottles, or anything in between. This car waste basket is big enough to hold several empty bottles of water and all of that!
This is the SIXTH installment of the 2022 Car Series. Can you believe we’re halfway through already?! Simply insane!
Find the ad-free, PDF version of this pattern on Ravelry, Etsy, or the Heart Hook Home blog shop.

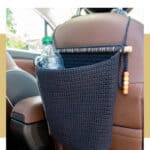
Not only is this waste basket quick to crochet, it is super chic (if I do say so, for a trash receptacle) and easy to take out, empty, and return to its position on the back of your passenger seat.
To finish this pattern off, we’ll crochet around a dowel rod. The rod will help the receptacle to keep its shape, and to be more sturdy if holding heavier items. I love that!

I decided to use the Linked Double Crochet stitch for this pattern because of the dense fabric it creates. I debated using the Waistcoat stitch but if you know me, you know that I also like QUICK crochet, which the Waistcoat stitch is not. Because of the linked nature of the stitch we do use, it’s just as sturdy and we need half as many rows… meaning that it’s the perfect solution.

Materials:
Dishie Cotton Yarn (or any worsted weight cotton)
-approx. 350 yards
Crochet hook in size G/4mm
12″ Dowel rod
Gauge: 17 dcs x 10 rows = 4” square
Pattern Notes:
Pattern written using US terms.
The majority of this pattern is worked in continuous rounds with no chaining or turning, with few exceptions as noted.
Ldc = Linked Double Crochet (tutorial here)
Bpsc – Back Post Single Crochet (tutorial here)
If you need help reading a crochet pattern, make sure you head over here and check out this detailed post.
Pattern:
Round 1: Ch-24, 3dc in 3rd ch from hook. (mark first stitch with stitch marker) dc in each to end, 6dc in last ch. Working up the opposite side of the chain, dc in each st to end, 3dc in beg st. (52)
Do not join throughout. Work in spiral, continue using stitch markers to mark first st of each row.
Round 2: 2dc in next 3 sts, dc in next 20 sts, 2dc in next 6 sts, dc in next 20 sts, 2dc in each of last 3 sts. (64)
Wanna save this for later?
Round 3: * dc in next, 2dc in next * repeat between * * 2 more times, dc in next 20 sts. Repeat between * * 6 more times, dc in next 20 sts. Repeat between * * 3 more times. (76) Dc in next st (to push the seam over).
Round 4: * dc in next 2 sts, 2dc in next * repeat between * * 2 more times, dc in next 20 sts. Repeat between * * 6 more times, dc in next 20 sts. Repeat between * * 3 more times. (88)
Round 5: * dc in next 3 sts, 2dc in next * repeat between * * 2 more times, dc in next 20 sts. Repeat between * * 6 more times, dc in next 20 sts. Repeat between * * 2 more times, dc in next, hdc in next 2 sts, sc in last st. Join to top of first dc. (100)


Round 6: Ch-1, do not turn. Bpsc around each st around. Join to top of first st. (100)


Round 7: Ch-2, do not turn, Ldc in each st around. Do not join, work in a spiral for remainder of pattern, marking first stitch with stitch marker. (100)
Rounds 8 – 30: Ldc in each st around. (100)

Lhdc in next st, sc in next, sl st to next st. Fasten off and weave in all ends.

Lay the waste basket down flat. Attach where pictured with sl st.

Sc around the dowel rod for the width of 10” (should be 42 stitches).

When finished, and before fastening off, make a crocheted chain that is ~36” long. Add optional beads to the end. Fasten off and weave in all ends.
To attach to the back of the seat, wind the chain around the dowel rod a few times, then slip a loop through the opening, similar to tying a shoe. Ta-da! How fancy is that?!

Please share a photo with me by tagging @HeartHookHome on all social media and in the Heart Hook Home Crochet Community on Facebook.
More free Car Patterns:
Seatbelt Cover Free Crochet Pattern
Car Coaster: Free Crochet Pattern
Steering Wheel Cover: Free Crochet Pattern


14 Comments