Home » Hook » 5 Tips for Changing Colors in Corner to Corner Crochet (C2C)
| |

5 Tips for Changing Colors in Corner to Corner Crochet (C2C)

This post may contain affiliate links, meaning that I may earn a small commission if you make a purchase. See our disclosure policy for more information.

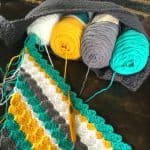
Are you ready to branch out and start changing colors in corner to corner crochet? Once you get the hang of it, you’ll be changing graphghan colors like a pro. Let me teach you how!

How to Change Colors in Corner to Corner (c2c) Crochet

5 Tips for Changing Colors in Corner to Corner Crochet

We’ve got changing colors in regular crochet conquered; changing colors in corner to corner crochet, however, is handled slightly differently. C2C graphghans can either use written patterns or chart patterns, or sometimes even both! As a visual person, I find it easiest to cross the blocks off using a chart as I go.  Totally a personal preference thing; neither way is right or wrong.

I do have 5 rules I follow for changing colors in corner to corner crochet graphghans. I will go into details of each below, and be sure to catch the video at the bottom of this post to see them all in action…

  1. Use the 5:2 chain method for Corner to Corner (instead of the 6:3)
  2. Change colors with the slip stitch instead of traditional color change method
  3. Don’t “carry” the yarn too far
  4. Bobbins are your best friend
  5. Do not weave in ends until at least three rows past that point

Use the 5:2 chain ratio for Corner to Corner (c2c)

When crocheting a corner to corner afghan, you can either chain 5 to start a new row OR you can chain 6.  Depending on which method you choose, you’ll then either chain 2 to start each new block in that row or chain 3. I always use the chain 5 and 2 respectively, it helps to keep the holes in between blocks smaller which in turn helps to keep the color changes less conspicuous.  To see a more detailed explanation of the 5:2 vs 6:3 you’ll want to read this post, and watch this video.

Change colors with the slip stitches 

I know I am going against my own cardinal rule of changing colors here, but when crocheting a corner to corner I change colors with the slip stitch instead of in the last pull-through as normal. Does it really matter? Probably not. See exactly what I mean in the video below.

Don’t carry the yarn too far

Don’t shoot the messenger here but I have found that if I “carry” my yarn too many blocks away, it creates a sloppier/more puckered look than when I clip and reattach my yarn. YES, it creates more ends to weave in, but it also creates a more seamless color change and a prettier overall finished effect. I personally carry my yarn no more than one block’s width away (either direction). Unless you have A TON of color changes, this doesn’t really add that much more work and it is worth it to me.

I have also found that if I reattach the yarn instead of carrying, I am able to go back and tighten those ends after a few rows which helps to not only keep everything uniform but to clean up the color changes as well. You can not do that if you carry the yarn more than one block’s width away; it is simply woven in and at that point and it is what it is.

Bobbins are your best friend

When creating a corner to corner graphghan, you absolutely need to have some sort of system to keep your yarn clean while turning your work. Ain’t nobody got time for yarn barf!

To combat the ever-present threat of yarn-rat-nest, I use Industrial Clips like these as bobbins.  When finished with a particular color, and before clipping your yarn, look ahead on your chart. See how many blocks you will need of that color when you come back up the next row. For example, if, by reading my chart, I know that I will need enough yarn for 6 blocks when coming back, I can wind enough yarn around that bobbin to get me those six blocks. Then I simply clip the bobbin onto my work and keep on keepin’ on.  Watch the video below to see how I use them.

Tip: Do a test block and see approximately how many inches you’ll need to wind around your bobbin per block.  Simply crochet one block and then rip it out and measure how much yarn you used. This will give you a better guess when winding those bobbins!

Weave in ends as you go (but not too soon)

When crocheting a corner to corner graphghan with many color changes, yarn ends get in the way. I find it is less cumbersome to turn my work if I go back and weave in ends as I go. That being said, I have also found that if I weave in too close to my working yarn (where I currently am working on the graph/chart) it may cause my blocks to become too tight, warping the overall effect.

My general rule of thumb is to not weave in any ends that are within two – three rows of the row I am currently working. When weaving in those ends, I like to go back and forth with my yarn needle at least twice, and go through the fibers of the yarn as well.  I use the same method as when I weave in regular yarn ends, keeping like colors with like colors. More on How to Weave in Yarn Ends.

YouTube video
You can find countless corner to corner crochet graphghan patterns on Pinterest, or you could use a free website like Stitch Fiddle to either create your own graph freestyle or upload an image and they will help you plot that graph. Cool huh?

Do you have a rule/method for changing colors in corner to corner that I may not be aware of or did not list here? Be sure to drop me a comment so I can test it out too!

5 Tips for Changing Colors in Corner to Corner Crochet

More crochet tips and tutorials:

How to Change Colors in Crochet
3 Ways to Add a Border in Crochet
How to Crochet a Corner to Corner (C2C) Throw + Video Tutorial
Crochet WIP Bag (Work In Progress) Using Corner to Corner
How to Crochet the Invisible Decrease for Amigurimi Crochet
Create Planned Yarn Color Transitions in Crochet

Similar Posts

Leave a Reply

Your email address will not be published. Required fields are marked *

This site uses Akismet to reduce spam. Learn how your comment data is processed.

41 Comments

  1. Hi!! Ok so I did a huge c2c blanket and cut the yarn after every colour change... but I get how to carry the yarn across the row your currently in but how to I carry the xolour from a row below- the pattern I'm currently doing has a slanted colour change on the left side... how can I continue carrying the colour in the left side up to the next row? Does that make sense??
  2. I often plan an edging on my C2C projects. Therefore at the end of the row I'll chain 3, turn, then double crochet at base of that chain 3, then chain 3, then double crochet over that first double crochet. this leaves a loop to work into on every block.
  3. Interesting way of changing colors. I love c2c but need help in figuring out the amount of rows for rectangular Afghan. What’s the best way to figure out when to start decreasing?
    1. If you do a swatch, you’ll be able to determine how many rows will measure what you want and when you get that number of rows in your project, you start to decrease. E.g. if you’ve done a swatch and you realise that 5 rows measure 5 inches, if you want your project to measure 50 inches, you just do (50 inches * 5 rows) / 5 inches which will give you 50 inches. Hope this helps.
  4. OMG OMG .. So I was struggling with ta graphgan this weekend and I'm so happy I stumbled across your page/youtube. I completely ripped out a pattern that I was 3/4 finished with and started over using bobbins and 5/2...I tend to crochet loose, but I couldn't go any smaller on the needle as it started to go into the yarn. Moving to 5/2 and bobbins it's going to be beautiful, albeit it will take me weeks to catch up. They went and had twins so now I'm on doubles duty but I am very excited at how it looks now. Thank you thank you.
  5. Pingback: 6 FREE Beginner C2C Patterns to Practice On - Nine Inspired
  6. Pingback: PNW Baby Blanket Mystery CAL Announcement! - Nine Inspired
  7. When following c2c pattern, do you flip the pattern for each new row? I'm getting in a muddle thank you
  8. Hi, I do the slip stitch method too along with the 5:2! I stop every so often to untwist the yarn! That's fine with me lol.
  9. I don't understand how to use the bobbins for colour changes. Why would I only want a small amount of yarn on the bobbin (say if there are 6 blocks in a row) instead of enough yarn for 50 blocks that continue in the next few rows? I've done C2C before but snipped and joined the yarn at each colour change point, but its just too time consuming. I have a commissioned blanket and I need to do it much faster.
  10. Do you have a pattern for the stripe blanket that is shown in the picture? I love the way the rows are different numbers for different colors.
  11. Pingback: 5 Tips for Changing Colors in Corner to Corner Crochet (C2C) - New Craft Works
  12. THANK YOU! I have been having such a problem with the space left between the colors, and the 5-2 stitch absolutely resolved the look I didn't care for. Lol. Too bad I'm going to have to redo some 55-60 rows lol. But it's ok!!!!
  13. Love your tutorial! So helpful! My only question is, after you did the second set of white after the blue, how do you go back? Do you just do a second set of white in the same yarn, then do your blue again, and then use the white that was on the clip for the next set like it is brand new yarn?
  14. If you are just doing c2c color changes at the ends of rows this probably is not an issue, but if you are doing a graphghan with color changes in the middle of the rows it makes a neater look to always bring your new color in from the Right side of your project. By doing this that little 1/4"tail of the old color will always be on the wrong side of your work making for a neater front side of your project. It really does make a big difference.
  15. Hi...I. check just wanted to say thank you very much for the amazing video and instructions. I do have 2 ?'s for you. How do you change colors at the end of a row so the first block is of a different color and how do you keep all the tails pretty much on one side. Thanks so much,Peggy
    1. Hi Peggy! To change colors at the very end of a row, I would change yarn when making the last stitch when pulling through the last 2 sts on your hook. I have a tutorial here: https://hearthookhome.com/how-to-change-colors-in-crochet/ As for the tails all being on one side, if you do an even number of rows for each color change, then your tails will all be on one side. Hope that helps!
  16. Pingback: How to Crochet Muppets C2C & Granny Square Afghan | How To Crochet
  17. I was wondering how you made the single, smaller sections of white in your c2c that is in the picrure at the top of this page. It looks smaller than the typical ch 2 and then 3 dc. Is it a ch 2 and 2 dc? Thanks for any info.
  18. Hi, Thanks a mil for your tips and help with the C2C. I only have one problem. The end results tends to be scew. It's not a perfect rectangle. What did I do wrong?
  19. Is there a rule of thumb as to how many rows to do with each color? I’m doing 6 rows of one color and then 3 rows of the next color but the zig zag between the colors is alternating on each side. Is it because I am doing an even number of one color and an odd number of the other? Thank you!
  20. On you tube a girl showed how to weave in the starting end as you crocheted by weaving the tail around the working yarn as you went I have been using these method with a little success and not having the tails having to be to long
  21. I am working on my 1st C2C graphgan and couldn't find the clips that you all use for your bobbins so I used the claw type hairclips. I really think they work better than the bobbins like your because I can use different sizes for however much yarn I might need to complete my color.
  22. I both knit and crochet, and have taught a few of my knitting friends to crochet. One of them taught me the "Russian join", and this was the best thing ever! No ends to weave in, which I love because that was the worst part of creating anything with yarn for me. Try it and let me know if you like it.
  23. I've been crocheting C2C blankets for over ten years, and this post gave me wonderful new information. Thanks!
  24. Hi Ashlea, How do you pick back up with the wound yarn on the bobbin? On the other side of the blue on the next row? How much of that color are you planning for? I just cut all my color changes and bury ends later, so I'm interested in the idea of the bobbin. Thanks!
    1. Don't cut the yarn when you change colors. Instead keep it on a bobbin and pick it up on the next row. This works only if the color is not separated by another color for more than two rows. Never drag the yarn its best to cut it.
  25. Thank you for this tutorial. I found it through Pinterest. It is very good! Easy to understand, to the point, and not too long (the video), which is hard to find. Keep up the good work!
    1. I have been making these for a long time now,,girls prefer plain colours but I make a lot for charity with all the left overs I only do two chain on mine cos three makes it loopy and baby fingered could get stuck ,,,,love the tutorial very good ,,,dont ,we all hate finishing the ends ,,,,yuck ,,I do my groups on twos so it is easier to do the edges ,,,