Lacy Leaf Swimsuit Coverup Crochet Pattern
This post may contain affiliate links, meaning that I may earn a small commission if you make a purchase. See our disclosure policy for more information.
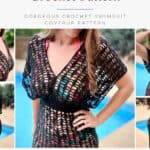









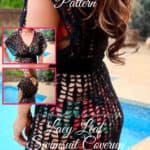
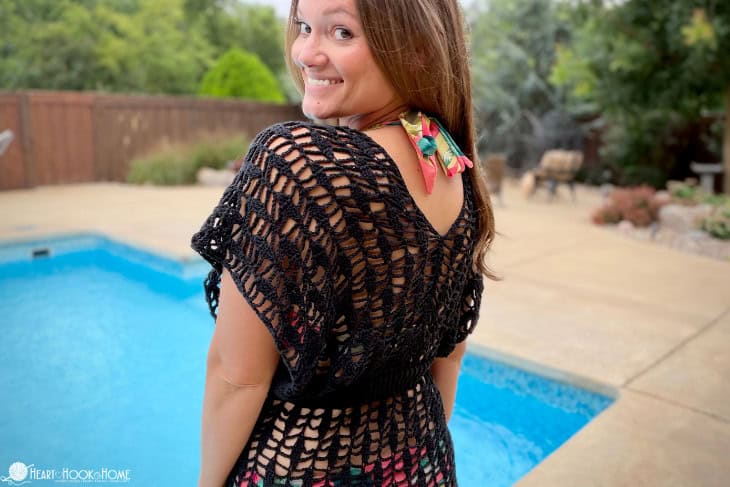
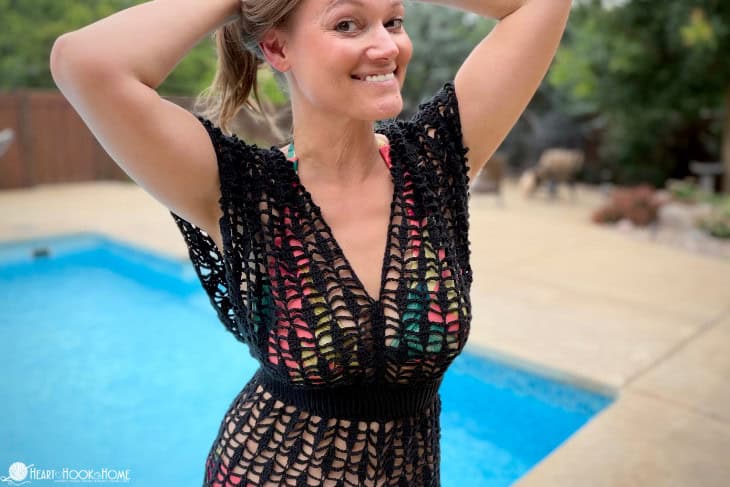
Are you ready for the most gorgeous Lacy Leaf Swimsuit Coverup crochet pattern?! I have fallen in love with a new stitch. This one is lacy and has a great boho-chic vibe thanks to its leafy theme. Using mostly double crochet stitches and chains, this gorgeous fabric is perfect for a swimsuit coverup. Let’s make it!
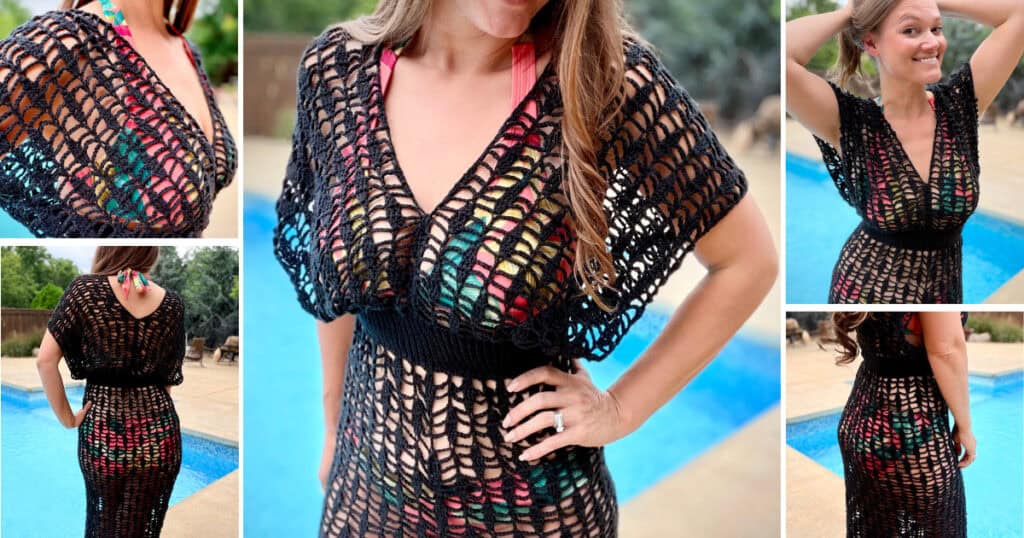
Lacy Leaf Crochet Swimsuit Coverup
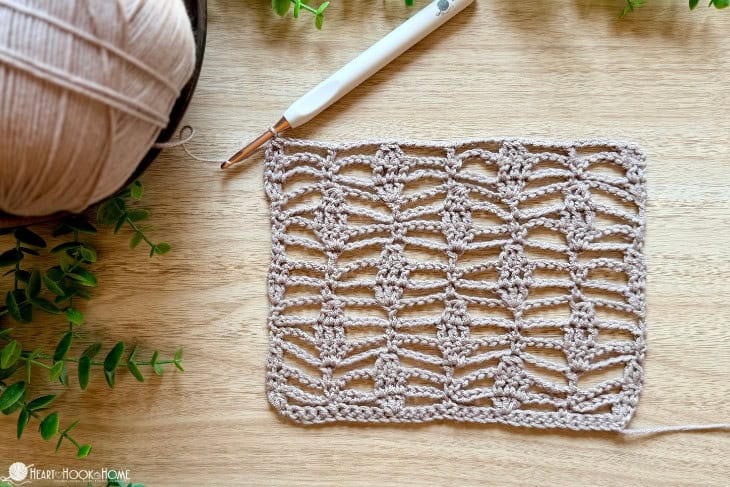
This crochet stitch is interesting enough to keep your attention and easy enough that you can watch a movie with the family while you make it. There is a “ladder” effect, in that the stitches are stacked in a ladder or a column. The columns are separated by chains and the resulting pattern is an offset leaf motif that is drapey and gorgeous!
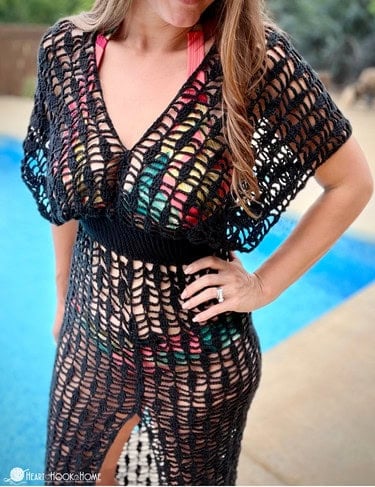
The openwork of the crocheted fabric makes for an excellent swimsuit coverup. I also think it would make a gorgeous table runner, or a delicate shawl!
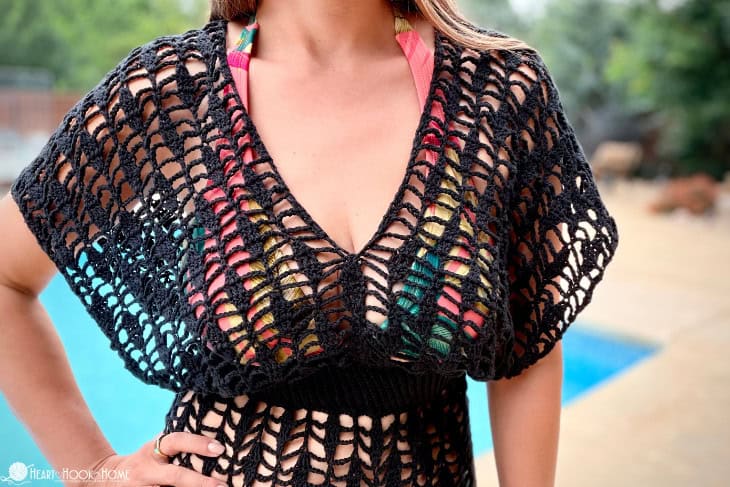
Since this is a more complex stitch pattern than just a series of stitches, the best way to learn it in my opinion is to make a small sample. Follow along with me making the gauge swatch on video below. To take it from there, you’ll need to know the basics of reading a crochet pattern, but my hope is that by the time we finish the gauge swatch together you will be more comfortable tackling the larger design.
To make the Lacy Leaf stitch we’re only using chains, single crochets, and double crochets. Some of the double crochets will be increases (3 in one stitch) and some will be decreases (1 stitch from three), but other than that this is a pretty straight forward stitch pattern.
Before we get started we need to do the gauge swatch. This helps us with two things… first to learn the construction of the stitch. This isn’t a hard stitch pattern, in fact it uses some of the most basic crochet stitches, just combined in a way that creates a more intricate looking stitch. My favorite! The second is to make sure that your stitches are the same size as mine, meaning that your new crochet coverup will come out the intended size.
Read more on gauge here, but make sure to follow along with me in the video tutorial below where I make this gauge swatch and then measure it. You want the width to be ~7″ (18 cm) when you’re finished. Adjust the hook size up or down if yours is too narrow or too wide.
Grab the ad-free, printable version of this pattern on Ravelry, Etsy, or right here in the Heart Hook Home Blog Shop. Thank you!
Materials:
Sport/#2 Weight Cotton Yarn
-approx. (1150, 1200, 1250, 1425, 1520, 1750, 1600, 1840, 2025) yards
–Premier Cotton Fair in “Black” used
Crochet hook in size G/4mm or size needed to obtain gauge
Elastic Thread (not required, but makes a huge difference!)
Gauge:
In Lacy Leaf pattern – 3 Repeats = 7” and 12 rows = 5” (unblocked) – Watch the VIDEO of me making the gauge swatch below!
Waistband – 10 Rows = 1” (unstretched)
Sizing:
(XS, S, M, L, XL, 2XL, 3XL, 4XL, 5XL) -fits hip measurement up to (34”, 36”, 40”, 44”, 48”, 53”, 55”, 57”, 62”)
Pattern Notes:
Pattern written using US terms.
The ch(s) at the beginning of each row do not count as a stitch unless otherwise noted.
When working in the Lacy Leaf Pattern, you will always skip the chain spaces and work your sts into the sc/dc’s of the previous row/round.
A video for the Lacy Leaf coverup gauge swatch can be found below – or on YouTube here.
If you need help reading a crochet pattern, make sure you head over here and check out this detailed post.
Abbreviations:
Beg: Beginning
BLO: Back Loop Only
Ch(s): Chain(s)
Dc: Double Crochet
Dc3tog: Double Crochet three together (decrease)
Sc: Single Crochet
Sk: Skip
Sl st: Slip stitch
St(s): Stitch(es)
Stacked Sc: alternative starting double crochet method, can use ch-3 instead if you prefer (tutorial coming soon!)
First, let’s make the gauge swatch together. As long as yours comes out the same size as mine, your swimsuit coverup should turn out the intended size as well!
If you would rather watch this video on YouTube, you can find it on my channel here. Don’t forget to subscribe while you’re there!
If you want to print the pattern and follow along, you can find the printable version of this pattern on Ravelry, Etsy, or right here in the Heart Hook Home Blog Shop. Thank you!
Gauge Pattern:
Row 1: Ch-32, sc in 2nd ch from hook and in each ch to end. (31)
Row 2: Ch-1, turn, 2dc in first st, ch-5, sk-4 sts, * sc in next, ch-5, sk-4 sts, 3dc in next st, ch-5, sk-4 sts, * repeat between * * 1 more time. Sc in next st, ch-5, sk-4 sts, 2dc in last st.
Row 3: Turn, stacked sc, dc in next st, ch-5, * sc in next sc, ch-5, dc in each of next 3 dcs, ch-5 * repeat between * * 1 more time. Sc in next sc, ch-5, dc in each of final 2 sts.
Row 4: Ch-1, turn, dc2tog, ch-5, * dc in next sc, ch-5, dc3tog using next 3 dcs, ch-5 * repeat between * * 1 more time, dc in next sc, ch-5, dc2tog in final 2 sts.
Row 5: Ch-1, turn, sc in first st, * ch-5, 3dc in next st, ch-5, sc in next st * repeat between * * across.
Row 6: Ch-1, turn, sc in first st, *ch-5, dc in each of next 3 dcs, ch-5, sc in next st * repeat between * * across.
Row 7: Turn, stacked sc, * ch-5, dc3tog using next 3 dcs, ch-5, dc in next sc * repeat between * * across.
Row 8: Turn, stacked sc, dc in same st, ch-5, * sc in next, ch-5, 3dc in next st, ch-5 * repeat between * * 1 more time. Sc in next st, ch-5, 2dc in final st.
Measure for gauge, adjust hook size up or down accordingly.
Now that we’ve got our supplies, we are comfortable with the stitch pattern, and we know the hook sizing is legit, let’s get started!
Wanna save this for later?
Lacy Leaf Swimsuit Cover Up Crochet Pattern:
For this pattern we are starting with a super stretchy waistband, then working our way down to make the skirt. Once finished, we will reattach at the waistband and work up to make the “tops”, then seam then into place.
Waistband:
Row 1: Ch-(16), sl st in 2nd ch from hook and in each ch to end. (15)
Rows 2 through (160, 170, 180, 200, 220, 240, 250, 260, 280): Ch-1, turn, sl st in blo of each st across.
Join the final row to the first row with a sl st to form a circle. Sl st stitch for stitch across. Do not fasten off.
Skirt:
Where still attached…
Round 1: Ch-1, sc in each row end around. Join to first st with sl st. (160, 170, 180, 200, 220, 240, 250, 260, 280)
Round 2: Ch-1, do not turn, * sc in next, ch-5, sk-4 sts, 3dc in next st, ch-5, sk-4 sts, * repeat between * * around. Join to top of first sc with sl st. (16, 17, 18, 20, 22, 24, 25, 26, 28) Leaves
Round 3: Ch-5, turn, dc in each of next 3 dcs, ch-5, * sc in next sc, ch-5, dc in each of next 3 dcs, ch-5 * repeat between * * around, sc in final st. Join to first ch with sl st. (16, 17, 18, 20, 22, 24, 25, 26, 28) Leaves
Round 4: Ch-8 (counts as dc+ch-5), turn, dc3tog using next 3 dcs, ch-5, * dc in next sc, ch-5, dc3tog using next 3 dcs, ch-5 * repeat between * * around. Join to third ch from beg chain. (16, 17, 18, 20, 22, 24, 25, 26, 28) Leaves
Round 5: Ch-2, turn, dc in same as join, ch-5, sc in next st, ch-5, * 3dc in next dc, ch-5, sc in next st, ch-5 * repeat between * * around. 2dc in same as join. Join to top of first dc with sl st. (16, 17, 18, 20, 22, 24, 25, 26, 28) Leaves
Round 6: Ch-2, turn, dc in first 2 sts, ch-5, sc in next sc, ch-5, * dc in each of next 3 dcs, ch-5, sc in next sc, ch-5 * repeat between * * around, dc in final st. Join to top of first st with sl st. (16, 17, 18, 20, 22, 24, 25, 26, 28) Leaves
Round 7: Ch-8 (counts as dc + ch-5), turn, * dc in next sc, ch-5, dc3tog using next 3 dcs, ch-5 * repeat between * * around, dc in next sc, ch-5, dc2tog, join using third ch from beg chain. (16, 17, 18, 20, 22, 24, 25, 26, 28) Leaves
Round 8: Ch-1, turn, * sc in next st, ch-5, 3dc in next st, ch-5 * repeat between * * around. Join to top of first sc with sl st. (16, 17, 18, 20, 22, 24, 25, 26, 28) Leaves
Rounds 9 through 26: repeat rounds 3 through 8 in order
*If you would like the Front Split to start lower, then continue adding rounds here in multiples of SIX
Round 27: Ch-5, turn, dc in each of next 3 dcs, ch-5, * sc in next sc, ch-5, dc in each of next 3 dcs, ch-5 * repeat between * * around, sc in final st. Join to first ch with sl st. (16, 17, 18, 20, 22, 24, 25, 26, 28) Leaves
From here on out we do NOT join. We’re starting the split in the middle.
Row 28: Turn, stacked sc (counts as dc here and for remainder), ch-5, dc3tog using next 3 dcs, ch-5, * dc in next sc, ch-5, dc3tog using next 3 dcs, ch-5 * repeat between * * around. Dc in same as beg st. Do not join here or for remainder. (16, 17, 18, 20, 22, 24, 25, 26, 28) Leaves
Row 29: Turn, stacked sc, dc in same, ch-5, sc in next st, ch-5, * 3dc in next dc, ch-5, sc in next st, ch-5 * repeat between * * around. 2dc in final st. (15, 16, 17, 19, 21, 23, 24, 25, 27) Leaves
Row 30: Turn, stacked sc, dc in next st, ch-5, sc in next sc, ch-5, * dc in each of next 3 dcs, ch-5, sc in next sc, ch-5 * repeat between * * around, dc in final 2 sts. (15, 16, 17, 19, 21, 23, 24, 25, 27) Leaves
Row 31: Ch-1, turn, dc2tog, ch-5, * dc in next sc, ch-5, dc3tog using next 3 dcs, ch-5 * repeat between * * around, dc in next sc, ch-5, dc2tog. (15, 16, 17, 19, 21, 23, 24, 25, 27) Leaves
Row 32: Ch-1, turn, sc in first st, ch-5, 3dc in next st, ch-5, * sc in next st, ch-5, 3dc in next st, ch-5 * repeat between * * around. Sc in final st. (16, 17, 18, 20, 22, 24, 25, 26, 28) Leaves
Row 33: Ch-1, turn, sc in first st, ch-5, dc in each of next 3 dcs, ch-5, * sc in next sc, ch-5, dc in each of the next 3 dcs, ch-5 * repeat between * * around, sc in final st. (16, 17, 18, 20, 22, 24, 25, 26, 28) Leaves
Row 34: Turn, stacked sc, ch-5, dc3tog using next 3 dcs, ch-5, * dc in next sc, ch-5, dc3tog using next 3 dcs, ch-5 * repeat between * * around. Dc in final st. (16, 17, 18, 20, 22, 24, 25, 26, 28) Leaves
Rows 35 through (73) or to desired length: repeat rows 29 through 34 in order. Fasten off and weave in ends.
Top Right (as worn):
Attach at the center waistband, directly above the skirt slit, with sl st.
Row 1: Ch-1, sc in each row end around. Join to first st with sl st. (160, 170, 180, 200, 220, 240, 250, 260, 280)
Row 2: Ch-1, do not turn, 2dc in first st, ch-5, sk-4 sts, * sc in next, ch-5, sk-4 sts, 3dc in next st, ch-5, sk-4 sts, * repeat between * * (3, 3, 3, 4, 4, 5, 5, 5, 6) more times. Sc in next st, ch-5, sk-4 sts, 2dc in next st. (4, 4, 4, 5, 5, 6, 6, 6, 7) Leaves
Row 3: Turn, stacked sc, dc in next st, ch-5, * sc in next sc, ch-5, dc in each of next 3 dcs, ch-5 * repeat between * * (3, 3, 3, 4, 4, 5, 5, 5, 6) more times. Sc in next sc, ch-5, dc in each of final 2 sts. (4, 4, 4, 5, 5, 6, 6, 6, 7) Leaves
Row 4: Ch-1, turn, dc2tog, ch-5, * dc in next sc, ch-5, dc3tog using next 3 dcs, ch-5 * repeat between * * (3, 3, 3, 4, 4, 5, 5, 5, 6) more times, dc in next sc, ch-5, dc2tog in final 2 sts. (4, 4, 4, 5, 5, 6, 6, 6, 7) Leaves
Row 5: Ch-1, turn, sc in first st, * ch-5, 3dc in next st, ch-5, sc in next st * repeat between * * across. (5, 5, 5, 6, 6, 7, 7, 7, 8) Leaves
Row 6: Ch-1, turn, sc in first st, *ch-5, dc in each of next 3 dcs, ch-5, sc in next st * repeat between * * across. (5, 5, 5, 6, 6, 7, 7, 7, 8) Leaves
Row 7: Turn, stacked sc, * ch-5, dc3tog using next 3 dcs, ch-5, dc in next sc * repeat between * * across. (5, 5, 5, 6, 6, 7, 7, 7, 8) Leaves
Row 8: Turn, stacked sc, dc in same st, ch-5, * sc in next st, ch-5, 3dc in next st, ch-5 * repeat between * * (3, 3, 3, 4, 4, 5, 5, 5, 6) more times. Sc in next st, ch-5, 2dc in final st. (4, 4, 4, 5, 5, 6, 6, 6, 7) Leaves
Rows 9 through (56, 56, 56, 56, 56, 62, 62, 62, 62): repeat rows 3 through 8 in order.
Rows (57, 57, 57, 57, 57, 63, 63, 63, 63) through (61, 61, 61, 61, 61, 67, 67, 67, 67): Repeat rows 3 through 7 in order
Row (62, 62, 62, 62, 62, 68, 68, 68, 68): Ch-1, turn, sc in first st, * ch-4, sc in next st * repeat between * * across.
Fasten off leaving a long enough tail for sewing into place.
Top Left (as worn):
Looking down at the completed portion, count (51, 51, 51, 61, 61, 71, 71, 71, 81) sts to the right of the “center” and attach your hook to start the second panel.
Complete it exactly as the “Top Right”, starting with row 2.
Construction:
Each side will overlap by (22, 17, 12, 22, 12, 22, 17, 12, 22) sts at the underarm when constructed. Plot them out with stitch markers and then sew using the long tail.
For the seaming of the front and back, first “pin” the two tops (left and right) together. Sew row-end to row-end, up to the desired height. I sewed the back a bit higher than I did the front. You could alternately use a drawstring closure and lace it like a shoe. That would be gorgeous with beads on the ends!
I can’t wait to see yours! Be sure to tag @HeartHookHome across all social media, or share in the Heart Hook Home Crochet Community on Facebook.
More tutorials for you:
How to Fix a Dropped Stitch in a Round of Tunisian Crochet
Apache Tears Crochet Stitch Tutorial