Slip Stitch Stocking Cap Pattern
This post may contain affiliate links, meaning that I may earn a small commission if you make a purchase. See our disclosure policy for more information.


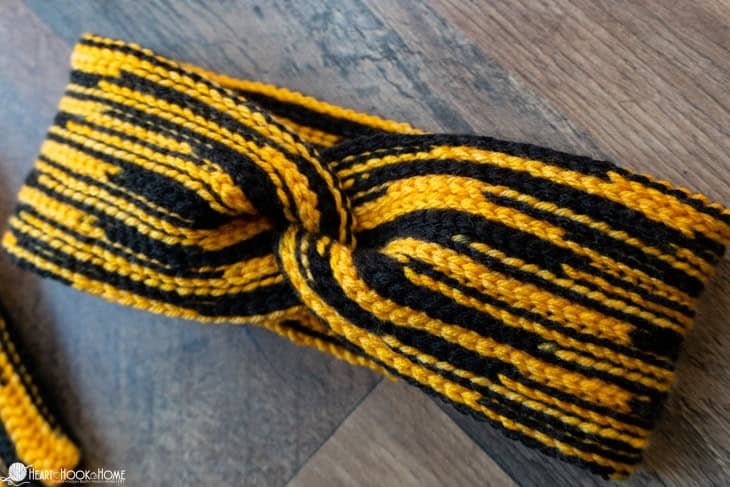
One of the best ways to make a crocheted hat look hand knit? Make it using the Slip Stitch! This crocheted hat looks knit. It is super stretchy and great for showcasing color changing yarn.

Slip Stitch Stocking Cap Pattern
My boyfriend recently asked for a new, tight-fitting beanie. We found the perfect yarn in the colors of our favorite local team, Wichita State University. This new, adult size crochet beanie uses less than one skein of yarn. Awesome!

After trying different stitches I decided the best way to show off those yarn color changes, while also making a nice, snug beanie, is to use the Slip Stitch. This creates a super stretchy fabric that is excellent for cold weather and the way the slip stitches line up with these color changes almost makes them look like wheat stalks. Too cool!
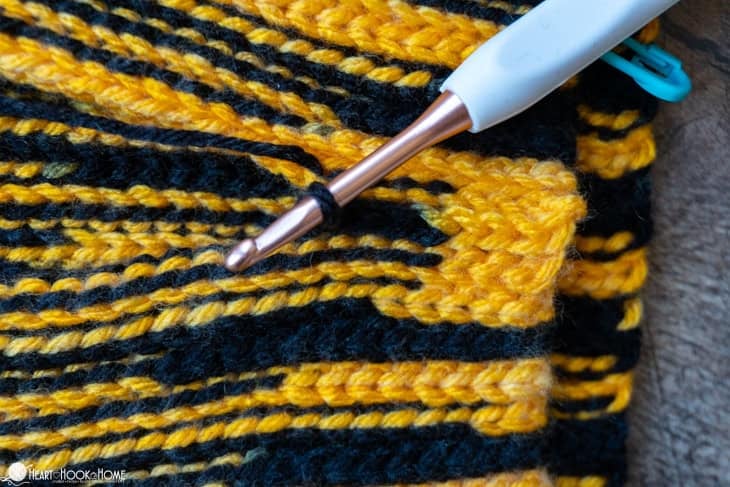
One of the best ways to get a crocheted beanie to look knit? Make those slip stitches in the Back Loop Only!
I will not pretend that this is a fun or quick stitch to make. Because of the slip stitches it is slow going and a labor of love, but then again it’s only a hat and worth the time and patience for someone you love!

For this pattern I used the Uptown Worsted yarn in the Spirit Stripes colorway. I am not finding it readily available online, but there is an MVP line of Herrschners Worsted yarns that would be an excellent substitute. I ordered a Kansas City Chiefs colorway to make another one with that yarn (Chrismon and Gold) so I’ll keep you posted!
Of course you could also make it using a solid color of worsted yarn as well.

Materials:
Worsted yarn (MVP Worsted would work nicely!)
-approx. 180 yards for adult
Crochet hook in size G/4mm or size needed to obtain gauge
Gauge: 21 sts and 34 rows = 4” square using Slip Stitches in Back Loop Only
Pattern Notes:
Pattern written using US terms.
The chain at the beginning of the row does not count as a stitch.
If you need help reading a crochet pattern, make sure you head over here and check out this detailed post.
Abbreviations:
Ch(s): Chains
BLO: Back Loop Only
Sl st: Slip stitch
Sc2tog: Single Crochet Two Together
St(s): Stitches
Ldc: Linked Double Crochet
Ldc2tog: Linked Double Crochet two Together
Wanna save this for later?
Pattern:
Row 1: Ch-41, sl st in BLO of 2nd ch from hook and in BLO of each to end. (40)
Rows 2 through (112): Ch-1, turn, sl st in BLO of each st to end. (40)
Seam to first row by slip stitching stitch for stitch. Change to solid color yarn (if desired) and rotate to close the top of the beanie.

Crown:
Round 1: Ch-1, sc2tog over every other row end. Repeat around. Join to first st. (28)
Round 2: Ch-2, Dc in next,* Ldc2tog, Ldc in next * repeat between * * around. Join to top of first st. (19)
Round 3: Ch-2, Ldc2tog, * Ldc in next, Ldc2tog * repeat between * * around, Ldc2tog in final two sts. Join to top of first st. (12)
Fasten off leaving a long enough tail to chinch up the hole and weave in ends.

Brim/edging:
Attach near bottom join/seam…
Round 1: Ch-1, sc in each row end around. Join to top of first st. (112)
Round 2: Ch-1, sc in each st around. Fasten off using Invisible Join. Weave in all ends.

That’s it! Very little shaping, but TONS of stretch. Let us know what you think about this stitch and beanie! When you finish one, be sure to tag @HeartHookHome across all social media, or share in the Heart Hook Home Crochet Community on Facebook.
More hats and beanie patterns:
Aspen Dreams Beanie (Printable Version)
Quick Donation Hat Crochet Pattern
Lattice Love Beanie Crochet Pattern (Infant through Large Adult)