Trunk Cargo Net: Free Crochet Pattern
This post may contain affiliate links, meaning that I may earn a small commission if you make a purchase. See our disclosure policy for more information.


One thing I absolutely love about crochet: the usefulness! I love being able to make things that are helpful to those that I love, or myself, such as this super cool trunk cargo net. Let’s whip one up with this free crochet pattern.

Trunk Cargo Net: Free Crochet Pattern
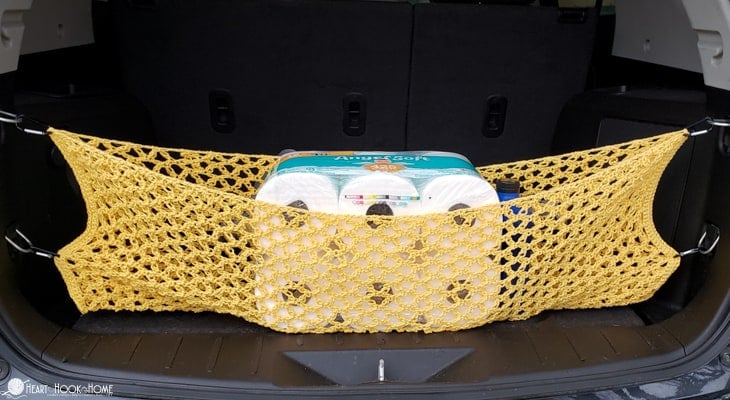
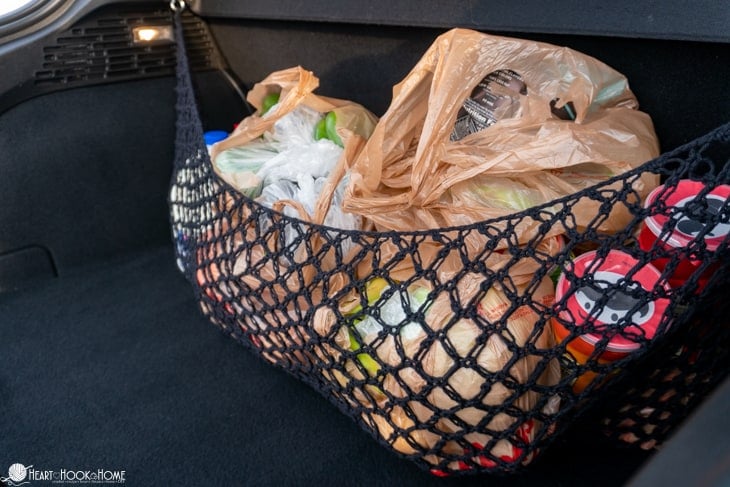
This pattern was born out of necessity. As you may have seen, the reason that I decided to start this 2022 Car Series is because I got a new-to-me car, Fiona. She’s adorable and I love her (and she gets great gas mileage) but one thing drove me nuts. (See what I did there?! Ha!) Whenever I’d put groceries in the back they’d slide all over. Not any more!

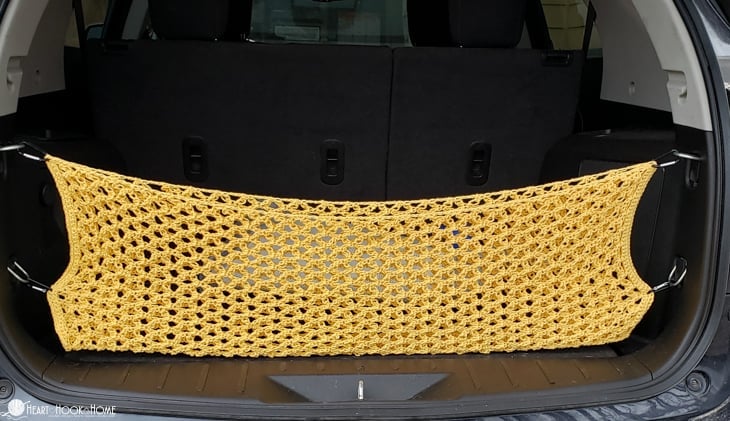
This Car Trunk Net crochet pattern can be made one of two ways: either a single, smaller rectangle with carabiners at each corner OR twice as tall so you can fold it over (like a taco). I definitely recommend going and looking in the vehicle for which your net will be made to determine which version of the pattern will work best for you.


Materials:
Dishie cotton – approx. 220 yards for the smaller net and 450 yards for the larger/folded net
*any 100% worsted weight cotton would suffice if you’re stash busting
Crochet hook in size H/5mm AND size G/4mm
(2) or (4) Carabiners depending on your vehicle
Pattern Notes:
Pattern written in US terms.
If you need help reading a crochet pattern, make sure you head over here and check out this detailed post.
Tr = Treble Crochet (tutorial here)
Fsc = Foundation Single Crochet (tutorial here)
For this pattern we are using the Solomon’s Knot stitch – also known as the Lover’s Knot stitch. Abbreviated as “Lk” (Lover’s Knot) instead of “Sk” because the Sk looks too similar to “skip” in crochet terms.
Find a tutorial for the Solomon’s knot here. In fact, if you just follow along with the video changing only the number of stitches in the initial single crochet row, that’s basically a video tutorial for this pattern. I do plan to record a dedicated video for this pattern and that will be out as soon as possible on the Heart Hook Home YouTube channel!
Finished Dimensions:
Smaller Rectangle: approx. 14″ tall and 39″ wide.
Folded Over Rectangle: approx. 28″ tall (before folded) and 39″ wide.
If you need yours to be taller (or shorter) or wider (or more narrow), make the following adjustments:
1. To adjust the height of your car net add or remove stitches from the first row in multiples of FOUR. Each set of four stitches added or removed will adjust the height by about 1″ (before stretching).
2. To adjust the width of your car net add or remove rows from the pattern in multiples of TWO. Measure as you go, gently stretching while you do so.
Have questions about sizing? Just ask!

Wanna save this for later?

Pattern for smaller net:
Using the H/5mm hook…
Row 1: Fsc-(49) (or ch-50, sc in 2nd ch from hook and in each to end.) (49)
Switch to the G/4mm hook for main portion…
Row 2: Ch-1, turn, sc in first stitch, * Lk two times, sk-3 sts, sc in next * repeat between * * to end. (12 Lk sets)
Row 3: Ch-4, Lk one time, turn. Sc in the center sc of first Lk pair. * Lk two times, sc in center sc of next Lk pair * repeat between * * to end. Lk one time, Tr in last st. (11 full Lk sets & 2 half sets)
Row 4: Ch-1, turn, sc in first st. * Lk two times, sc in center sc of next Lk set * repeat between * * to end, sc in top of ch-4. (12 Lk sets)
Rows 5 – 50: alternate rows 3 & 4
Row 51: repeat row 3 (11 full Lk sets & 2 half sets)
Switch back to the H/5mm hook for the remainder…
Row 52: Ch-1, turn, sc in first st, * ch-3, sc in center sc of next Lk set * repeat between * * 10 more times. Ch-3, sc in 4th ch from turning chain of previous row. (49)
Row 53: Ch-1, turn, sc in each st/ch to end. (49)
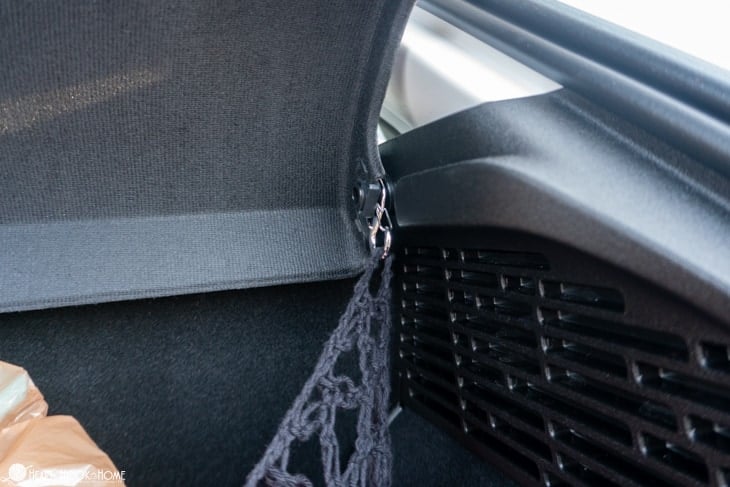
Fasten off and weave in all ends. Hook your carabiner into the corresponding corners and attach to the rings in your trunk.
Pattern for larger/folded net:
Using the H/5mm hook…
Row 1: Fsc-(101) (or ch-102, sc in 2nd ch from hook and in each to end.) (101)
Switch to the G/4mm hook for main portion…
Row 2: Ch-1, turn, sc in first stitch, * Lk two times, sk-3 sts, sc in next * repeat between * * to end. (25 Lk sets)
Row 3: Ch-4, Lk one time, turn. Sc in the center sc of first Lk pair. * Lk two times, sc in center sc of next Lk pair * repeat between * * to end. Lk one time, Tr in last st. (24 full Lk sets & 2 half sets)
Row 4: Ch-1, turn, sc in first st. * Lk two times, sc in center sc of next Lk set * repeat between * * to end, sc in top of ch-4. (25 Lk sets)
Rows 5 – 50: alternate rows 3 & 4
Row 51: repeat row 3 (24 full Lk sets & 2 half sets)
Switch back to the H/5mm hook for the remainder…
Row 52: Ch-1, turn, sc in first st, * ch-3, sc in center sc of next Lk set * repeat between * * 23 more times. Ch-3, sc in 4th ch from turning chain of previous row. (101)
Row 53: Ch-1, turn, sc in each st/ch to end. (101)
Fold in half, sc together. Attach at opposite side and do the same. Fasten off and weave in all ends. Hook your carabiner into the corresponding corners and attach to the rings in your trunk.
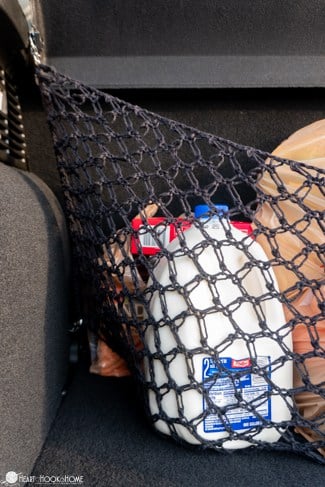
Note that the net will stretch significantly but the sides should stay mostly rigid. I love how quickly this works up and how practical it is.
Will you stash bust to make yours, and if so… what color will you use? I do hope you’ll share a photo with me by tagging @HeartHookHome on all social media and in the Heart Hook Home Crochet Community on Facebook. ♥


10 Comments