Yoga Mat Bag Free Crochet Pattern
This post may contain affiliate links, meaning that I may earn a small commission if you make a purchase. See our disclosure policy for more information.

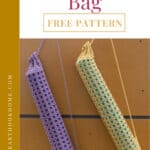
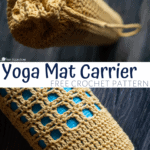
Are you into yoga? If you crochet and attend regular yoga classes, you’ll love this free yoga mat bag crochet pattern! This crochet yoga case fits an average size yoga mat and has a drawstring cord that doubles as a strap. I feel fancy already.

Yoga Mat Bag Free Crochet Pattern
I’ve recently started attending a “stretch and strength” class at my local gym/recreation center. Twice a week I carry in my yoga mat, all rolled up under one arm, ready to conquer the day. My yoga mat was feeling a bit neglected and since I cover everything else I own in yarn, I figured I should whip up a yoga mat carrier crochet pattern too. 😉 I hope you love it!

yoga mat bag dimensions:
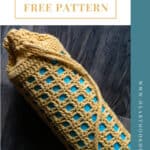
Approximately 14″ circumference and 25″ in length. This bag is intended to fit “average” size yoga mats, which are generally 24″ wide and 68″ long. There is an ad-free, PDF version available on Ravelry.

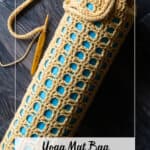
When the drawstring is fully open, the strap is taut. When you pull the strap to sling it over your shoulder, the drawstring cinches automatically and makes the strap the perfect length.

This crochet yoga mat bag is worked using the Grid Stitch, similar to what we used to make the Grid Cardi.

I am using my favorite cotton yarn: Dishie. The colorway pictured here is Creme Brulee and is absolutely delicious. I love the vibrancy of this cotton yarn!

Stitches used:
You will also need to know how to make an I-cord. I-cords are not difficult to make, but if you’re more comfortable making a foundation half double crochet, you could use that for the strap instead.

Yoga Bag Materials:
Cotton Yarn (Dishie used)
-approx. 275 yards total
Crochet hook in size G/4mm
Gauge:
16 dc sts = 4”
Pattern Notes:
BLO = Back Loop Only
Pattern written using US terms.
If you need help reading a crochet pattern, make sure you head over here and check out this detailed post.
Only turn on the “bag body” portion, do not turn on the solid dc rows.
Pattern:
Bag bottom:
Round 1: Magic Circle. Ch-1 (does not count as a st), 10 dc in circle. Join to first dc. (10)
Round 2: Ch-1, 2dc in each st around. Join to first dc. (20)
Round 3: Ch-1, * dc in next, 2dc in next * repeat between * * around. Join to first dc. (30)
Round 4: Ch-1, * dc in next 2 sts, 2dc in next * repeat between * * around. Join to first dc. (40)
Wanna save this for later?
Round 5: Ch-1, 2dc in first st, * dc in next 3 sts, 2dc in next * repeat between * * around, placing 2dc in each of last 2 sts. Join to first dc. (52)
Round 6: Ch-1, dc in BLO of each st around. Join to first dc. (52)
Rounds 7 – 10: Ch-2, dc in each st around. Join to first dc. (52)

Bag body:
Round 11: Ch-5 (counts as dc + ch-2) do not turn, sk-2 sts, * dc in next 2 sts, ch-2, sk-2 sts * repeat between * * eleven more times, dc in last. Join to third ch from beg. ch. (52)

Round 12: Ch-1, turn, sc in first st, ch-2, * sk-2 chs, sc in next 2 sts, ch-2 * repeat between * * eleven more times, sc in last st. Join to first sc. (52)
Round 13: Ch-3 (counts as dc), turn, dc in next st, ch-2, sk-2 chs, * dc in next 2 sts, ch-2, sk-2 chs * repeat around. Join first dc. (52)
Round 14 – 55: alternate rows 12 & 13 twenty one more times. (52)
Bag top:
Rounds 56 – 59: Ch-2, do not turn, dc in each st around. Join to first dc. (52)

Round 60: Ch-2, do not turn, * dc in next 3 sts, ch-1, sk-1 * repeat between * * around. Join to first dc. (52)
Rounds 61 – 62: Ch-2, do not turn, dc in each st around. Join to first dc. (52)
Fasten off using Invisible Join and weave in all ends.
Strap:
Make an I-cord. When it gets to about 36” long, mark 16” from the beginning with stitch marker and feed it through the drawstring holes as pictured.


Sew securely where marked so that you have a 16” drawstring loop. You should have about 20” of I-cord left.

Check to see if that strap length is good for you before securely sewing to the top of round 10 (the last round of “bag bottom”). You can make it as long or as short or as long as you like. Weave in all ends.
That is all there is too it, folks! Now all that’s left is to namaste. Please share a photo with me by tagging @HeartHookHome on Instagram and Twitter, or share in the Heart Hook Home Crochet Community on Facebook.
You’ll also like:
How to Make Your Own Homemade Swiffer Cleaning Solution
How to Make Homemade Laundry Detergent (Read About HE Safety)


8 Comments