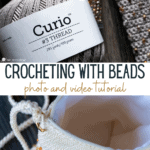
3 Ways to Add Beads to Crochet
This post may contain affiliate links, meaning that I may earn a small commission if you make a purchase. See our disclosure policy for more information.

Are you looking to add beads to your next crochet project? There are many ways to add beads when crocheting. Today we’ll discuss several different methods, and why some are preferred over others. Let’s learn how to crochet with beads!

How to Add Beads to Crochet
Crocheting with beads can be a tedious adventure, but it doesn’t have to be. I know when I first tried I was overwhelmed and abandoned several projects. How do you pre-string the beads (or do you?!) and in what order? Or do you just add them one at a time? Would it be easier to add the beads after the fact?


In truth, whatever produces the end result that you are happiest with is the correct answer. That being said, I definitely have my own preferred method, which we will dive into today.

Let’s make learning how to bead as painless as possible!

First, let’s talk about the different ways to add beads to crochet, whether that is after the fact or while you’re actually crocheting the project. Both have their merits, and make sure to watch my favorite method including a full VIDEO tutorial below.

Ways to add beads to yarn
There are multiple ways to add beads to yarn in order to incorporate them into your next crochet piece. How you add the beads also changes the way the beads lay. For instance, some methods make the beads stand diagonally (as when you pull the pre-strung bead to the back of the crochet fabric before completing your stitch), and another method makes the beads lay horizontally against the crochet stitches (as seen in the video below), and by sewing the beads on after the fact with needle and thread (method #1 below), you can make the beads lay any ol’ which way you like.

For adding the beads you can either:
1. Sew beads on after the fact.
Adding the beads after you’re finished crocheting the project requires the use of needle and thread, which can be beneficial in some ways and tedious in others. For example, if you’re using very small beads that have a small opening that the yarn would not fit through, but a beading needle or regular needle and thread would. Depending on how many beads you’re adding, this could be the answer for you. Use a thread color closest to your yarn color for best results.
2. Add beads as you go.
Add the beads individually as you crochet each beaded stitch of your project. For this you will need a teeny tiny steel crochet hook (like this one) and beads with a large enough hole, or opening, to pull both the doubled up yarn (or crochet thread) and the hook through.


To do this, pull the loop a bit taller than normal. Put a bead on your tiny hook, grab the yarn and pull it through the bead. Then re-insert the regular crochet hook to complete the stitch.


3. Pre-string the beads.
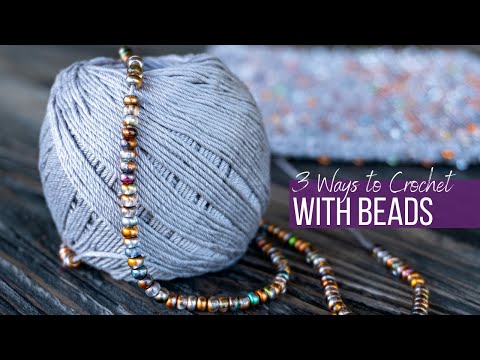
For this you will take the yarn, or crochet thread, and string as many beads as needed for your project. You can either add them in the color sequence needed (which will require plenty of planning) or you can add them randomly and let the bead colors fall where they may. I prefer to find a bead mix that I love and just string the beads on randomly. You can string the beads by hand (which can be tedious) or with a bead loader tool like this one. (I demonstrate this in the video below)
Note! It may be beneficial to make sure your yarn has no factory knots before stringing all of your beads. If you encounter a knot, you’ll have to remove all of the beads, clip the knot, and restring before continuing on.
Wanna save this for later?


How to choose the beading method for you:
First, you’ll want to think of the material you are using to make your crochet project. Are you using actual yarn, or are you using crochet thread? The real question is: How delicate is the fiber?
If you are using a yarn that is thinner you probably don’t want to pre-string your beads. The weight of the beads sliding back and forth, and the friction of pushing them down, will start to wear on the yarn and make it more liable to break.
If you’re not sure where you want the beads, adding them with the needle and thread after the fact will probably be your best option. (method #1)
If you are using a thinner or more delicate yarn/thread, you will most likely want to add the beads individually as you go. (method #2)
If you are using a crochet thread that has been mercerized (treated for durability) pre-stringing may be just the ticket! (method #3)
When you’re ready to start a new project with beads, I encourage you to try the Cross-Body Bead Bag pattern pictured in this post. It only requires single crochet and not much crochet thread!

My go-to combination for crocheting with beads is Curio #3 crochet thread (“Whisker” colorway pictured) with size 6/0 Seed Beads that are pre-strung using my Spin N Bead Jr. Bead Loader.
And now for the video tutorial showcasing each of these three main ways for adding beads to crochet. Find the Cross-Body Bead Bag purse pattern I’m working on in the video right here on Heart Hook Home. ♥
In this video…
Method #1 starts at 1:00
Method #2 starts at 1:56
Pre-stringing the beads starts at 5:24
Pre-string method #1 starts at 9:50
Pre-string method #2 starts at 11:10
More fun crochet techniques:
Shrink Film Stitch Markers Tutorial + Free SVG
How to Add a Zipper and Lining to a Crochet Bag
3 Reasons to Use Pantyhose in Crochet


7 Comments