Tunisian Crochet Waffle Stitch Tutorial
This post may contain affiliate links, meaning that I may earn a small commission if you make a purchase. See our disclosure policy for more information.
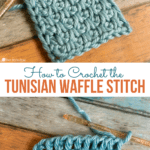
The Tunisian Waffle stitch gives great texture to your next Tunisian project. By alternating two kinds of Tunisian stitches, we are able to create a fun pattern that works up quickly. Let’s learn this Tunisian Waffle stitch with this video tutorial.

Tunisian Crochet Waffle Stitch Tutorial
Tunisian stitches are so fun to crochet. You’ll work all of the stitches onto your hook, then knock them off one by one.
In order to crochet Tunisian, you’ll need a Tunisian crochet hook – typically in a size or two larger than what you would use for regular crochet.
For the Tunisian Waffle Stitch you need to know how to make a Tunisian Simple Stitch (TSS) and how to make a Tunisian Slanted Stitch (TSLS).
The Tunisian Slanted Stitch is basically the Tunisian Simple Stitch, but instead of inserting your hook right to left to pull up the loop, you’ll insert the hook from left to right. This is better explained in the VIDEO tutorial below.
This stitch uses a two-row repeat. Alternate those two rows back and forth until the piece is as tall as it needs to be.
To start the Tunisian Waffle Stitch:
1. Chain an even number of chains.

2. Forward pass: Pull up a loop in the 2nd chain from the hook and in each chain to the end of the row.

3. Backward pass: Yarn over and pull through one loop. (This is the side of the last stitch.) Yarn over and pull through two loops. Yarn over and pull through two loops… all the way to the end of the row.

First actual Waffle Stitch row…
4. Starting with a Tunisian Simple Stitch, alternate Tunisian Simple and Tunisian Slanted stitches to the end of the row.


The Tunisian Slanted Stich is worked the same way as a Tunisian Simple stitch, but instead of inserting your hook from right to left to pull up that loop, you’ll insert the hook left to right. It does feel wrong and it will take some practice and I find it helps to rotate the work counter-clockwise.

Wanna save this for later?
You should end this row with a Tunisian Slanted Stitch.
5. Backward pass: Yarn over and pull through one loop. (This is the side of the last stitch.) Yarn over and pull through two loops. Yarn over and pull through two loops… all the way to the end of the row.

Second Waffle Stitch row…
6. Starting with a Tunisian Slanted Stitch, alternate Tunisian Slanted and Tunisian Simple stitches to the end of the row. You should end this row with a Tunisian Simple Stitch.

7. Backward pass: Yarn over and pull through one loop. (This is the side of the last stitch.) Yarn over and pull through two loops. Yarn over and pull through two loops… all the way to the end of the row.

From here on out you’ll alternate how you start each row, one starting with Tunisian Simple, then the next with Tunisian Slanted, then the next again with the Simple. This ensures that the stitches are offset each row, creating the lovely “waffle” texture.

That’s it! How fun is this stitch?! We use this in my NEW beanie, the Tunisian Waffle Beanie.
I hope you love it, and that you’ll share photos of yours with me in the Heart Hook Home Crochet Community on Facebook or by tagging @HeartHookHome across all social media. ♥
More Tunisian Crochet Stitches:
Tiny Clusters Tunisian Crochet Tutorial
Tunisian Smock Stitch Tutorial
Tunisian Crochet Puff Stitch Tutorial
Tunisian Knitling Stitch Tutorial


3 Comments