
2/3T Size On Point Poncho Pattern
This post may contain affiliate links, meaning that I may earn a small commission if you make a purchase. See our disclosure policy for more information.
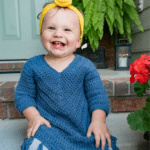
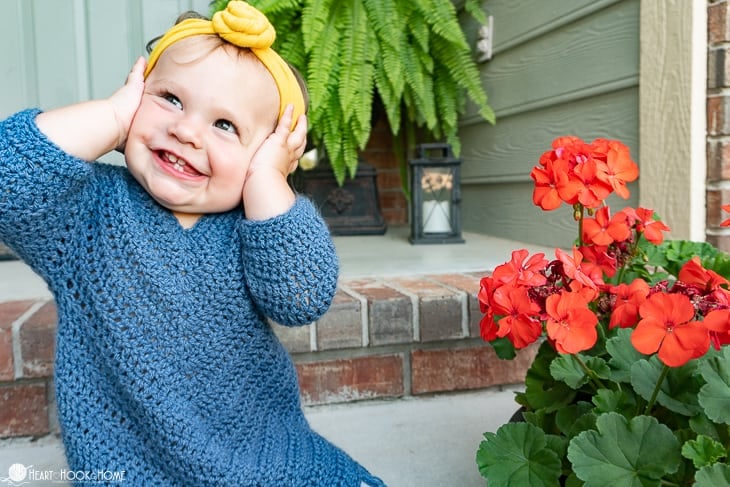
Next up on the list of On Point Poncho pattern sizes: the toddler years! Perfect for little ones wearing 2/3T size clothing, this sleeved poncho is too much fun! Let’s make one with this free pattern.

2/3T Poncho Pattern
There’s something about toddlers and their zest for life that I just can’t get enough of. Almost like your favorite crazy (albeit miniature) aunt, they are willing to try just about anything, they are courageous, and FUN, and cuddly all at the same time. (I’m fairly certain she was licking the flowers here. lol!!) Toddlers with blossoming personalities. Such a fun time!
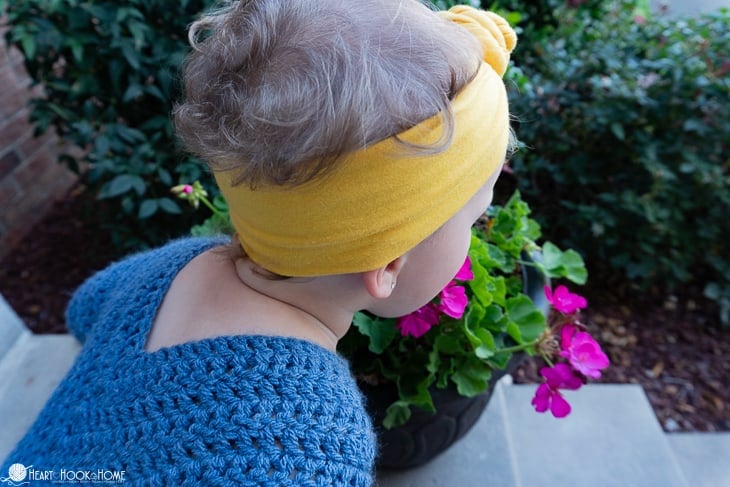
Sizes of this pattern include:

Materials:
Lightweight/Size 3/DK yarn (w/o fringe)
-approx. 325 yards for 2/3T
6mm hook (or size needed to obtain gauge)
Gauge: 12 dc sts x 8 rows = 4”
Pattern Notes:
Start at the top and work your way down.
Pattern starts at the center back and is joined in rounds, turning each row.
Place first stitches of each row in the same space as join. (the ch-2 does not count as a stitch)
Odd numbered rows are “right side” and even numbered rows are “wrong side”. When finished with row 1, you could add a safety pin to remind you which side is which.
Grab the ad-free, printable version of ALL the child sizes bundled together on Ravelry. Thank you!
If you need help reading a crochet pattern, make sure you head over here and check out this detailed post.
2/3T PATTERN:
To see the companion video for this pattern, check the Newborn size here.
Row 1: Ch-52. Join to first ch w/o twisting chain. Ch-2, 3dc in first ch, dc in next 24 sts. 2dc in next st, 3dc in next (Place st marker in center most st) 2dc in next st. Dc in next 24 sts, 2dc in same space as starting sts. Join to top of first dc with sl st. (60)
Row 2: Ch-2, turn, 3dc in first st, dc in each st to marker. 5dc in marked st. Move up st marker to new center (here and throughout pattern). Dc in each st to end, 2dc in same space as starting sts. Join to top of first dc with sl st. (68)
Wanna save this for later?
Rows 3 – 9: Ch-2, turn, 3dc in first st, dc in each st to marker, 5dc in marked st. Dc in each st to end, 2dc in same space as starting sts. Join to top of first dc with sl st. (124 sts at the end of row 9)
ARMHOLES
*note that the center points are smaller from here on out.
Row 10: Ch-2, turn, 2dc in first st, * dc in next 18 sts, ch-1, sk-25 sts, dc in next 18 sts * 3dc in marked st. Repeat between * * one more time. Dc in same space as starting sts. Join to top of first dc with sl st. (80)
BODY
Rows 11 – 14: Ch-2, turn, 2dc in first st, dc in each st to marker, 3dc in marked st. Dc in each st to end, dc in same space as starting sts. Join to top of first dc with sl st. (96 sts at the end of row 14)
Rows 15 – 23: Ch-2, turn, 2dc in first st, * dc in next 21 sts. Dc2tog, dc in next st, dc2tog. Dc in each st to marker * 3dc in marked st. Repeat between * * one more time. Dc in same space as starting sts. Join to top of first dc with sl st. (96)
Fasten off and weave in all ends. If desired, add fringe. Cut yarn in ~6” long strands (so they will be ~3” long when halved), and attach three strands of fringe in every third stitch across the bottom of the last row of the body.
SLEEVES
Attach yarn at center of underarm looking at the INSIDE of the sleeve opening. See pattern notes regarding “right side” and “wrong side”.
Row 1: Ch-2, Dc in same sp. Dc2tog up the side of the dc from the armhole row. Dc in each st around armhole (should be 25 sts there), Dc2tog down the side of the dc from the armhole row. Join to top of first dc with sl st. (28)
Row 2: Ch-2, turn, dc2tog, dc in each st around. Join to top of first dc with sl st. (27)
Row 3: Ch-2, turn, dc in first, dc in each st around. Join to top of first dc with sl st. (27)
Row 4: Ch-2, turn, dc in all but last 2 sts, dc2tog. Join to top of first dc with sl st. (26)
Row 5: repeat row 3 (26)
Rows 6 – 9: repeat rows 2 – 5
Row 10: repeat row 2 (23)
Row 11: repeat row 3 (23)
Row 12: Ch-1, turn, sc in each st around. Join with Invisible Join and weave in all ends.
You. Are. Done! Share a photo of your finished On Point Poncho in the Heart Hook Home Crochet Community on Facebook, or by tagging @HeartHookHome on Twitter or Instagram!
MORE FREE PATTERNS FOR KIDDOS:
Bomber Cardi for Kids (size 2/3T)
Toddler Hoodie Free Crochet Pattern (size 2/3T)
Child Size Summer Vest Crochet Pattern (American Girl, Toddler, Child, Pre-Teen)


Hi I’m making 2/3T poncho. At the beginning 3&9 at the 5 point center, not counting the 5, I’m getting one less stitch after the 5 stitches, at the beginning it’s 3 dc, then 1 dc to center, then 5, 1 dc wit 2 at the end…it makes the back slanted. I’ve been adding one to make it even at each row. I just stopped hoping to get a reply.
Hi there. I’m working on the 2/3 size, the armhole part and it states there should be 80 stitches total. I’m only counting 78, after frogging multiple times. I even calculated on my calculator and it amounts to 78. Please advise.
Does anyone have input??
Hi Jasmine! Are you counting your ch 1’s when creating the armholes? Those are included in the row stitch count.
Ok, that explains the total stitch count, but I also forgot to mention that when doing the first armhole, the first 18 stitches to the center, it takes me past the center part….. i’m counting 16 stitches up to the center…
correction *the 18 stitches after the 25 skip… i’m only counting 17 dcs until the center
??
Without seeing it, I can’t say why you’re only coming up with 17 sts before the centerpoint. I have double-checked the counts and everything is correct. If you haven’t already, re-check the previous row that you have the correct stitch count and that you haven’t accidentally marked the wrong stitch as the center. Other than that you can send an email to support@hearthookhome.com and we can try to get this worked out for you.
I just finished making the 2/3T size and was super bummed that it wouldn’t fit over the head of my average-sized 10 month old. Maybe my stitches were too tight or my yarn not stretchy enough? All the rest seems to look like it would be large on her. I’ve checked the stitch count – do you happen to know how large the opening should end up being so I can see if I can figure out what went wrong?
Hi Sam! The neck hole should be approximately 17.5 inches around. Hope this helps!
Is there an adult version?
Hi Beverly! Yes! You can find that post here: https://hearthookhome.com/on-point-poncho-crochet-pattern/
I want to make a poncho for my daughter, and was searching patterns. And today I saw an email.. poncho pattern from one of my favourite crochet designers I am so glad.. thanks a lot for sharing.
Are the number of double crochets on either side of the “points” supposed to be the same? I’m getting extra stitches after the 5dc in front.
Hi Danita! Yes, each side should have the same number of stitches. If you need extra help, you can send a message to the Heart Hook Home Facebook page or email me and we can try to get it figured out.
Hi, I’ve bought the adult pattern and thought I’d practice with child size first. Can I double check with you about the 1st row of the body section where it says “ch2, ch2” – is this an error? Looking forward to making it
Sorry, I meant the sleeve section
Hi Cathy! Thanks for pointing that out! It is an error and will fix it immediately.
You really are a superstar..just saying..
Can I ask re sizing . Do the numbers ie; 4/6 etc refer to age ? Just bit confused here in UK as wouldn’t class that as youth ?
Thank you can’t wait to get started on this pattern in various sizes .
The sizes like 2T, 3T, sizing, generally follows the age of the child. A 4-6 would fit a child between those ages. Hope this helps.
Hi Valerie! Here in the US child sizes typically coincide with their age…so an average sized 4 year old would wear a child size 4. Hope this helps!