Herringbone Double Crochet Tutorial (Hbdc)
This post may contain affiliate links, meaning that I may earn a small commission if you make a purchase. See our disclosure policy for more information.
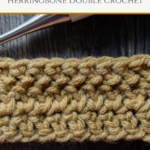


Herringbone crochet stitches are beautiful and a great way to incorporate a little texture into your work. Worked similarly to a regular double crochet stitch, the Herringbone Double Crochet is easy once you get the hang of it. Let’s learn how!

How to Herringbone Double Crochet
The Herringbone Double crochet stitch is abbreviated as Hbdc when used in crochet patterns. If you’ve made the Hedonist’s Housecoat or the Chunky Housecoat pattern, you are familiar with Herringbone crochet stitches. Those patterns both use the Herringbone Half Double Crochet, which is just a slight modification from this stitch. The only difference is one little chain!
The Hbdc stitch is great for blankets, scarves, sweaters, dishcloths… anything your heart desires. What’s great is that with this stitch you can start with ANY number of chains. You can even start with a row of foundation double crochet if you’re unsure of how wide to make your initial chain. Then pick up the herringbone stitch starting at row 2.

To practice this stitch, head on over to my Stitch Sampler Afghan square pattern post. Make it as a dishcloth or join in on the entire afghan pattern.
To make this stitch, you’ll start the stitch just like a regular double crochet. The difference between the two, however, is how you finish the stitch. Let’s take an up-close, in-depth look at the Herringbone double crochet.

You can start your project with any number of chains. There is not multiple of stitches required, nor is there a repeat required for this stitch.
To make the HBDC stitch:
1. Yarn over, insert hook into next stitch and pull up a loop (3 loops on hook)

2. Pull first loop straight through the second (similar to a slip stitch)

Wanna save this for later?
3. Chain one.

4. Yarn over, pull through two remaining loops on hook.

That’s it! How easy is that?! And what a fun texture it creates! To start a new row, chain two, then turn and start working your way down the row starting in the first stitch.

HERRINGBONE DOUBLE CROCHET VIDEO TUTORIAL

More crochet tutorials:
How to Crochet the Bobblet Stitch
Linked Double Crochet Stitch Tutorial


6 Comments