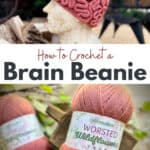
How to Crochet a Brain Beanie
This post may contain affiliate links, meaning that I may earn a small commission if you make a purchase. See our disclosure policy for more information.
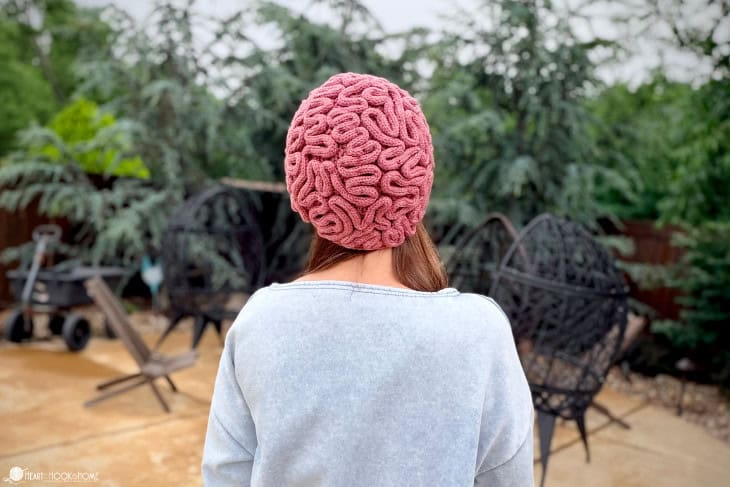
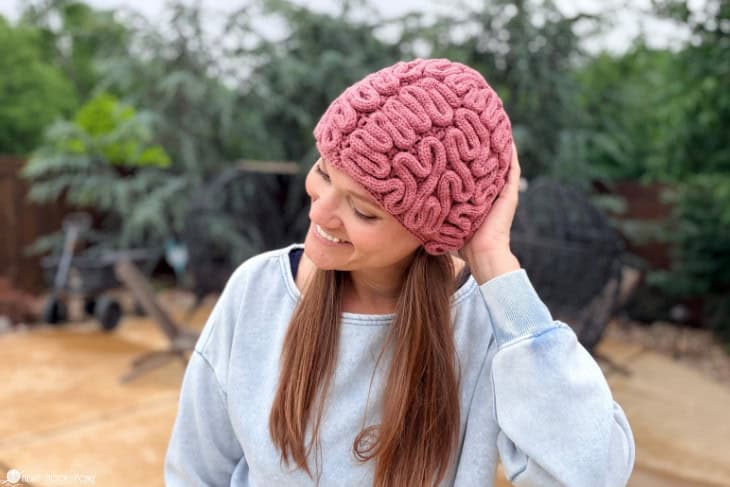
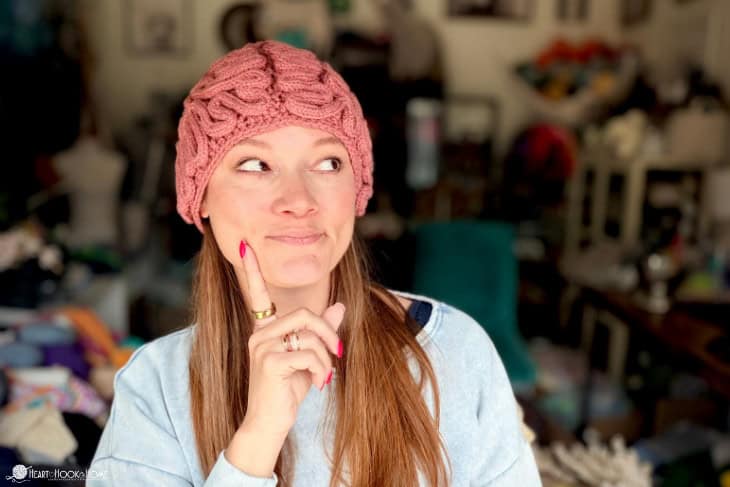
Do you have someone in your life that studies the brain, works in neuroscience, or is interested in psychology? Maybe someone you love has a big brain and you want to celebrate how clever they are. Let’s make a crocheted Brain Beanie using this simple, free pattern!

Free Brain Beanie Crochet Pattern
This hat is the perfect accessory for anyone that enjoys anatomy, works in the medical field, or is super brainy. Or maybe you’re looking for the perfect hat to crochet for a zombie Halloween costume, for science-themed crochet, or you just enjoy making anatomical crochet patterns. This hat starts with a basic beanie using my Master Beanie pattern, then we make a super long i-cord that we attach to the beanie using the same yarn and tapestry needle.
You might be thinking that an i-cord of this length made by hand is prohibitive — and you are 100% correct. That’s why I used my electric i-cord maker to make mine while I enjoyed a cup of coffee and supervised. WINNING! This link gives you a discount from the manufacturer, and there are more inexpensive options on Amazon as well.
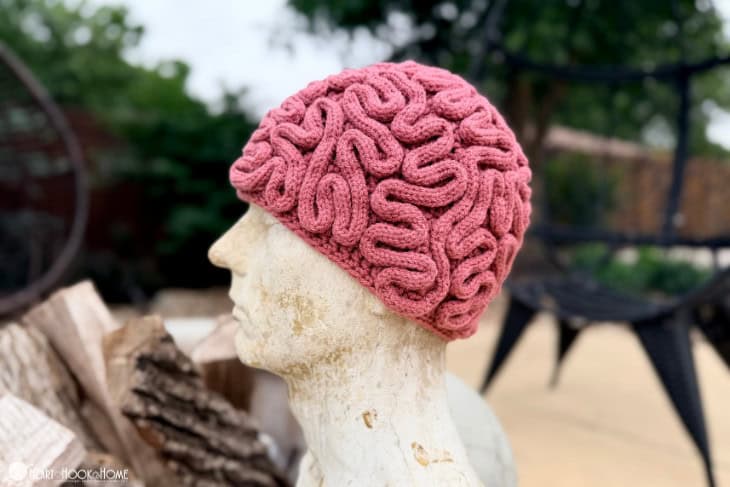
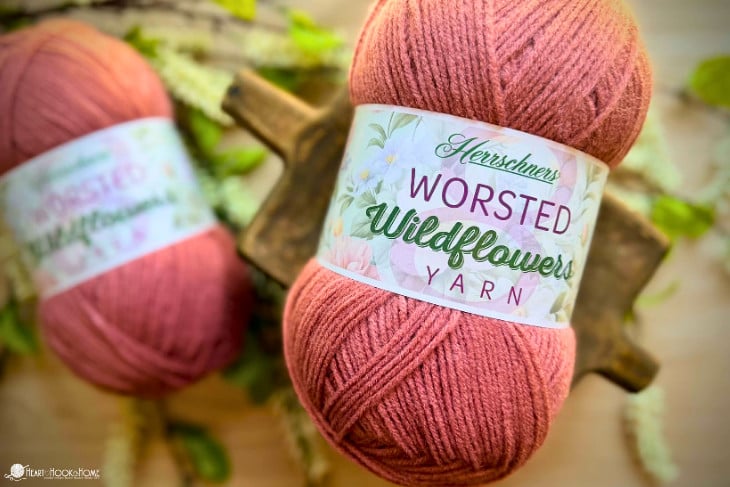
For this pattern I used a “brainy” color that I had in my stash. Very “mauve” if I do say so. I even consulted my sister, the anatomist and professor at St. Louis University for her input. Any worsted weight acrylic yarn close to this dark rosy pink would work well.
I used about 300 yards total for my brain beanie, but given the nature of the i-cord and how that yardage will vary significantly from machine to machine and from person to person, I am recommending you have closer to 400 yards of the yarn – just to be safe. For most major worsted weight yarn brands this will be two skeins.
![]()
If you’re a Herrschners lover you could use just ONE skein of the Worsted 8 yarn, or two the Supreme Worsted would work great as well. The Wildflowers Worsted also has a great color called “Rose Clover” and those skeins are big enough that you’d need just one.
If you’re a WeCrochet lover you could use the “Rose Heather” in the Swish worsted line, or the “Sweet Bing” colorway in the Heatherly Worsted line. That heathered color might make the brain look even more 3-dimensional. Nice!
Crocheting the underlying beanie is the easy part, so let’s do that first. To do so we are using the Master Beanie pattern and taking it to 70 stitches which is a good “adult” size.
Grab the ad-free, printable version of this pattern on Ravelry, Etsy, or right here in the Heart Hook Home Blog Shop. Thank you!
If you need help reading a crochet pattern, make sure you head over here and check out this detailed post.
Materials:
Worsted weight yarn in a “mauve” type colorway (see specific recommendations above)
-approx. 300 yards for completed brain beanie
*BUT I’m recommending you have closer to 400 yards to be safe
Crochet hook in size H/5mm
Mannequin head or bust (a foam one like this is great for pinning)
Sewing pins (these bigger ones are handy for this project)
An i-cord maker is ideal
Gauge: unimportant but 13 sts = 4″ using Double Crochet
Pattern Notes:
Pattern written using US terms.
Magic circle alternative: ch-4, sl st to first ch made to form a circle.
Wanna save this for later?
Abbreviations:
Ch(s): Chains
Sl st: Slip stitch
St(s): Stitches
Sc: Single crochet
Dc: Double Crochet
Pattern:
Row 1: Magic Circle, Ch-1, 10dc in circle. Join to top of first dc with sl st. (10)
Row 2: Ch-2, 2dc in each st around. Join to top of first dc with sl st. (20)
Row 3: Ch-2 * dc in next st, 2dc in next * repeat around. Join to top of first dc with sl st. (30)
Row 4: Ch-2 * dc in next 2 sts, 2dc in next * repeat around. Join to top of first dc with sl st. (40)
Row 5: Ch-2 * dc in next 3 sts, 2dc in next * repeat around. Join to top of first dc with sl st. (50)
Row 6: Ch-2 * dc in next 4 sts, 2dc in next * repeat around. Join to top of first dc with sl st. (60)
Row 7: Ch-2 * dc in next 5 sts, 2dc in next * repeat around. Join to top of first dc with sl st. (70)
Rows 8 through 15: Ch-2, dc in each st around. Join to top of first dc with sl st. (70)
Row 16: Ch-1, sc in each st around. Fasten off using Invisible Join and weave in yarn ends.
Reserving plenty of yarn for sewing later, separate the remaining yarn roughly into two halves. Make two extremely long i-cords. Don’t worry if you end up making it too short. If you need to add to it you can make another shorter one and with careful sewing and placement you won’t be able to tell.
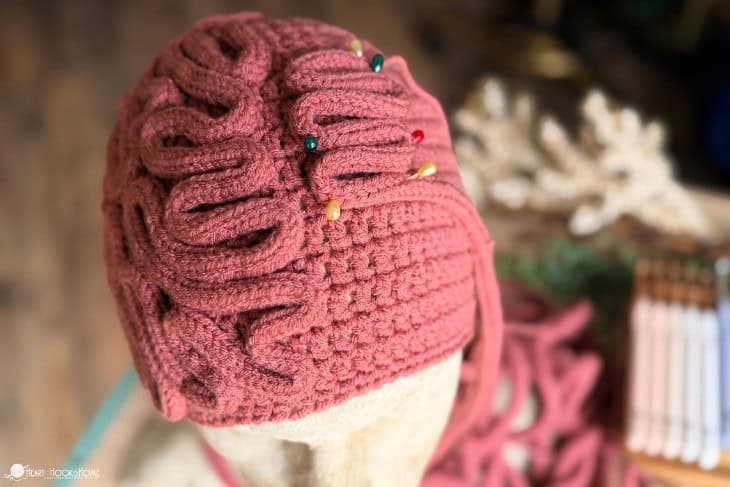
Using the mannequin’s head, pin the i-cord into place, one side of the head at a time. Go back and forth and get the i-cord to lay just so, then use a yarn needle and some of the remaining yarn to sew the i-cord to the beanie. This doesn’t have to be super secure right now (as in stitch-for-stitch) but some strategic stitches will keep the “brain” in place. You can always go back later if there are spots that need more securing.

Sew the brain in place as you go, and when you cover the entire first half of the head, trim the i-cord to the appropriate length and stitch the end down. Move on to the other side of the brain and do the same thing.
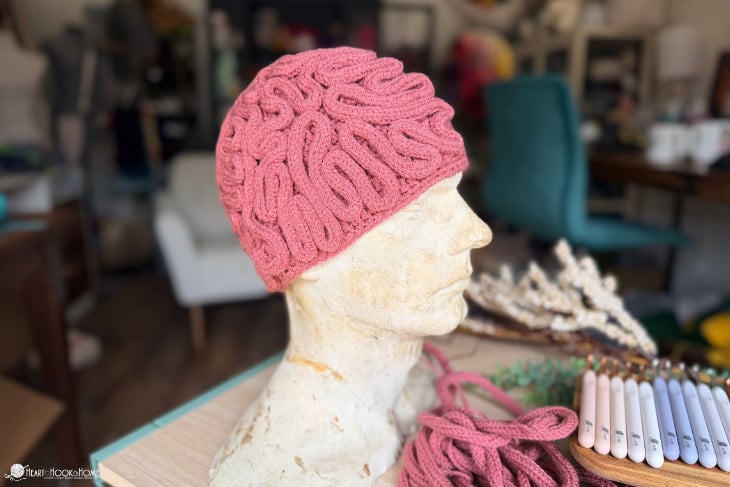
When you’re finished stitching the i-cord into place it’s time to make sure that there aren’t any spots that need reinforcing. Wiggle the brain pieces around a bit and when you find a looser spot, simply add another stitch or two to hold it better in place. Make sure everything is nice and secure, and weave in all straggling ends. You’re finished!
I can’t wait to see yours! Be sure to tag @HeartHookHome across all social media, or share in the Heart Hook Home Crochet Community on Facebook.
More fun patterns:
How to Crochet an Anatomical Heart
Personal Pouch: Free Crochet Pouch Pattern


