Kids Size Marvelous Moss Hooded Tunic Crochet Pattern
This post may contain affiliate links, meaning that I may earn a small commission if you make a purchase. See our disclosure policy for more information.


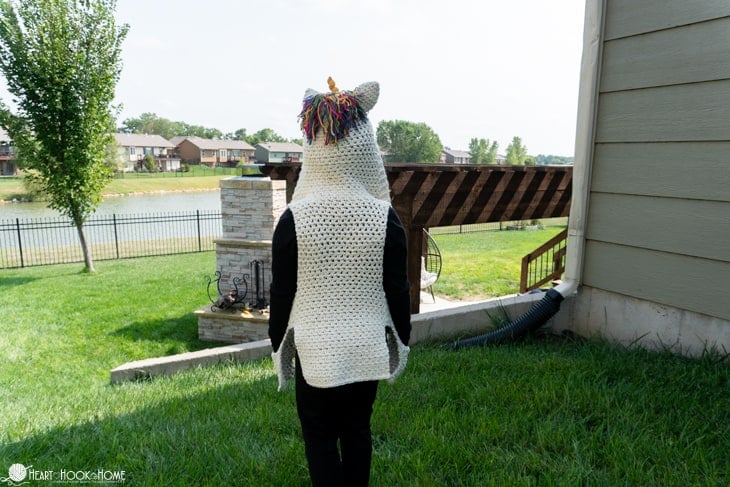
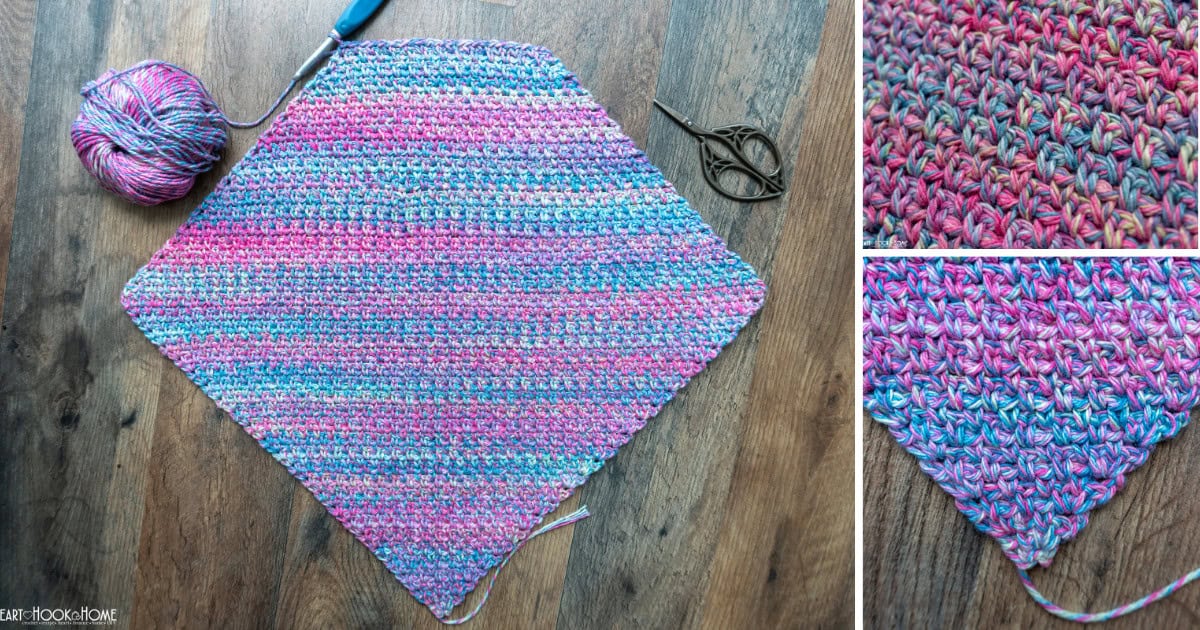
I am so in love with the Marvelous Moss Hooded Tunic. I am so happy that many of you love it, too! I decided to whip up a child size available in Toddler, Small Child, and Large Child so we can have one for our little ones as well.

Kids Size Hooded Tunic
I love how cozy this design is. I love the huge armholes, the hood, and of course the pockets. ♥ There is a free adult size crochet pattern available as well! See the adult in “one size” and “plus size” here.

I intentionally made the body of this design a bit on the short side, knowing that with washing and especially after using the pockets, the garment would lengthen. We don’t want pockets down to our knees! So, if you finish yours and it seems a bit short, give it a wash to soften it up and to help the yarn relax. After wearing it a bit, it should be perfect.
Materials:
Brava Bulky (size 5, bulky weight)
-approx. 300 yards for toddler
-approx. 375 yards for small child
-approx. 590 yards for large child
Crochet hook in size 6.5mm (main body)
Crochet hook in size 6mm (edging only)
Gauge:
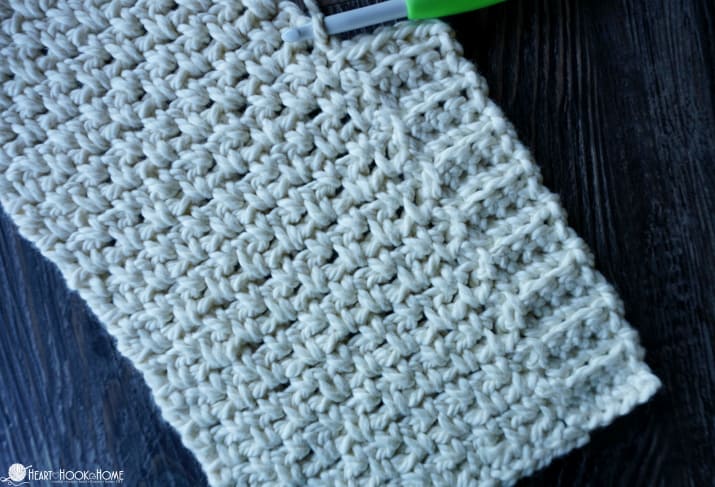
12 Moss sts (meaning 6 chs and 6 scs) x 10 rows = 4” square
Pattern notes:
Pattern written using US terms.
“Right side” is odd numbered rows. “Wrong side” is even numbered rows.
The garment will lengthen after use. (Especially as you use the pockets)
If you need help reading a crochet pattern, make sure you head over here and check out this detailed post.
Sizes:
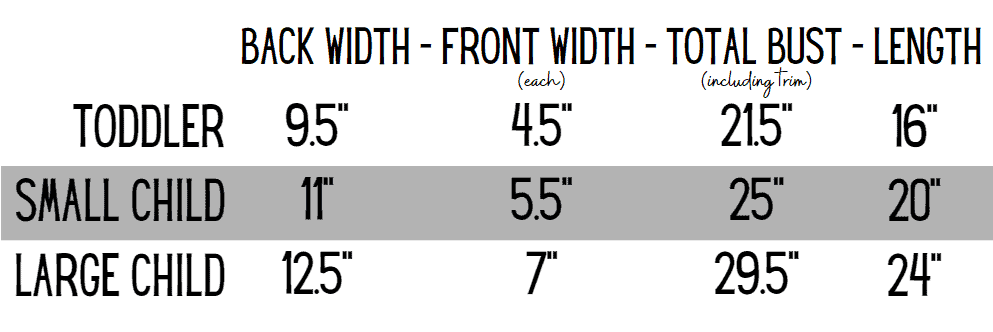
When deciding which size to make, start by measuring the length of the arm. Compare the measurement from shoulder to finger tip, and decide which length would be best for your child. Keep in mind that the garment will “grow” another two inches or so as it is washed and used.
Pattern:
Back:
Using 6.5mm hook…
Row 1: Fsc-(28, 32, 36), or Ch-(29, 33, 37), sc in 2nd ch from hook and in each ch to end. (28, 32, 36)
Row 2: Ch-2 (counts as sc + ch-1 here and throughout), turn, sk-first st, sc in next. * ch-1, sk-next st, sc in next * repeat between * * to end. (29, 33, 37)
Rows 3 – (40, 50, 60): Ch-2, turn, sk first sc, sc in ch-sp. * ch-1, sc in next ch-sp * repeat between * * to end. (29, 33, 37)
Fasten off leaving a ~20” long tail for sewing shoulders.
Fronts:
Make two…
Row 1: Fsc-(12, 16, 20), or Ch-(13, 17, 21), sc in 2nd ch from hook and in each ch to end. (12, 16, 20)
Row 2: Ch-2 (counts as sc + ch-1 here and throughout), turn, sk-first st, sc in next. * ch-1, sk-next st, sc in next * repeat between * * to end. (13, 17, 21)
Rows 3 – (40, 50, 60): Ch-2, turn, sk first sc, sc in ch-sp. * ch-1, sc in next ch-sp * repeat between * * to end. (13, 17, 21)
Fasten off ONE of the fronts only, leaving a ~20” tail for sewing shoulders. Do NOT fasten off the second “front”.

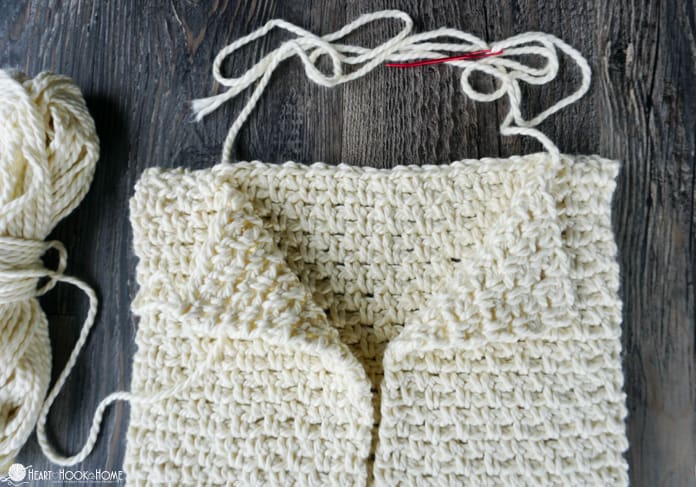
Construction:
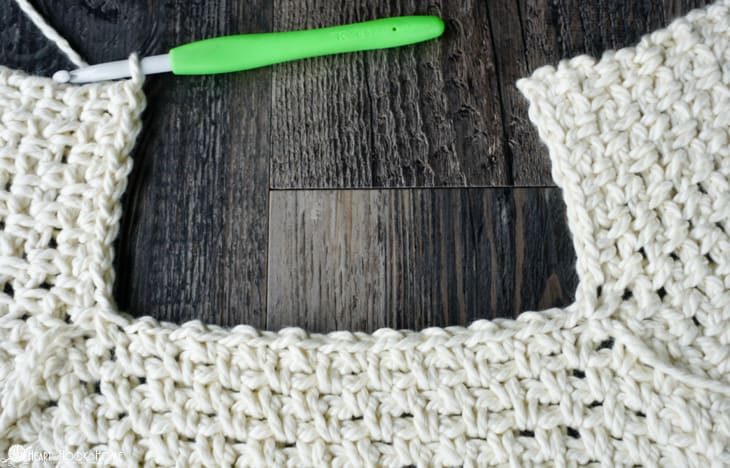
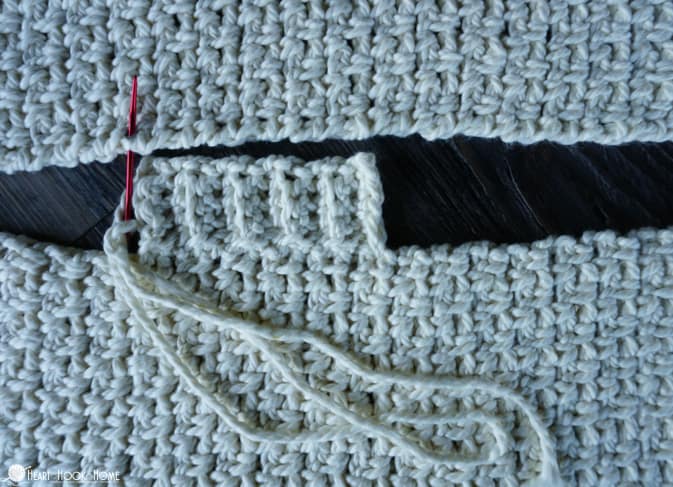
Lay “back” with the “right side” down. (See pattern notes.) Position the two fronts with “right side” up on top of the “back” with the outside corners of each lined up. Place the “front” which still has the working yarn attached on the left and the fastened off “front” on the right. You should have a yarn tail at each top corner and the working yarn should be attached as pictured.

Sew the shoulders shut stitch for stitch for the width of (5, 6, 8) stitches including single crochets and chain stitches. This should leave a total of (8, 11, 13) stitches on both “fronts” and (19, 21, 21) stitches along the neck for a total of (35, 43, 47) stitches.

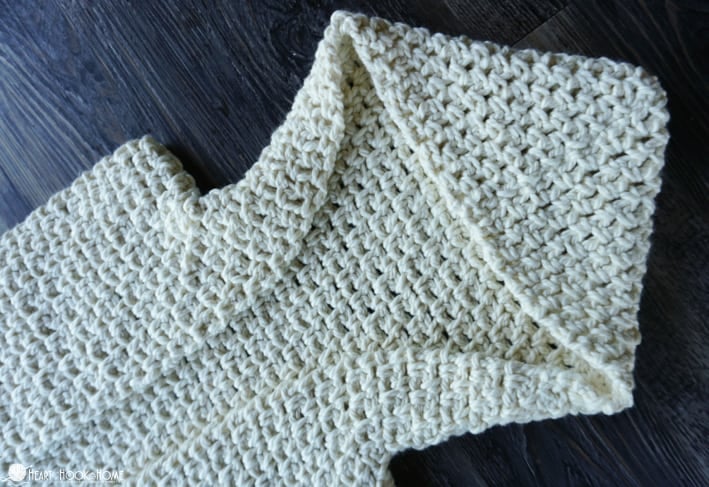
Hood:
Where still attached…
Row 1: Ch-2, turn, sk first sc, sc in ch-sp. * ch-1, sc in next ch-sp * repeat between * * (1, 2, 3) more times. Ch-1, sc2tog using next 2 ch-sps (one ch-sp from “front” and one ch-sp from “back”). Repeat between * * (8, 9, 9) more times. Ch-1, sc2tog using next 2 ch-sps. (one ch-sp from “back” and one ch-sp from “front”). Repeat between * * to the end of the row. (33, 41, 45)

Rows 2 – (24, 30, 34): Ch-2, turn, sk first sc, sc in ch-sp. * ch-1, sc in next ch-sp * repeat between * * to end. (33, 41, 45)
Fasten off leaving a long enough tail to sew the hood shut. Fold hood in half and sew, then weave in all ends.
Wanna save this for later?
Inside Edging (all sizes):
With 6mm hook…
Attach yarn at bottom right (were you wearing the garment) to work UP the inside edge, attaching as you go with sl sts…
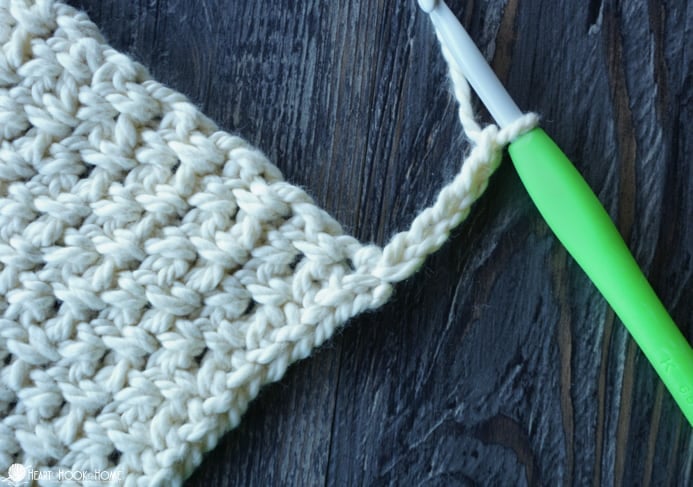
Row 1: Ch-5, sc in 2nd ch from hook and in each to end. Sl st to top of corresponding row on garment. (4)
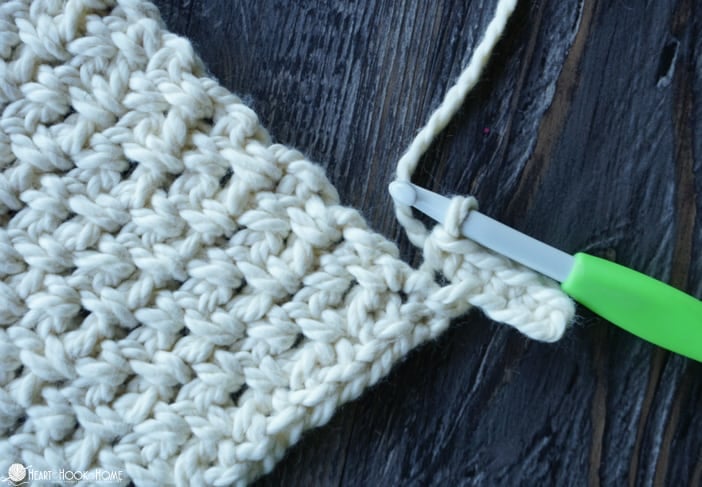

Row 2: Sl st to top of next row on body, turn. Sc in back loop only in first 3 sts, sc in both top loops of last st. (4)

Row 3: Ch-1, turn, sc in back loop only of each st to end. Sl st to top of corresponding row on garment. (4)
Alternate rows 2 & 3 up around the neck and hood and down the other side, ending with a row 3 at bottom left of garment. Weave in all ends.

Sides (all sizes):
With garment laying face down so that you are looking at the back, and still with the 6mm hook… looking at the right edge, count up (14, 18, 22) rows from the bottom and attach with sl st. We’ll do the sides the same as we did for the inside edging, but fewer rows.

Row 1: Ch-5, sc in 2nd ch from hook and in each to end. Sl st to top of corresponding row on garment. (4)
Row 2: Sl st to top of next row on body, turn. Sc in back loop only in first 3 sts, sc in both top loops of last st. (4)
Row 3: Ch-1, turn, sc in back loop only of each st to end. Sl st to top of corresponding row on garment. (4)
Rows 4 – (8, 10, 12): Alternate rows 2 & 3, ending with a row 2. Fasten off leaving a long enough yarn tail to sew (or slip stitch) to the corresponding stitches on “right front”. Weave in all ends.
Now, looking at the left edge, count (22, 28, 34) rows up from the bottom and attach with sl st. Repeat as other edging side for (8, 10, 12) rows. Fasten off leaving a long enough yarn tail to sew (or slip stitch) to the corresponding stitches on “right front”. Weave in all ends.


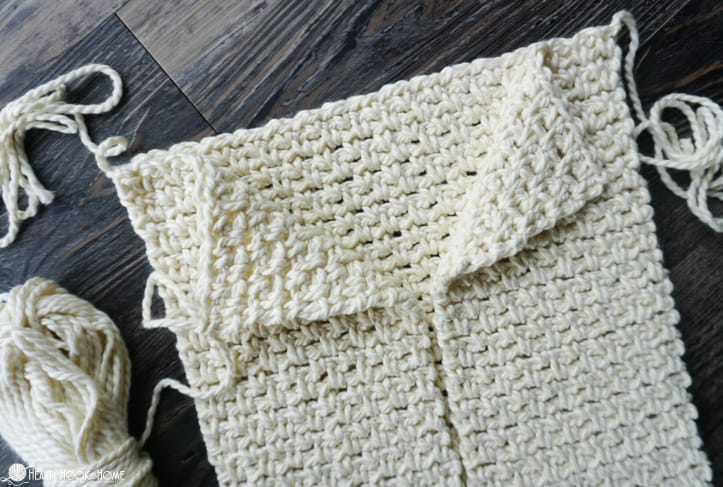
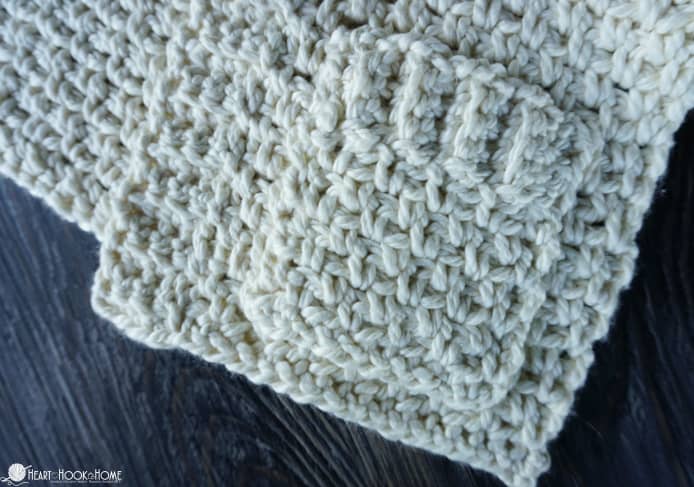
Pockets :
Make two…
Row 1: Fsc-(8, 10, 16), or Ch-(9, 11, 17), sc in 2nd ch from hook and in each ch to end. (8, 10, 16)
Row 2: Ch-2 (counts as sc + ch-1 here and throughout), turn, sk-first st, sc in next. * ch-1, sk-next st, sc in next * repeat between * * to end. (9, 11, 17)
Rows 3 – (6, 8, 10): Ch-2, turn, sk first sc, sc in ch-sp. * ch-1, sc in next ch-sp * repeat between * * to end. (9, 11, 17) Continue to “top edging”.
Pocket top edging:
Row 1: Ch-5, sc in 2nd ch from hook and in next 3 sts. Sl st to chain st. (4)
Row 2: Sl st to next sc st, turn, sc in blo of first 3 sts. Sc in both loops of last st. (4)
Row 3: Ch-1, turn, sc in blo of each st to end. Sl st to chain st. (4)
Repeat rows 2 & 3 until you reach the end of the pocket, finishing on a row 3.
Fasten off leaving a long tail for sewing into place. I stitched mine ~3 rows up from the bottom edge, centered on each “front”. You are done!

These whip up quickly and would make great gifts this holiday season. If you would like to turn yours into a unicorn as well, find the pattern for the ears and the horn right here.
More free crochet patterns for kids:
Painted Canyon Cardigan Crochet Pattern (size 2/3T)
Kids Flowy Top Free Crochet Pattern
Shanti Sweater for Big Kids: Free Crochet Pattern + Companion Video


4 Comments