Whale of a Lovey: C2C Crochet Lovey Pattern
This post may contain affiliate links, meaning that I may earn a small commission if you make a purchase. See our disclosure policy for more information.


There’s a new grandbaby in town, which means lots of new crochet patterns and ideas for baby. I’m so excited about this It’s a Whale Baby Lovey pattern! This one works up super quickly and is absolutely adorable. Let’s make one!

Whale of a Lovey
My boyfriend recently became a Papa and he (the baby, ha!) is absolutely precious. I’ve made him several projects lately and keep thinking of all the things he needs next. Between the baby cuddles, the baby smell, and seeing his adorable little self cuddled up with different things I’ve crocheted… I just love it!

Next up is this sweet little whale lovey using the Corner to Corner method worked in the round. If you need help reading a crochet pattern, make sure you head over here and check out this detailed post.

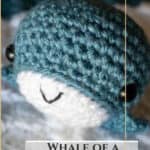
This super sweet little crocheted whale is the perfect topper to this Corner to Corner baby lovey. He’s a little over 2″ wide and 3″ tall. We use safety eyes to make sure he’s safe for baby to play with. Of course as with anything else, you’ll want to keep an eye on the baby at all times.

Materials:
Worsted Weight Yarn in two colors
-approx. 250 yards for lovey (160 Color A, 90 Color B)
-approx. 25 yards Color B for whale
-Scrap yarn Color A (less than a few yards)
Crochet hook in size G/4mm (for the whale) and H/5mm (for the Lovey)
(2) 10mm Safety Eyes
Yarn Needle
Black Embroidery Floss
Sewing Needle
Stitch Marker

Finished Lovey Dimensions: 14″ square
Baby Lovey C2C pattern:
Corner to Corner in the round using Color A for 10 rounds. Switch to color B and crochet for 4 more rounds. Fasten off and weave in all ends.
See a full C2C in the Round tutorial here.

Whale Pattern:
Using Color B, make one…
Round 1: Magic circle. 8sc in circle. (8) Do not join here or throughout, work in a spiral marking the first stitch of each row with a stitch marker.
Round 2: 2sc in each st around (16)
Round 3: sc in each st around (16)
Round 4: *sc in next st, 2sc in next* repeat from * * around (24)
Round 5: sc in each st around (24)
Round 6: *sc in next 2 sts, 2sc in next* repeat from * * around (32)
Rounds 7 – 11: sc in each st around (32)
Round 12: *sc in next 2 sts, sc2tog* repeat from * * around (24)
Round 13: sc in each st around (24)
Insert eyes between rows 10 and 11, placed 12 sts apart. Sl st in the next st and pull yarn through to fasten off the yarn. Weave in all ends.

Bottom:
Wanna save this for later?
Using Color A, make one…
Round 1: Magic circle. 8sc in circle. (8)
Round 2: 2sc in each st around (16)
Round 3: *sc in next st, 2sc in next* repeat from * * around (24)
Round 4: sc in each st around (24)
Sl st in the next st and pull yarn through to fasten off the yarn. Leave a 10 – 12” tail for sewing to body.
Fins:
Make two using Color B…
Ch-5, sc in 2nd chain from hook, hdc in next ch, dc in next ch, tr in last ch.
Fasten off the yarn, leaving a 6 – 8” tail for sewing to body. Set aside.
Tail fin:
Make one using Color B…
Ch-4, (sc, hdc, 3dc) in 2nd ch from hook, sl st in next, (3dc, hdc, sc) in last.
Fasten off the yarn, leaving a 6 – 8” tail for sewing to body. Set aside.
Assembly:
Gather the crocheted pieces, stuffing, a tapestry needle, embroidery floss, sewing needle, and scissors.
1. Line up the 24 stitches of the whale body to the 24 stitches of the whale bottom. Thread the tapestry needle using the White yarn tail from the whale bottom. Make sure the “right sides” are facing out and use the Whip stitch to attach. Sew through both loops of the bottom (White) and the inside loop only of the body (Blue). When only 2” or so remains to be sewn, add stuffing. Finish sewing shut, and weave the yarn tail in toward the center of the bottom.
2. Attach the two side fins opposite each other. The top of each fin should be 2 stitches below the eye and along the line where the Blue meets the White.
3. Position the tail fin to be centered between the two side fins. Attach and weave in all ends.


Kawaii Mouth:
1. Thread a sewing needle with black embroidery floss. Find the 4th round of the whale bottom, and four stitches to the left of the right safety eye.
2. Insert needle right to left with the point coming out 2 stitches over. Pull stitch through.
3. Insert needle in the same spot as the first stitch with the point coming out diagonally downward, 2 Rounds down and one stitch to the left. Make sure that the first loop made (the completed loop in step 2) is underneath the point of the sewing needle before pulling the stitch through.
4. Insert needle directly below centermost point of the mouth. Secure with a simple knot. Feed embroidery floss through the back of the head and clip.
I do plan on making a full tutorial on how to make a Kawaii mouth. Stay tuned! (Update: Here is a link to a full written and video tutorial)
All that’s left is to sew the whale to the lovey blanket. Using the white yarn (Color A) attach the whale near his tail fin securely. Weave in all ends and you are done!
Please share a photo with me by tagging @HeartHookHome across all social media, and in the Heart Hook Home Crochet Community on Facebook. I hope you love yours!
More crochet for baby:
Baby Bear Newborn Sleeper Crochet Pattern
Simple Newborn Sleeper: Free Crochet Pattern
Cozy Infant Cardigan Crochet Pattern (Size 3 – 6 months)


3 Comments