The Manilow Pullover – Free Crochet Pattern
This post may contain affiliate links, meaning that I may earn a small commission if you make a purchase. See our disclosure policy for more information.
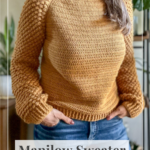


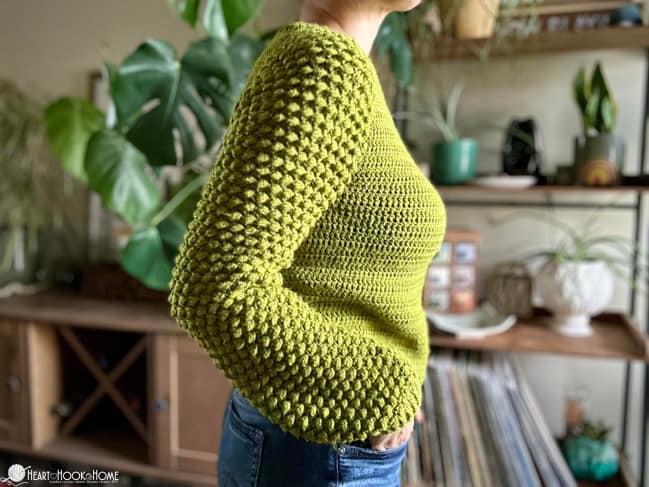
The first sweater pattern of 2024 is here! Meet the Manilow Pullover, a super chic free sweater crochet pattern spanning five sizes: SMALL to 2XL. This design is constructed differently than anything we’ve done before and I am so pleased with how this design turned out. I know you’ll love it, too. Grab your hooks and let’s go!

Manilow Pullover Free Pattern
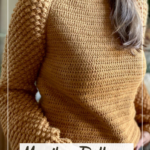
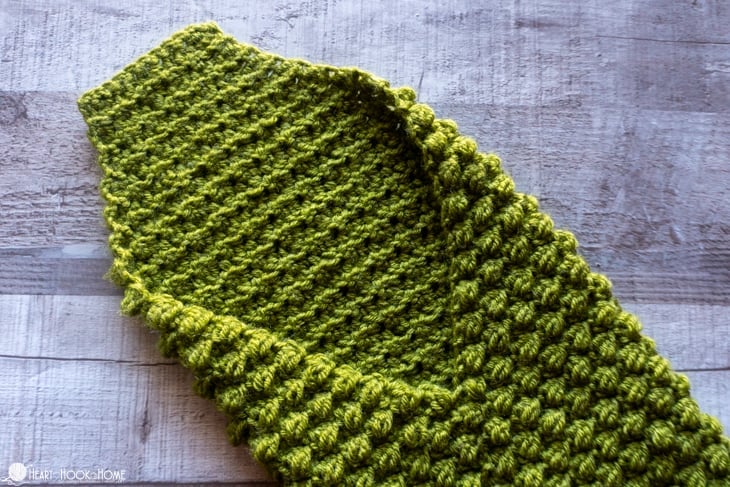
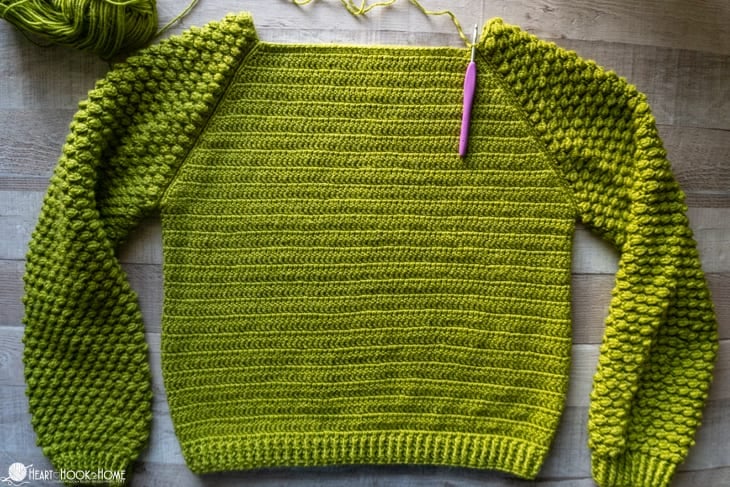
When designing the Manilow Pullover I wanted a stark contrast between the body (boring) and the sleeves (super fancy). The sleeve stitches really POP and give it a leveled-up vibe that can be paired with jeans for running errands or dressed up with fun jewelry for date night.
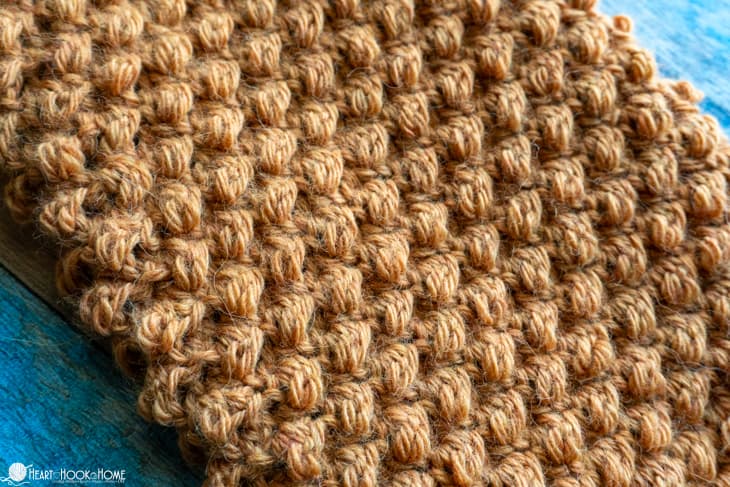
For the body of this design we are using an old trusty crochet stitch, the double crochet. For the sleeves we are using the fun Uneven Berry Stitch. This stitch is similar to a Mini Bean, or a small Bobble, but not quite as pronounced as a Popcorn stitch.
Did you hear? For the entire year of 2024 ALL new designs on Heart Hook Home will be free patterns. You’ll be able to see and follow any of the new patterns published throughout the year right here on the blog, or you can grab the ad-free printable versions on my Ravelry, Etsy, or Heart Hook Home Blog Shops to stick in your project book, save to your devices, or print and keep in your project bag.
I appreciate your support so that I can continue doing what I love to do, creating more crochet patterns and tutorials for you. ♥ This support includes simply coming back to Heart Hook Home frequently to see what’s new, or purchasing those ad-free PDFs to build your pattern library. Thank you!

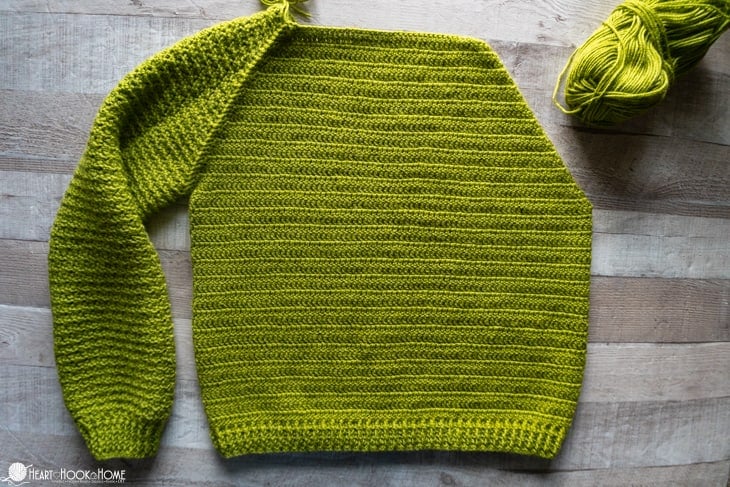
The Manilow Pullover is made in three pieces: the body and two sleeves. Then we’ll wash the three pieces to help the stitches settle, then we’ll assemble the pieces into this gorgeous wearable masterpiece.


For this pullover pattern I am using a sport weight yarn or a size 3/DK weight yarn. The gold pullover pictured uses Andean Treasure yarn, a NEW size 3/DK weight yarn from WeCrochet that is 100% baby alpaca. When I say that this sweater is soft, and warm, and like wearing a hug… that is exactly how it feels! This yarn is on the pricey side, so I have included more yarn options below.
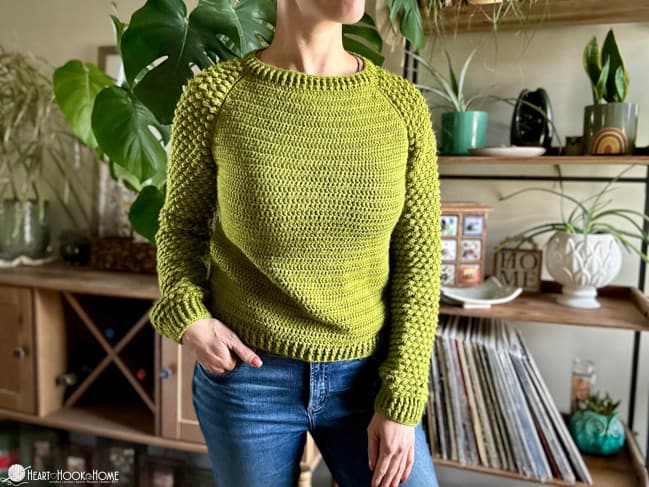

The green version here is made using Brava Sport, a much more economical version. I needed just over 1500 yards, so just five skeins for size medium!
Other great yarn options include Mellowspun from Mary Maxim, Bernat Softee Baby, Brava Recycle, Premier Bamboo Fair, Amigo from Hobbii, Happy Place from Hobbii, Mega Ball from Hobbii, Lion Brand Feels like Alpaca,
Grab the ad-free, printable version of this pattern on Ravelry, Etsy, or right here in the Heart Hook Home Blog Shop. Thank you!
Materials:
Andean Treasure Yarn OR Brava Sport
-approx. (1400, 1550, 1775, 1950, 2200) yards
Crochet hook in size 6mm and size 4mm
*or sizes needed to obtain gauge
If you need help reading a crochet pattern, make sure you head over here and check out this detailed post.
Sizing: (S, M, L, XL, 2XL)
Actual garment bust/torso measurement: (34”, 37.5”, 42”, 47.5”, 50.5”)
Gauge for Main Body: 17 sts x 10 rows = 4” square using double crochet and 4mm hook
Gauge for Sleeves: 14 sts (7 complete Berries) x 9 complete Berries (18 rows total) = 4” square using Uneven Berry Stitch and 6mm hook
Gauge Swatch for Berry Portion Pattern:
Row 1: Fsc-17 (or ch-18, sc in 2nd ch from hook and in each to end) (17)
Row 2: Turn, sl st in first st, * Berry in next sc, sl st in next * repeat between * * to end.
Row 3: Ch-1, turn, sc in first st, * sl st in top of next Berry, sc in next sl st * repeat between * * to end.
Row 4: Ch-1, turn, sc in first st, sl st in next st, * Berry in next sc, sl st in next sl st * repeat between * * until one st remains, sc in final st.
Row 5: Turn, sl st in first st, sc in next sl st, * sl st in top of next Berry, sc in next sl st * repeat between * * until one st remains, sl st in final st.
Rows 6 – 21: repeat previous 4 rows. Measure for gauge.

Pattern Notes:
Pattern written using US terms.
The chain(s) at the beginning of the row do not count as a stitch.
On the sleeves, the EVEN numbered rows are “Right Side” (RS).
On the body, the ODD numbered rows are “Right Side” (RS).
Keep slip stitches on even numbered rows on the looser side.
Berry = YO, pull up a loop in designated st. Ch-1, YO, pull up another loop in the same st. (5 loops on hook) YO and pull through all 5 loops, chain 1 to close the stitch. See the full tutorial including video here.
Fpdc/Bpdc = Front Post Double Crochet/Back Post Double Crochet – see a tutorial here
With this design if you would like a longer torso, or a longer sleeve…. simply continue adding to the length. If you are concerned that the sleeves or body may not be long enough, you could do the construction portion before doing the bottom edging and the cuffs… then you can try it on and see how much added length is needed – if any at all.
Wondering how we’ll seam the sleeves to the body? We’re using the same technique as this square joining tutorial, so follow along if you like! The most important tip is to stay loose with your slip stitches and to check your work often and before fastening off, so you can fix any wonkiness straight away.

Pattern:
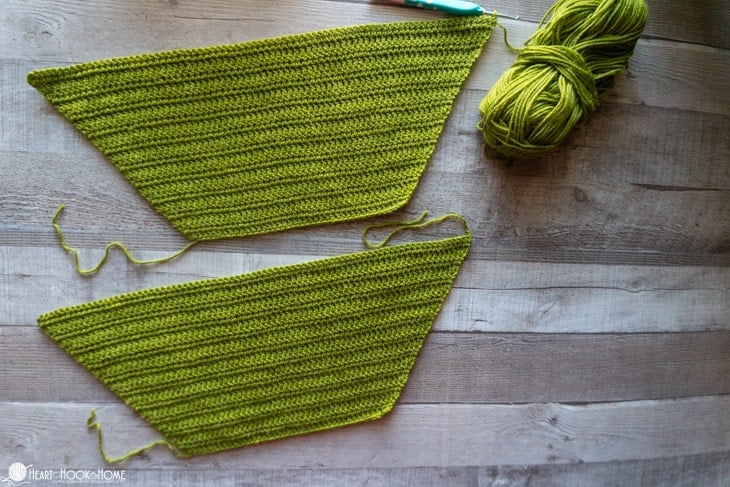
Front and Back for Sizes S, M, L ONLY:
Using the 4mm hook, make two…
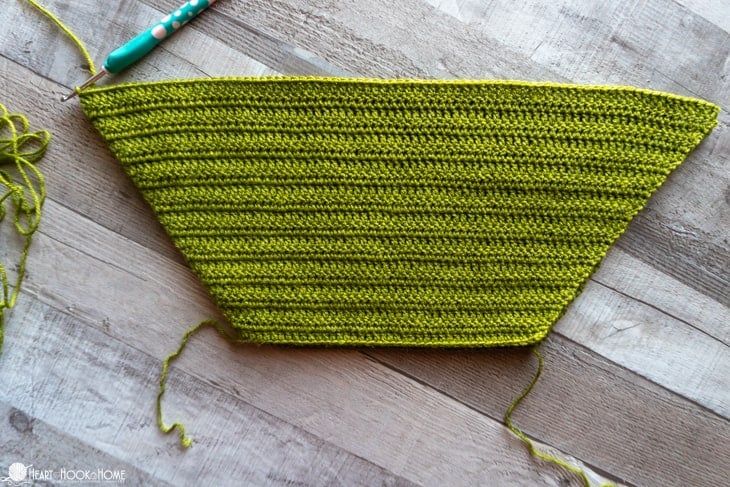
Row 1: Ch-(36, 42, 50), 2dc in 3rd ch from hook, dc in each ch across, 2dc in last ch. (36, 42, 50)
Rows 2 through (19, 20, 21): Ch-2, turn, 2dc in first st, dc in each st across, 2dc in last st. (ending with (72, 80, 90) sts)
Fasten off first and set aside. Do not fasten off the second… we will join “front” to “back” to complete the torso and body below.
Front and Back for Sizes XL & 2XL ONLY:
Using 4mm hook, make two…
Row 1: Ch-(36, 39), 3dc in 3rd ch from hook, dc in each ch across, 3dc in last ch. (38, 41)
Rows 2 – (22, 23): Ch-2, turn, 3dc in first st, dc in each st across, 2dc in last st. (ending with (101, 107) sts)
Fasten off first and set aside. Do not fasten off second… we will join “front” to “back” to complete the torso and body.
Body (S, M, L, XL, 2XL):
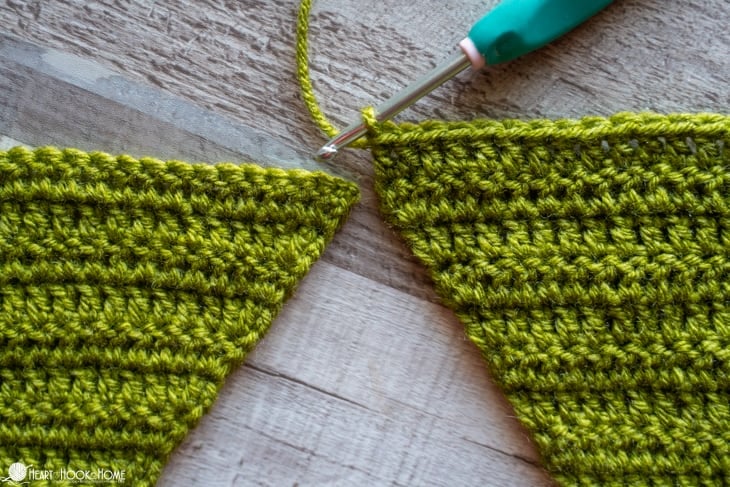
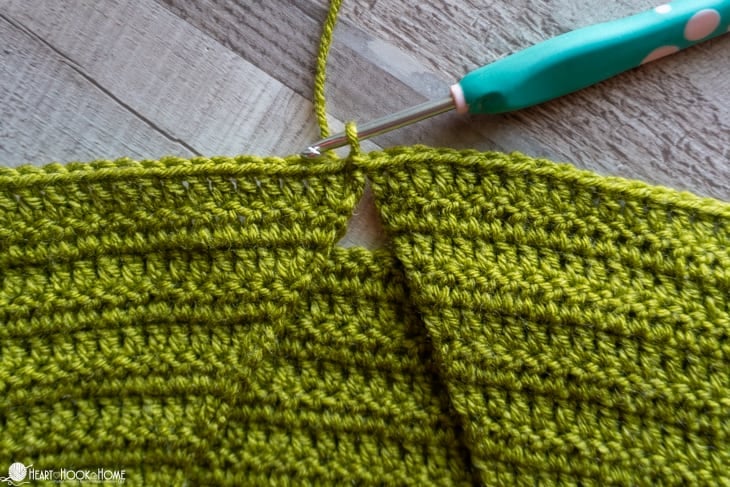
Where still attached on the second piece and both oriented the correct direction…
Row/Round (20, 21, 22, 23, 24): Ch-2, turn, dc in each st across, jump to the second piece and dc in each st across. Join to top of first dc made. (144, 160, 180, 202, 214)
Rounds (21, 22, 23, 24, 25) through (46, 48, 52, 52, 52): Ch-2, turn, dc in each st around. Join to top of first st. (144, 160, 180, 202, 214)
Do not fasten off.
Body Bottom Edging (ALL SIZES):
Round (47, 49, 53, 53, 53): Ch-2, turn, * fpdc around next, bpdc around next * repeat between * * until 2 sts remain. Fpdc2tog using final 2 sts, join to top of first st. (143, 159, 179, 201, 213)
Round (48, 50, 54, 54, 54): Ch-2, turn, * bpdc around next, fpdc around next * repeat between * * until one st remains. Bpdc around last, join to top of first st. (143, 159, 179, 201, 213)
Round (49, 51, 55, 55, 55): Ch-2, turn, * fpdc around next, bpdc around next * repeat between * * until one st remains. Fpdc around last, join to top of first st. (143, 159, 179, 201, 213)
Round (50, 52, 56, 56, 56) through (51, 53, 57, 57, 57): repeat previous two rounds
Round (52, 54, 58, 58, 58): Ch-1, do not turn, sc in each st around. Fasten off using Invisible Join.

Sleeves (S, M, L, XL, 2XL):
Using 6mm hook, make two…
Wanna save this for later?
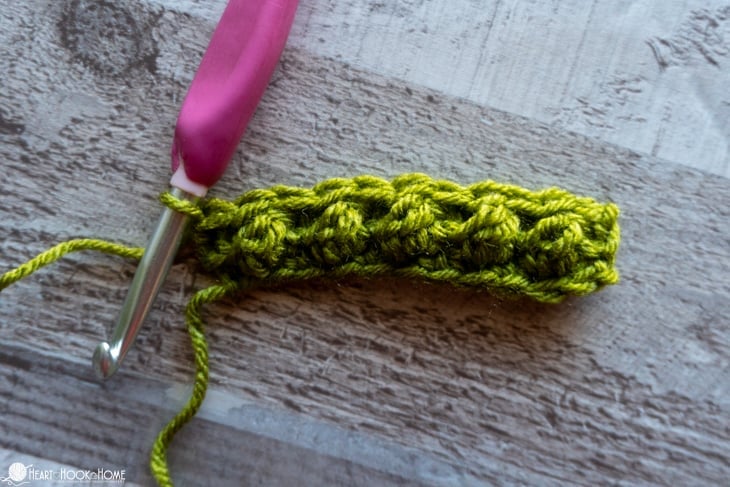
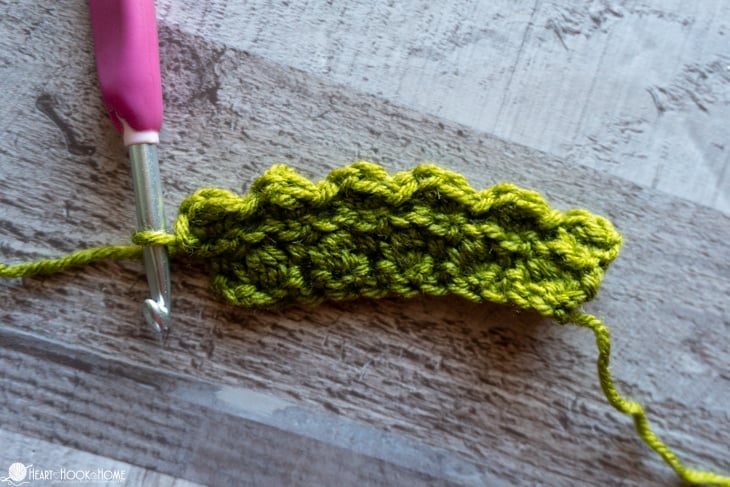
Row 1: Ch-(10, 12, 14, 16, 18), sc in 2nd ch from hook and in each ch to end. (9, 11, 13, 15, 17)
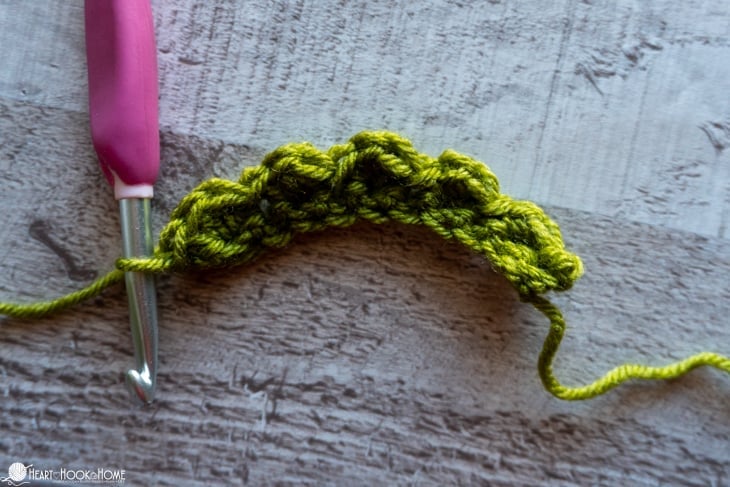
Row 2: Turn, sl st in first st, * Berry in next sc, sl st in next * repeat between * * to end.
(4, 5, 6, 7, 8 Berries)
Row 3: Ch-1, turn, sc in first st, sl st in top of next Berry, * sc in next sl st, sl st in top of next Berry * repeat between * * until one st remains, sc in final st. (9, 11, 13, 15, 17 sts)
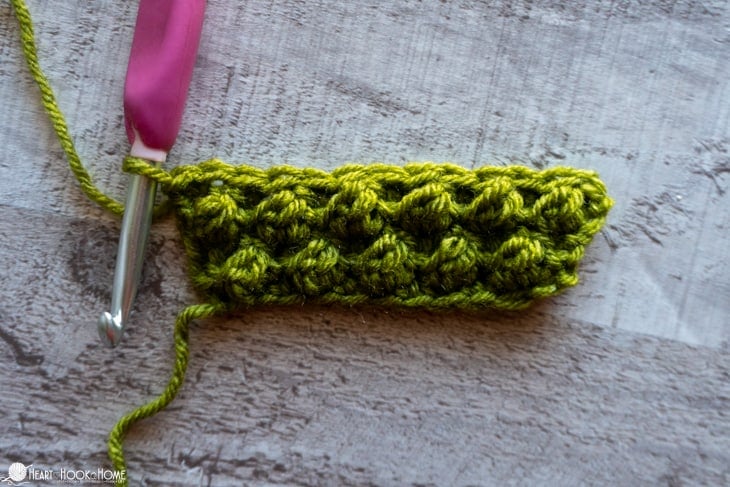
Row 4: Ch-1, turn, Berry in first sc, sl st in next st, * Berry in next sc, sl st in next sl st * repeat between * * until one st remains, Berry in final st, sl st in same. (5, 6, 7, 8, 9 Berries)
Row 5: Ch-1, turn, sc in first sl st, sl st in first Berry, sc in next sl st, * sl st in top of next Berry, sc in next sl st * repeat between * * until 1 Berry remains, 2sc in final Berry. (11, 13, 15, 17, 19 sts)
Rows 6 through (35, 35, 35, 39, 41): alternate rows 4 & 5 (ending with (41, 43, 45, 51, 55) sts)
 Row 1
Row 1
 Row 2
Row 2
 Row 3
Row 3
 Row 4
Row 4
 Row 5
Row 5
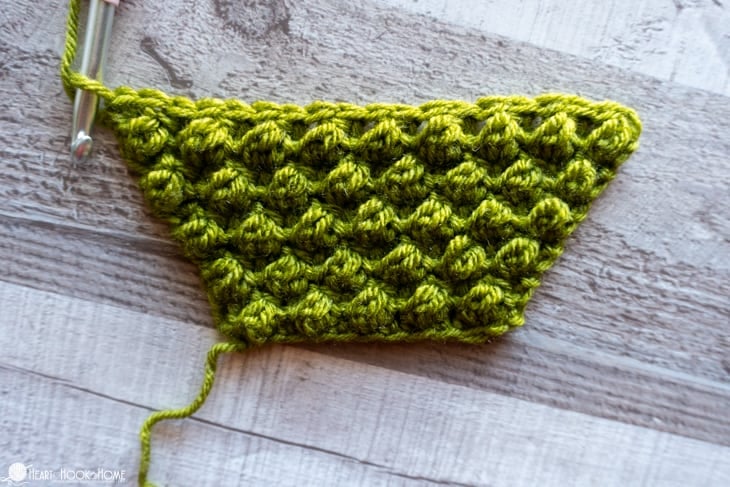 Row 11
Row (36, 36, 36, 40, 42): Ch-1, turn, Berry in first sc, sl st in next st, * Berry in next sc, sl st in next sl st * repeat between * * until one st remains, Berry in final st, sl st in same. Join to top of first Berry. (21, 22, 23, 26, 28 Berries)
Row (37, 37, 37, 41, 43): Ch-1, turn, sc in first st, sl st in top of next Berry, * sc in next sl st, sl st in top of next Berry * repeat between * * around. Join to first sc. (42, 44, 46, 52, 56)
Round (38, 38, 38, 42, 44): Turn, sl st in first st, * Berry in next sc, sl st in next sl st * repeat between * * until one st remains, Berry in final st, join to first sl st. (21, 22, 23, 26, 28 Berries)
Round (39, 39, 39, 43, 45): Turn, sl st in first Berry, sc in next sl st, * sl st in top of next Berry, sc in next sl st * repeat between * * around. Join to first sl st. (42, 44 46, 52, 56)
Round (40, 40, 40, 44, 46): Ch-1, turn, * Berry in next sc, sl st in next sl st * repeat between * * around. Join to first Berry. (21, 22, 23, 26, 28 Berries)
Round (41, 41, 41, 45, 47): Ch-1, turn, sc in first st, sl st in top of next Berry, * sc in next sl st, sl st in top of next Berry * repeat between * * around. Join to first sc. (42, 44, 46, 52, 56)
Rounds (42, 42, 42, 46, 48) through (101, 101, 101, 101, 99): repeat previous four rounds
Round (102, 102, 102, 102, 100): repeat round 38 (21, 22, 23, 26, 28 Berries)
Round (103, 103, 103, 103, 101): Ch-1, turn, * sc in next Berry, Hdc in next sl st * repeat between * * around. Join to top of first sc. (42, 44, 46, 52, 56)
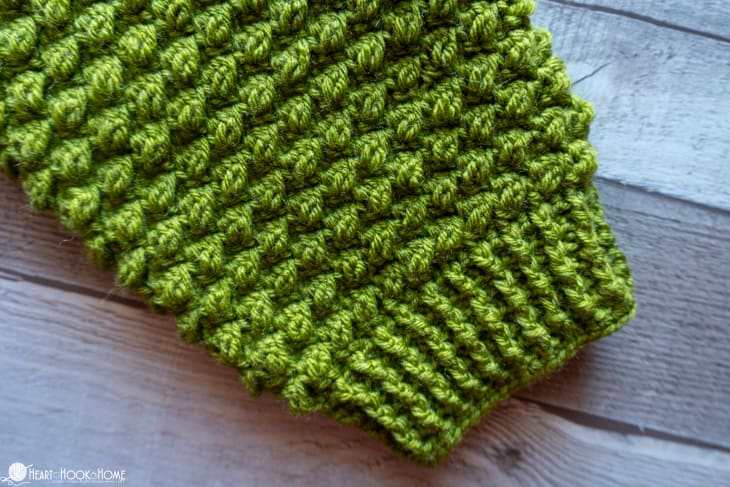
Cuff (ALL SIZES):
Change to the 4mm hook…
Round (104, 104, 104, 104, 102): Ch-2, do not turn, * fpdc around next, bpdc around next * repeat between * * until 2 sts remain. Fpdc2tog using final 2 sts, join to top of first st. (41, 43, 45, 51, 55)
Round (105, 105, 105, 105, 103): Ch-2, turn, * bpdc around next, fpdc around next * repeat between * * until one st remains. Bpdc around last, join to top of first st. (41, 43, 45, 51, 55)
Round (106, 106, 106, 106, 104): Ch-2, turn, * fpdc around next, bpdc around next * repeat between * * until one st remains. Fpdc around last, join to top of first st. (41, 43, 45, 51, 55)
Round (107, 107, 107, 107, 105) through (108, 108, 108, 108, 106): repeat previous two rounds
Round (109, 109, 109, 109, 107): Ch-1, turn, sc in each st around. Fasten off using Invisible Join.
Preparation: Fasten off all three pieces (two sleeves and body) and weave in all ends. It is preferable to launder the pieces before construction so that the stitches settle.
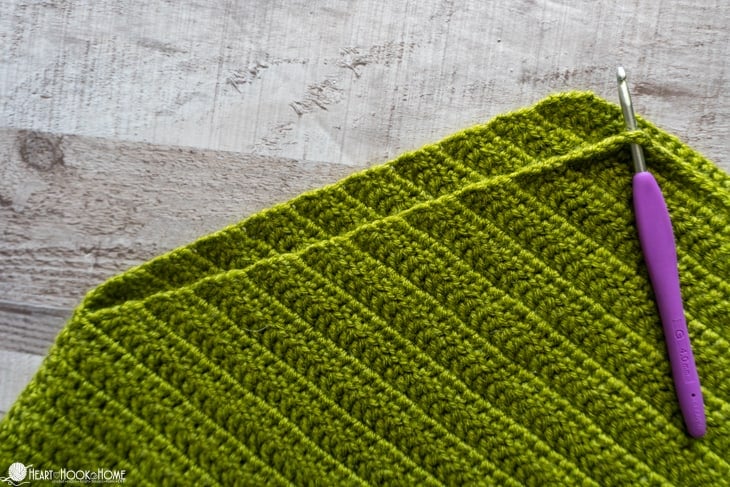
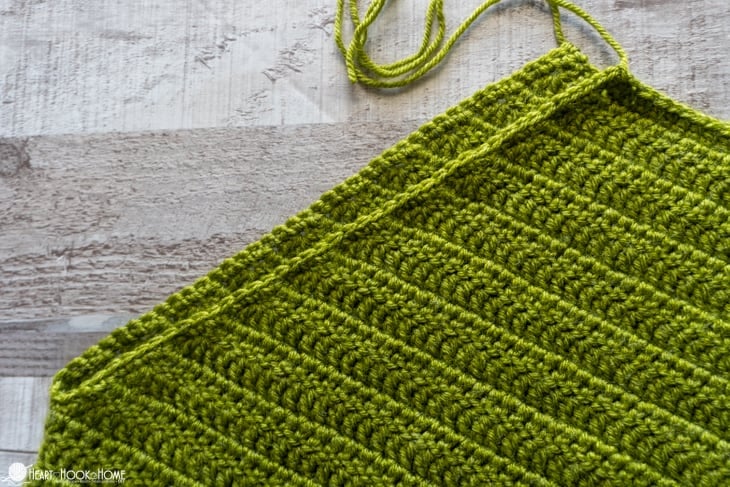
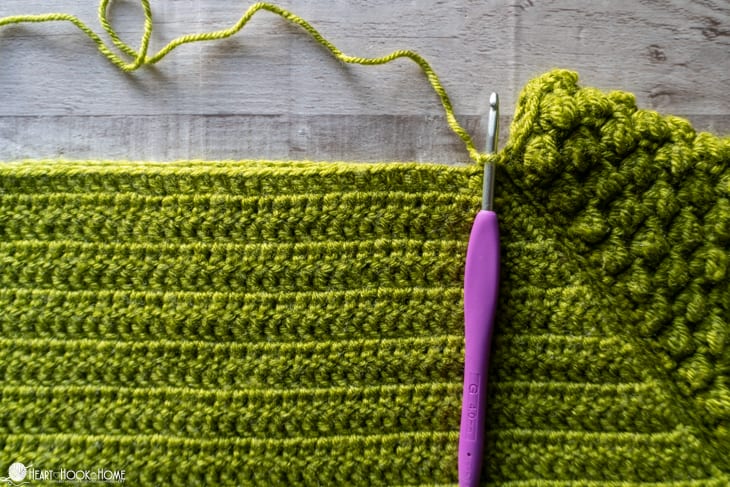
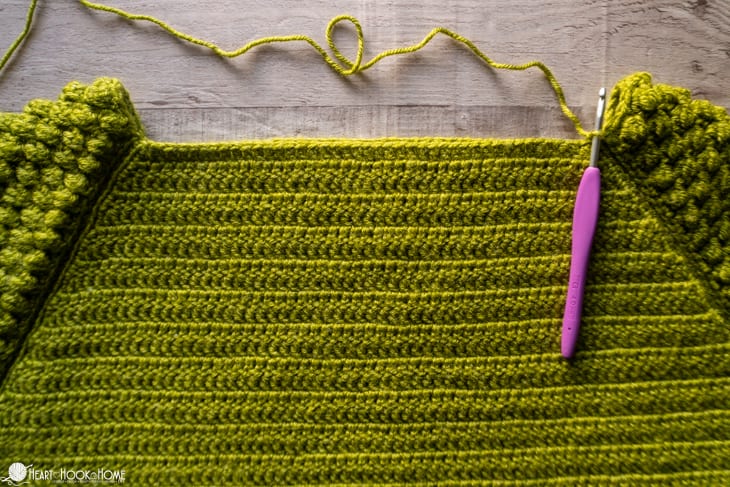
Body Border: Looking at “right side” attach in corner point as pictured. Ch-1, sc evenly down row ends and back up to their raglan point.
Fasten off on each side. Do not weave in ends. Flip inside out.
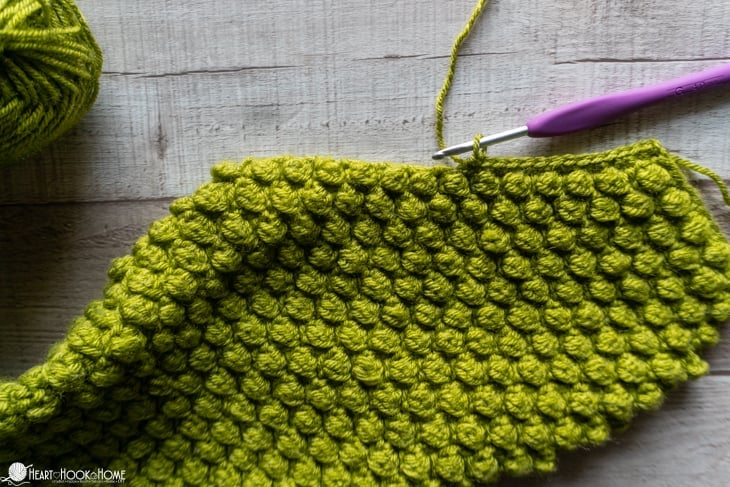
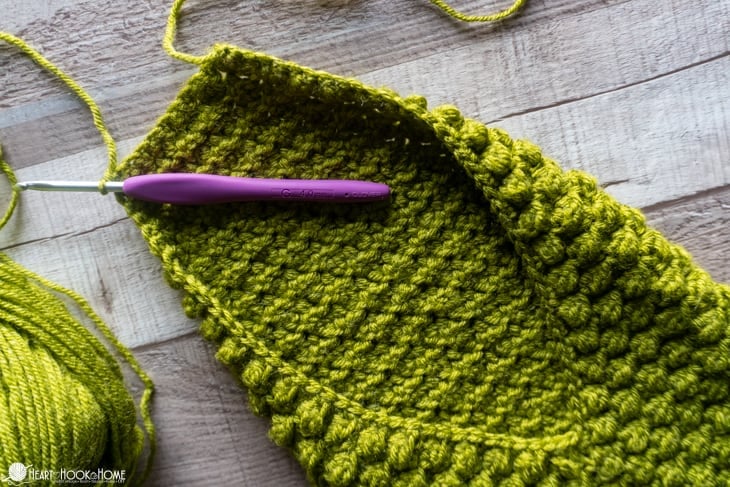
Sleeves border: Looking at “right side” attach in top corner as pictured. Ch-1, sc evenly down row ends and around to other top corner.
Do not fasten off. Flip inside out.
Construction:
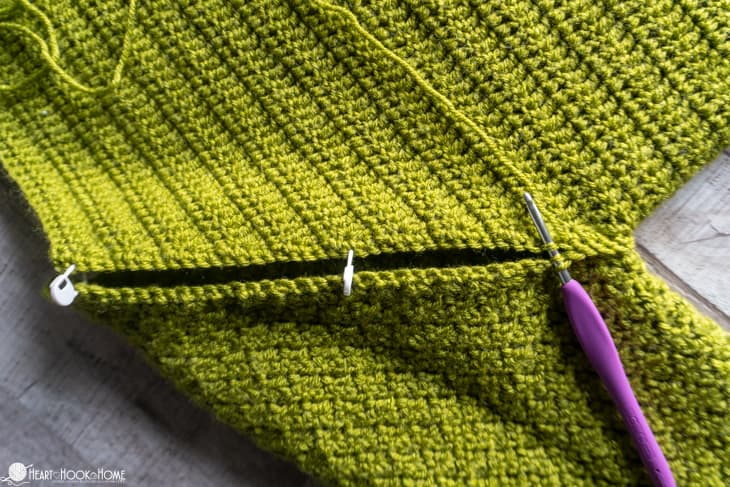
Where still attached, line up the sleeve opening with the corresponding body opening. Remember there is a video tutorial for this seaming technique that you can watch here. We are seaming squares in that video but the concept is exactly the same.
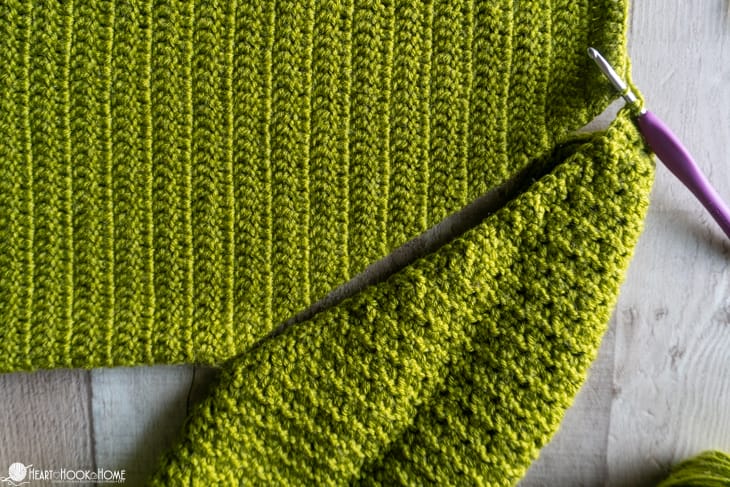
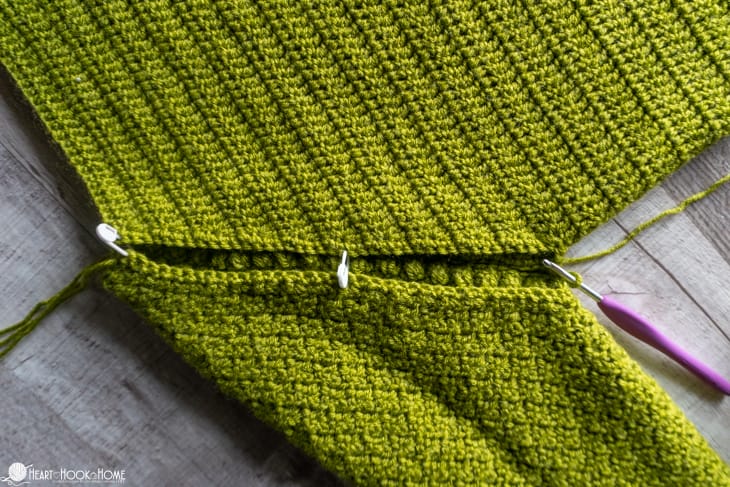
Using stitch markers, pin the bottom most point of each together. Smooth flat and place another stitch marker somewhere in the middle.
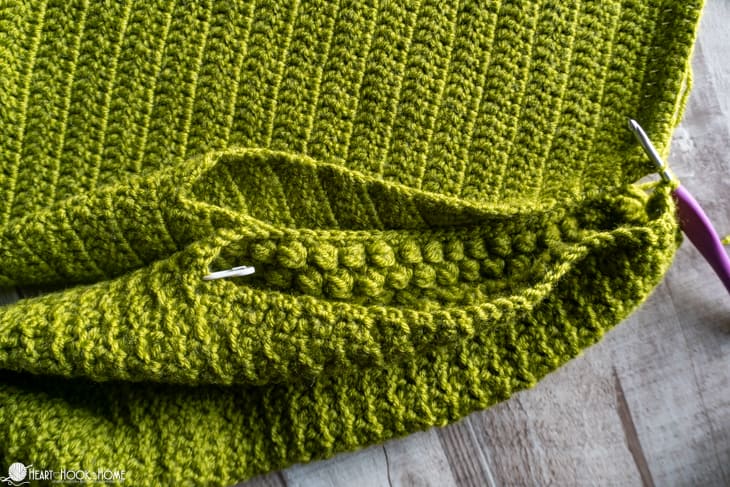
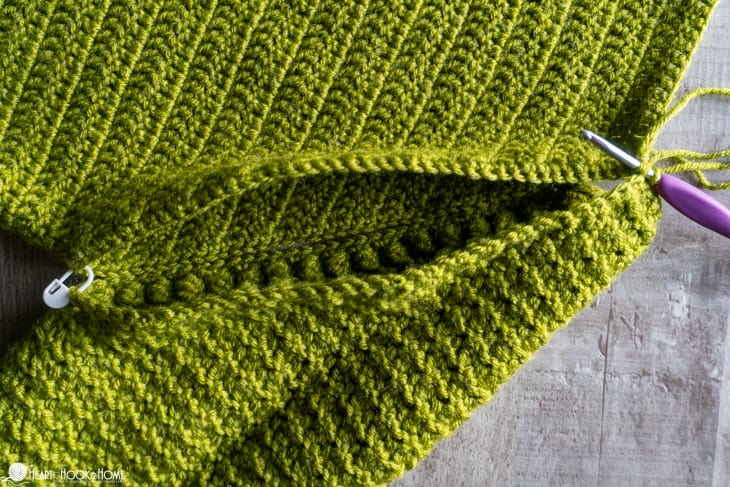

Loosely sl st using the outside loops only from each side, working down to the center-most point. Flip it over to work the other side.
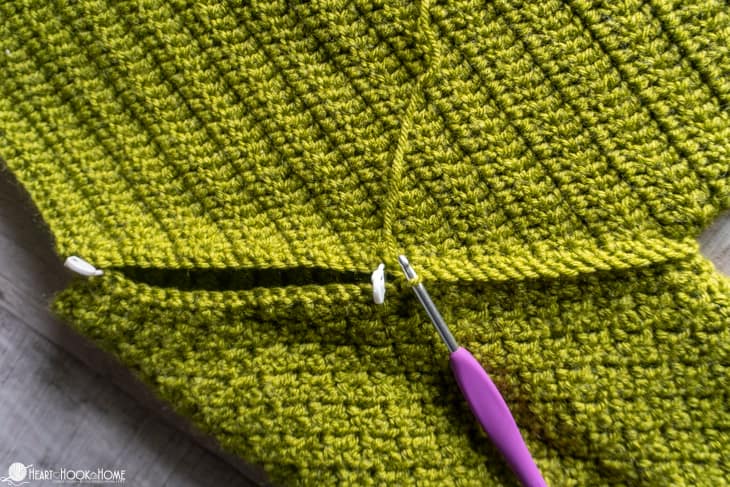
Re-do the stitch markers for the other half and continue loosely sl stitching up to the other shoulder.

Fasten off. Repeat on the other side. Flip right side out.
Do not fasten off the second side.
Neck edging:
Where still attached and with 4mm hook…
Row 1: Ch-2, * dc in each of the (36, 42, 50, 38, 41) sts of “front”, dc in each of the (9, 11, 13, 15, 17) sts across the sleeve top * repeat between * * one more time. Join to top of first st. (90, 106, 126, 106, 116)
Round 2: Ch-2, do not turn, * fpdc around next, bpdc around next * repeat between * * until two sts remain. Fpdc2tog, join to top of first st. (89, 105, 125, 105, 115)
Round 3: Ch-2, turn, * bpdc around next, fpdc around next * repeat between * * until one st remains. Bpdc around last, join to top of first st. (89, 105, 125, 105, 115)
Round 4: Ch-2, turn, * fpdc around next, bpdc around next * repeat between * * until one st remains. Fpdc around last, join to top of first st. (89, 105, 125, 105, 115)
Round 5: Ch-1, do not turn, sc in each st around. Fasten off using Invisible Join.
Use the yarn tails to sew up any holes or inconsistencies.

That’s it! I hop you adore this design and that you’ll wear it often.
I can’t wait to see yours! Be sure to tag @HeartHookHome across all social media, or share in the Heart Hook Home Crochet Community on Facebook.
More free designs for you:
Alex Sweater: Free Crochet Pattern
Free Corner to Corner Crochet Cocoon Pattern
Basic V-Neck Crochet Sweater: Free Pattern in Sizes XS – 5XL
Lori Hooded Poncho Crochet Pattern


12 Comments