Free Tunisian Granny Square Bag Crochet Pattern
This post may contain affiliate links, meaning that I may earn a small commission if you make a purchase. See our disclosure policy for more information.

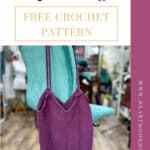
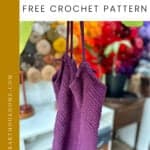
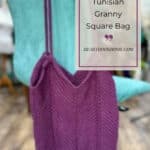

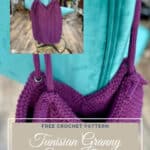

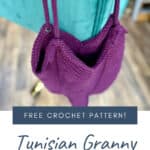
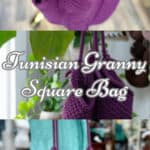
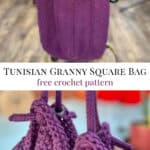
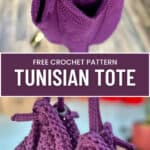

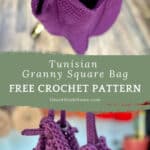
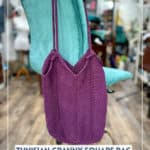
Do you love bags? I can never have enough tote bags or WIP bags. This gorgeous, rich purple crocheted bag is the perfect thing to tote around your things! Made from just one granny square that we keep on growing, it’s easy peasy to do. Let’s make one!
Tunisian Granny Square Bag
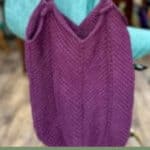
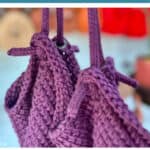
Tunisian Granny Squares are fun to crochet, and once you get going it is mindless and works up so quickly. We start with one round of regular crochet to get things going, then pick up with a double ended Tunisian Crochet hook to work in the round.
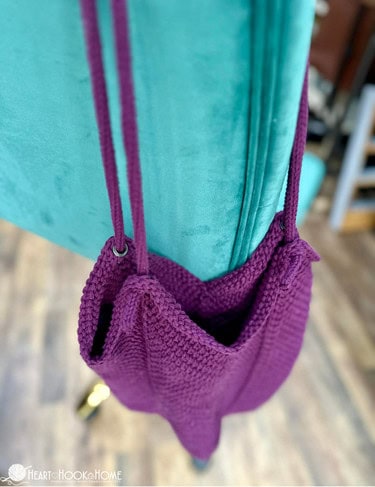
This bag has plenty of space. It would be great to use for shopping, or a trip to the beach, or as a WIP (work in progress) bag for your current crochet projects.
For this pattern I am using Craft Cotton in the “Eggplant” colorway. This is a 100% worsted weight cotton that holds up great to wear and plenty of use. It’s also available in Craft Cotton 5-pks at an incredible value. ♥
Materials:
Craft Cotton Yarn (100% Worsted weight cotton)
-approx. 400 yards total including straps (or grab the 5-pk!)
Double ended crochet hook in size H/5mm or size needed to obtain gauge
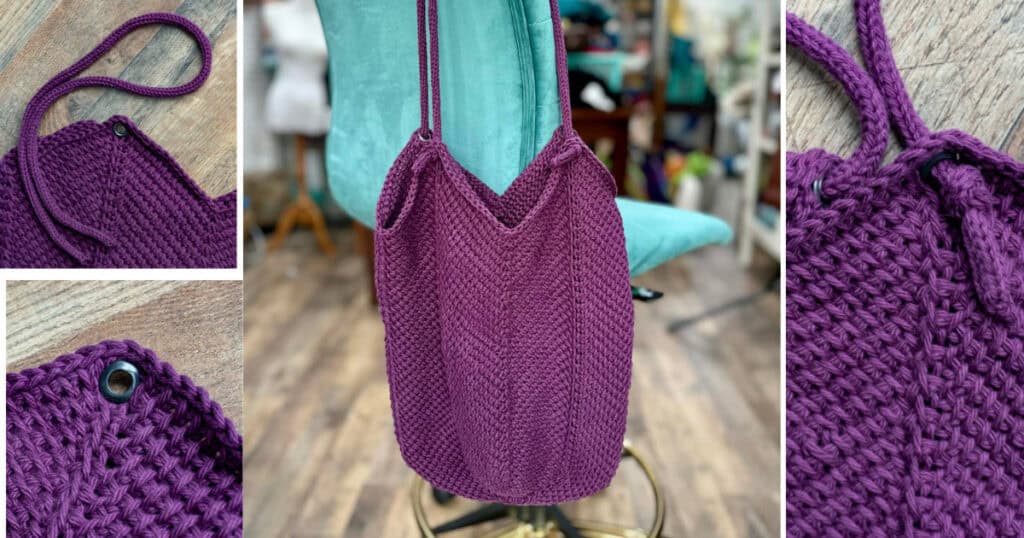
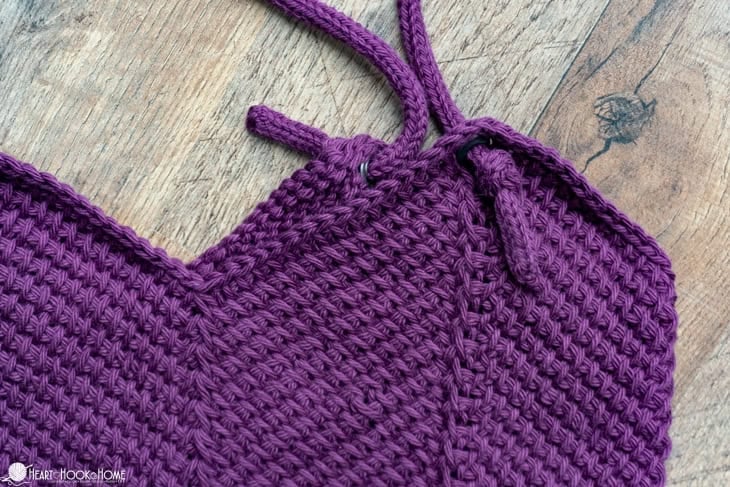
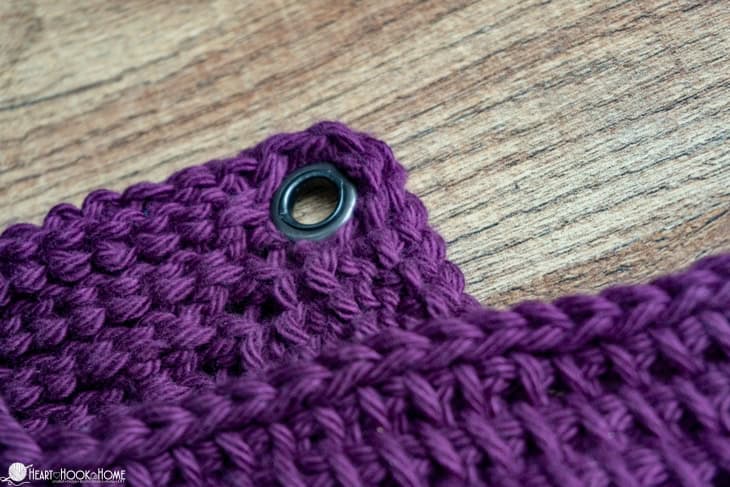
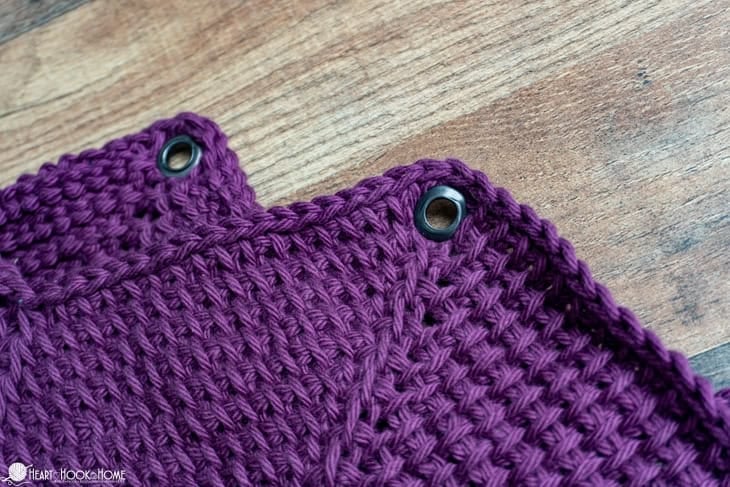
(4) 3/8″ eyelets (like these)

Gauge: One chevron repeat = 7” wide
The finished size is approx. 14″ wide and 18″ tall (not including straps)
Pattern Notes:
Pattern written using US terms.
Backward Pass in the Round: * YO pull through two loops * worked in a spiral.
TSS = Tunisian Simple Stitch (tutorial here)
TSS2tog = Tunisian Simple Stitch two together (this is a decrease of one stitch) – Insert hook under vertical bar of next two sts and pull up one loop.
TSS3tog = Tunisian Simple Stitch three together (this is a decrease of two stitches) – Insert hook under vertical bar of next three sts and pull up one loop.
Magic circle alternative: ch-4, sl st to first ch made to form a circle.
There is a tutorial for the Tunisian Granny Square here that has photos and more detailed explanation. A video is coming soon!
If you need help reading a crochet pattern, make sure you head over here and check out this detailed post.
Pattern:
Using Forward Pass yarn, make a foundation row: Magic Circle, Ch-1, 12dc in circle, sl st to first st to join. (12)
Wanna save this for later?
Round 1: (Loop on the hook currently counts as stitch number one) YO pull up loop in next st, YO pull up loop in next st. Using Backward Pass yarn and opposite end of hook, ch-1 and knock these sts off the hook. (Side one made) * TSS in next st, YO, pull up loop in next st, YO pull up loop in next st. Knock these sts off using the Backward Pass * (side two made) repeat between * * two more times. (20)
Round 2: TSS in next 2 sts, YO, TSS, YO, * TSS in next 4 sts, YO, TSS, YO * repeat between * * two more times, TSS in final 2 sts. (28)
Round 3: TSS in next 3 sts, YO, TSS, YO, * TSS in next 6 sts, YO, TSS, YO * repeat between * * two more times, TSS in final 3 sts. (36)
Round 4: TSS in next 4 sts, YO, TSS, YO, * TSS in next 8 sts, YO, TSS, YO * repeat between * * two more times, TSS in final 4 sts. (44)
Rounds 5 through 16: continue adding rounds in this manner (ending with 140 sts)
Round 17: TSS in next 16 sts, * YO, TSS, YO, TSS in next 16 sts, TSS2tog, TSS in next 16 sts * repeat between * * two more times, YO, TSS, YO, TSS in next 16 sts, TSS3tog. (144)
**the final stitch is a TSS3tog because it uses the first stitch of the same round to complete it, and is necessary to get the correct stitch multiple/count in the following rounds.
Rounds 18 through 44 (or to desired height): TSS in next 16 sts, * YO, TSS, YO, TSS in next 16 sts, TSS3tog, TSS in next 16 sts * repeat between * * two more times, YO, TSS, YO, TSS in next 16 sts, TSS3tog. (144)
Finishing Round: Pull Backward Pass yarn through Forward Pass yarn, sl st around. Fasten off and weave in all ends.
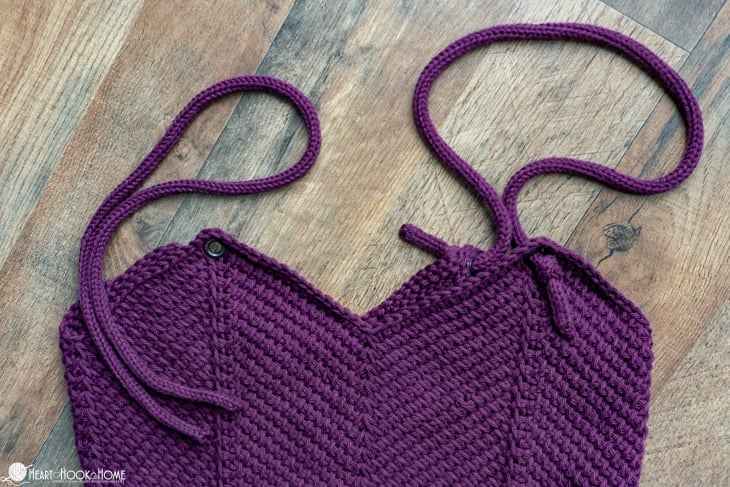
Add eyelets to second row of each peak.
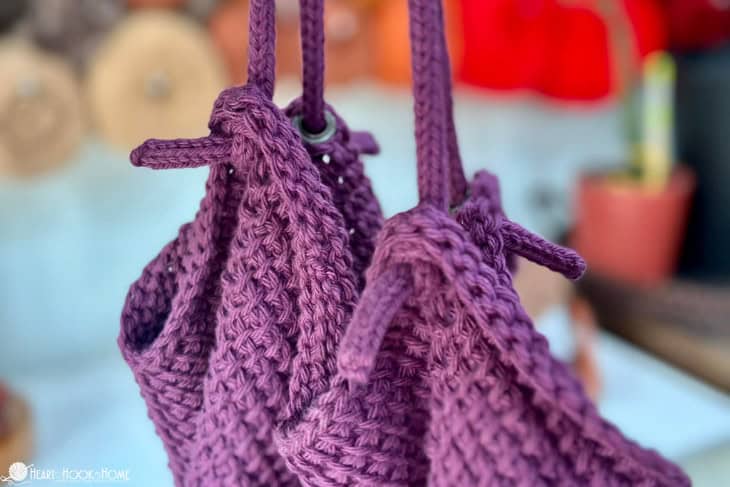
Straps: Make two straps, each approximately 30″ long. I made them as i-Cords but you could alternately use a Lucet Fork. Weave in all ends. Insert each end to the corresponding eyelet and tie a knot so it can’t come through.
That’s it! I hope you love this new pattern and that it will be your new favorite bag! If you’re new to Tunisian Crochet, or new to making it in the round, this is a great project to make to master the technique!
I can’t wait to see yours! Be sure to tag @HeartHookHome across all social media, or share in the Heart Hook Home Crochet Community on Facebook.
More crochet bag patterns:
Dog Treat Bag Free Crochet Pattern
Marigold Sling Bag Free Crochet Pattern
Plastic Bag Holder and Dispenser: Free Crochet Pattern
Wave Market Bag Free Crochet Pattern
Circle Bag Free Crochet Pattern


